_________________I am Mrs. Kalpana Mhaske, a Home-Maker, from the city of 52-Gates, one of the famous heritage- destination of the world- Ajanta - Ellora Caves, Bibi-Ka- Maqbara (The Taj of Deccan) and Deogiri Fort. i.e. AURANGABAD. I admire cooking - tryout and innovate different cuisines. Basically, both of my gorgeous daughters are foodie, they have always encouraged me in the kitchen and forced to carve a Food Blog, that’s why, I am happy to share the makings with you. I am an artist too. Painting – especially, Canvas-Painting is my one more hobby. In total - Ours is an ART-FAMILY, my husband is an Architect. In the end, I keep the same belief with Louise Fresco - “ Food, in the end, in our own tradition, is something holy. It's not about nutrients and calories. It's about sharing. It’s about honesty. it’s about identity ”

Tuesday, 1 August 2023

RESTAURANT STYLE DAL MAKHANI

 When we talk about traditional Indian dishes, it is impossible to not discuss Dal Makhani. It is one of the most admired dishes all over the world. What I have understood is that most individuals shy away from making this dish in their day to day life and prefer to make it as a part of their special menu. Traditionally, it involves lot of time and patience, and of course, in modern times we lack both.


If I think of Punjabi food, this is one of the first things that comes to mind after CHOLE-BHATURE. Silky velvety dal makhani - is also known as "Maa Ki Dal". This dish is slow-cooked which allows the lentils to soak up all the flavours from the aromatic spices. Made with whole black gram, red kidney beans and butter - accompanied by soft and crispy naan. This is the most popular dal in Indian restaurants outside India. 


The main ingredient used here is black gram which has several health benefits, including improving digestion, bone health and boosting energy. Urad dal is also rich in folates and phosphorus.Don't shy away from using butter in this dish. Tomato puree forms the base of the masala for the dal.Use fresh ginger and garlic for best-tasting dal. I have used the powdered spices like  kashmiri chilli powder,  kasoori methi and garam masala. This dish is:

- made restaurant-style

- buttery, rich, and creamy

- great for parties or when you have guests at home

- freezer-friendly. It can be frozen for up to three months.

If you tried this recipe, Click on the stars ★ in the recipe card to let us know your feedback!  You can also click the recipe pic and share on Instagram and Facebook with hashtag #Kalpana's La Cucina.

📌📌 Watch the video recipe here 📌📌


INGREDIENTS :

1 Cup Black Urad Dal (Black Gram /Black Lentil )

1/4 Cup Rajma ( Kidney Beans )

4-5 cups Water

2 tablespoon Desi Ghee / Oil

4-5 tablespoon Butter

1 tablespoon Ginger Paste

1 tablespoon Garlic Paste

1½ tablespoon Kashmiri Chilli Powder 

1/2 teaspoon Red Chilli Powder 

1 teaspoon Garam Masala Powder 

1 teaspoon Kasoori Methi

350 gms/ 1 ½ cup Fresh Tomato Puree 

1/4 Cup Fresh Cream 

Salt to taste

FOR TEMPERING and GARNISHING - 

1 tablespoon Ghee / Oil

2 tablespoon Butter

½ tablespoon Garlic chopped  

Fresh Cream 

METHOD :

STEP 1 -  Wash and clean the lentils and kidney beans atleast 4-5 times.


STEP 2 - Soak the whole urad dal ( black lentil ) & rajma ( kidney beans ) together for at least 8 hours or overnight. ( see notes )


STEP 3 - Now scrub it and wash it clean. 


STEP 4 - In pressure cooker, add 4-5 cups water and 1/2 teaspoon salt. 


STEP 5 - Pressure cook for 5-6 whistles or until the dal is cooked and turned soft and mushy. 


STEP 6 - Check the dal, if needed cook for more 10 minutes.

STEP 7 - Roughly cut the tomatoes and puree them. Keep aside.

STEP 8 - In a pan, heat 2 tablespoon desi ghee and 2 tablespoon white butter.


 STEP 9 - Add ginger - garlic paste when ghee is hot .Saute it for 1 minute ,till the raw smell is gone .


STEP 10 - Now add the kashmiri chili powder, 1/2 teaspoon regular chilli powder, stir it.


STEP 11 - Immediately add the tomato puree. Cook the tomatoes till they turn very thick & butter ooze out.


STEP 12 -  Add boiled black lentils and red kidney beans with all the water to it .


 STEP 13 - Add some more hot water and cook the dal for 25- 30 minutes on low flame.


STEP 14 -  Add 1 teaspoon kasoori methi and garam masala, salt as per taste, mix well and cook for 4-5 minutes.


STEP 15 - Add 2-3 tablespoon fresh cream and remaining white butter. Mix well.


STEP 16 - Mean while use your spatula to mix it so that it doesn't stick to the bottom while cooking. Cook for more 2-3 minutes .


TEMPERING - 

STEP 1 - In another pan heat 1 tablespoon ghee , 2 tablespoon butter and add chopped garlic and 2-3 dry red chillies ( optional ). 
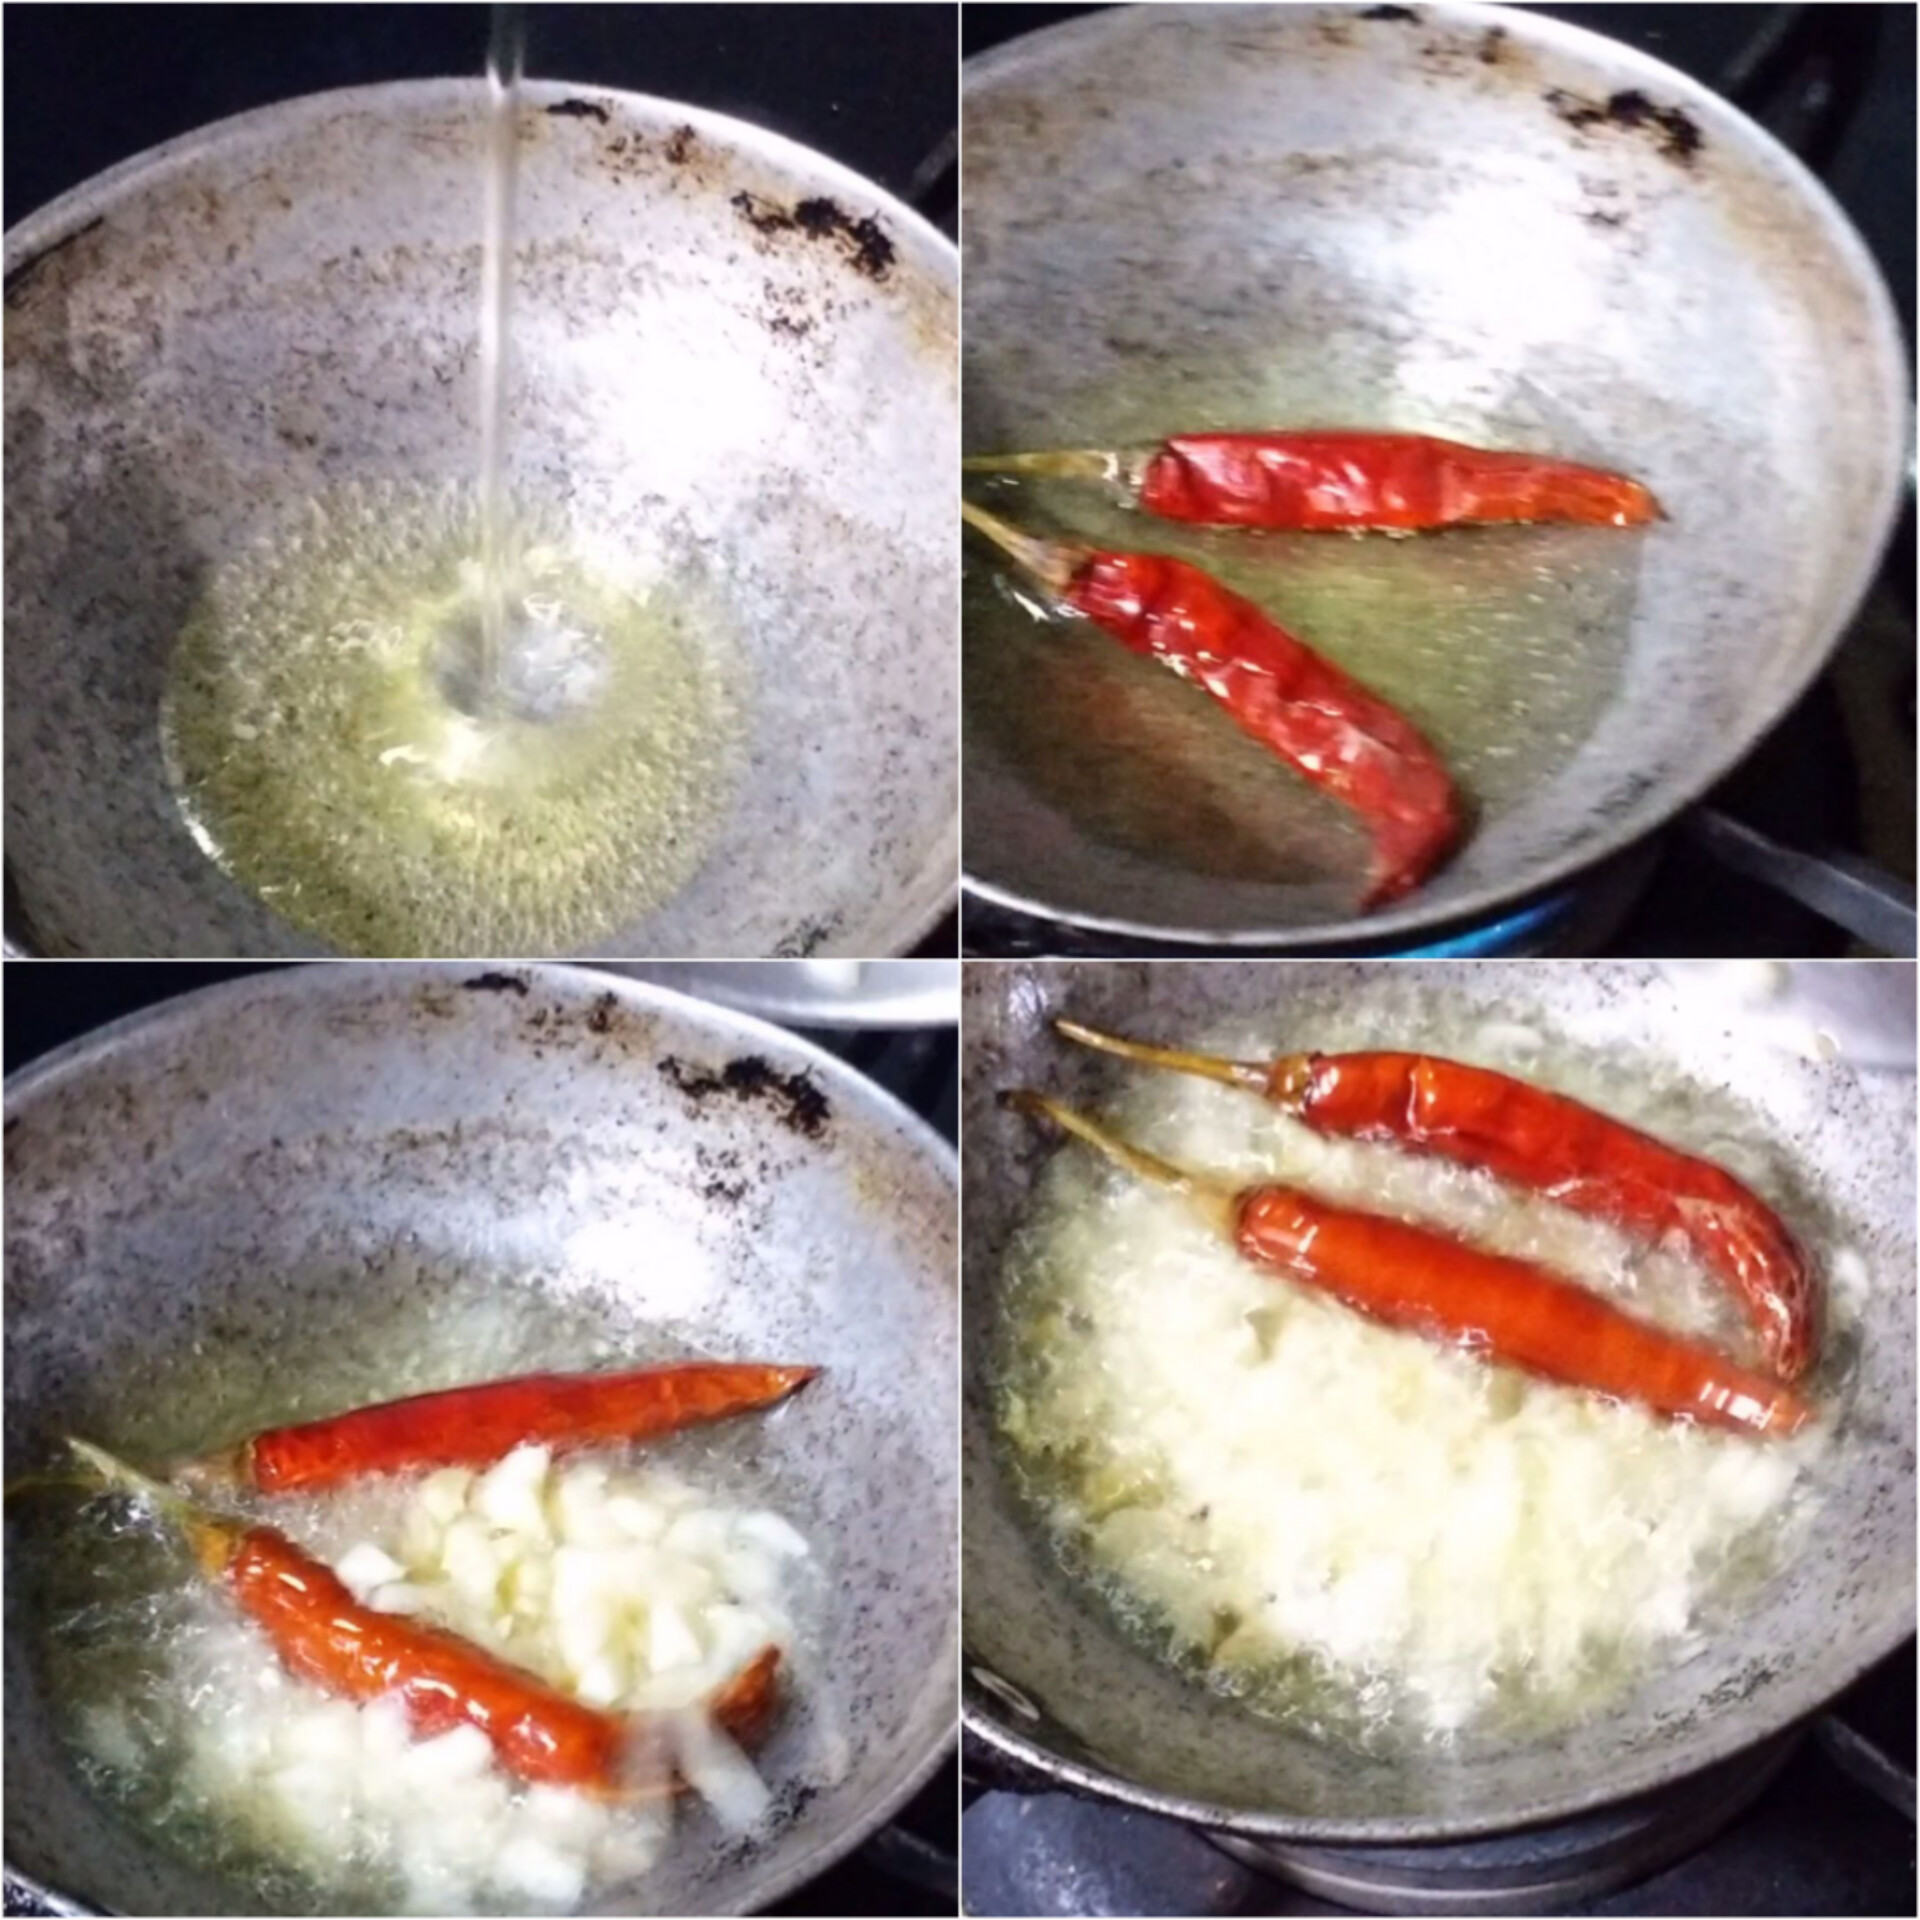
 STEP 2 - Brown the garlic and add it straight to the boiling dal. Then cook for 2-3 minutes, switch off the flame and dal makhani is ready.


STEP 3 -  Remove from heat, garnish with some more cream and serve hot.


Serve with any Indian bread like Naan, Paratha, Chapati or simply enjoy it with steaming hot rice. 


NOTES - * Soak the urad dal and rajma for a minimum of 8 hours. Soaking them for a long time will help achieve the creaminess.

* If you have no time, in that case, soak them for atleast 4-5 hours in hot water.

*Pressure cook the dal well. It is important to make sure the dal is completely cooked before adding it to the masala.

* Don't shy away from using butter. This is a rich dish and lots of butter goes into making it. If you cut down on butter, you will not get that creamy and delicious dal makhani you enjoy in restaurants.

* Lightly mash the dal before simmering. This will help achieve thickness and creaminess.

* Make the second tempering with ghee (see recipe) and add it towards the end. Don't skip it - consider this the game-changer.

*Simmer the dal over low flame for a minimum of 30 minutes. This is the best way to make the best-tasting dal makhani. Once the masala is ready, add the cooked dal, adjust consistency and let it simmer.

Saturday, 29 July 2023

ALUCHI VADI - ROLL/ अळू वडी - रोल

Alu is colocasia or taro in English and not aloo which is potato...😜😜So, this post is dedicated to one of the popular Maharashtrian dishes called Alu Vadi which is stuffed or rolled colocasia leaves that are tempered. This is one of those dishes from Indian cuisine which is gluten free, low-fat and a healthy choice in snacks.


Maharashtrian Alu Vadi Roll is one of the quick, easy, and nutritious snacks made using chopped colocassia leaves, gram flour, and a few spices. They are steamed and later shallow fried or deep-fried as per choice. I have already shared the easy and traditional method of making this vadi earlier on my blog and YouTube Shorts.

These are spicy, sweet, and tangy  and are steamed and then shallow or deep-fried to make a delicious snack. It can also be served as breakfast, or as party appetizers. You can pan-fry these rolls with a tempering of seeds and spices for a crispy vegan and gluten-free Indian snack. They’re perfect with chai. Indeed, a cup of masala chai is obligatory, not optional. Get your snack on! ENJOY..😍 This Alu Vadi is a crispy and healthy snack-appetizer which is also a perfect side dish with your meal. Here’s a foolproof step-by-step ALU VADI ROLL recipe with pictures and video so you too, can make this Gujarati and Maharashtrian favourite with ease.


This is the ultimate guide to homemade AluVadi Roll. If you tried this recipe, Click on the stars ★ in the recipe card to let us know your feedback!  You can also click the recipe pic and share on Instagram and Facebook with hashtag #Kalpana's La Cucina.

📌📌 Watch full video recipe here 📌📌

INGREDIENTS :

9-10 Alu/ Colocassia Leaves

1 Cup Besan/ Gram Flour

1/2 Cup Rice Flour

2-3  Green Chillies 

1/2 " Ginger 

5-6 Garlic Cloves

1 tablespoon Coriander Seeds / धणे 

1/2 teaspoon Cumin Seeds / जीरा 

1/2 teaspoon Carom Seeds/ ओवा 

1 teaspoon Sesame Seeds/ तीळ

1 tablespoon Tamarind Pulp

1 tablespoon Jaggery

1/2 teaspoon Turmeric Powder

1 teaspoon Garam Masala Powder

1 teaspoon Red Chilli Powder

Salt as per taste

2 teaspoon Oil

Water as needed

METHOD :

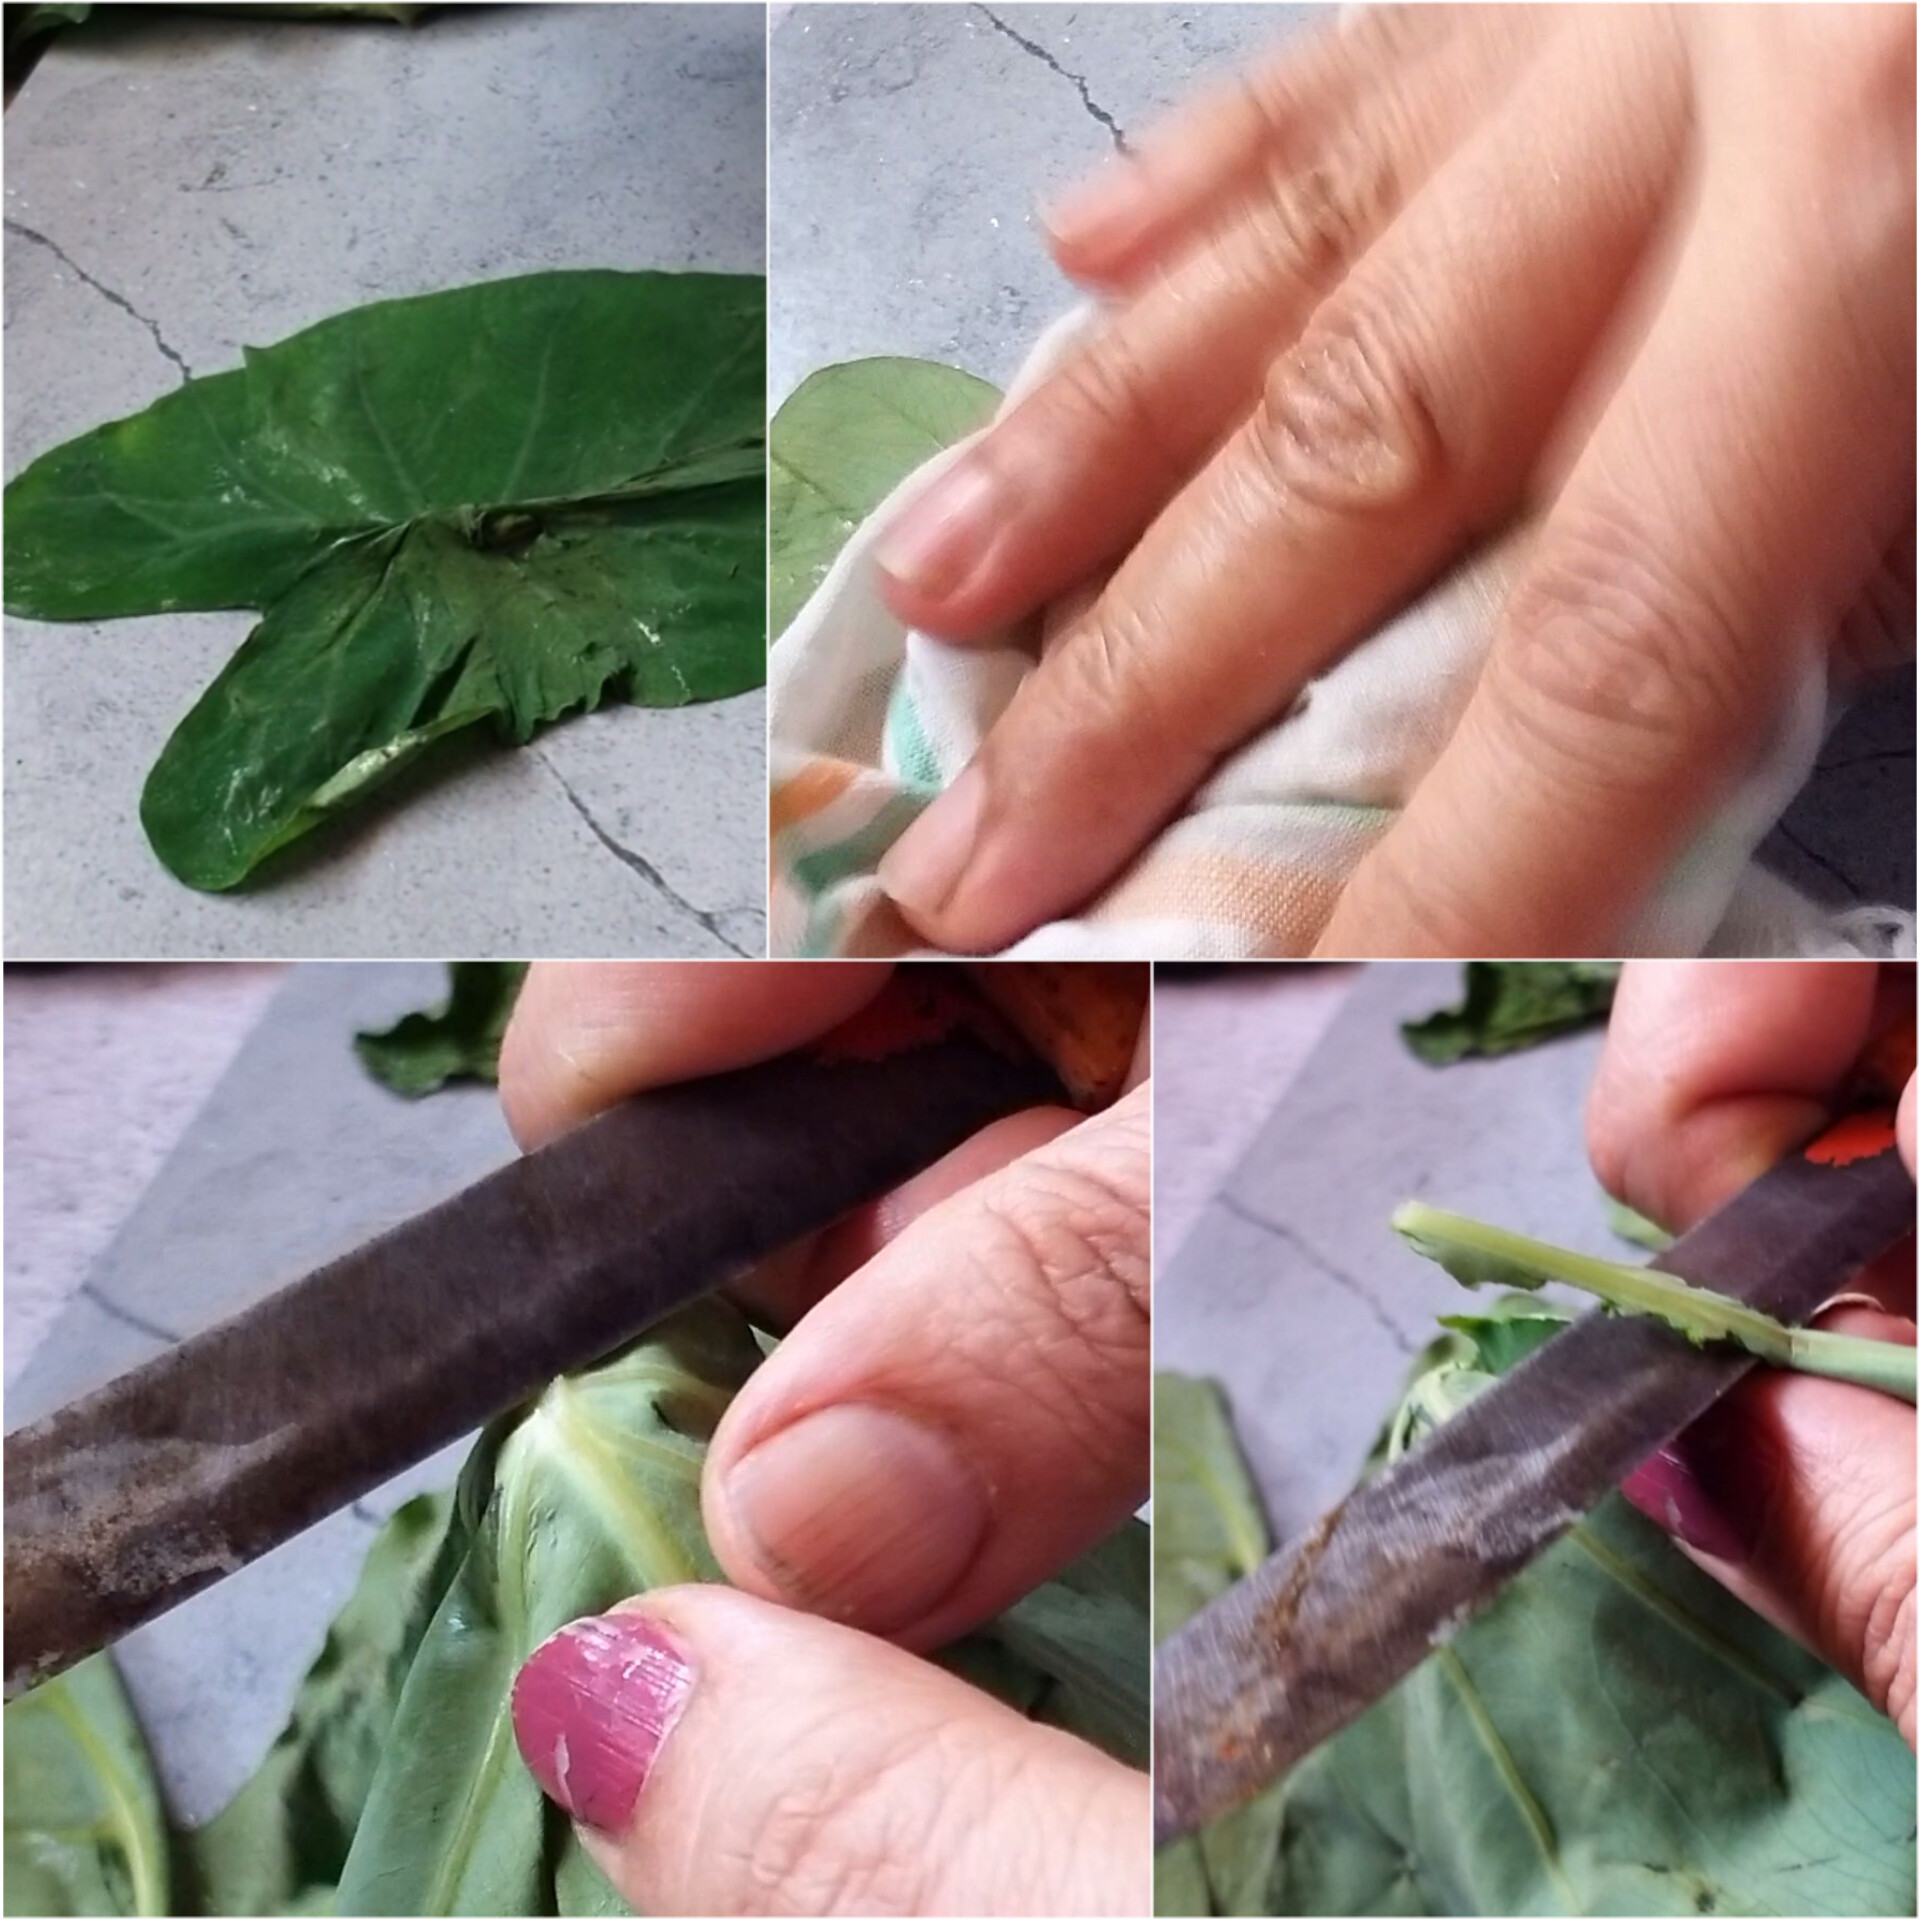
STEP 1 - Wash, pad dry Colocassia Leaves and remove the stem and hard stem from all the leaves.


STEP 2 - Chop them finely as shown in the picture below. Keep aside.

STEP 3 - In mixer pot, add green chillies, ginger, garlic, cumin seeds, coriander seeds and make a coarse paste of it. Do not add any water while blending.


STEP 4 - In mixing bowl, add chopped colocassia leaves, sesame seeds, carom seeds, salt , turmeric powder, garam masala, red chilli powder, tamarind paste, jaggery and mix well.


STEP 5 - Now add fresh masala with green chillies,  garm flour and rice flour and first mix well without adding water.


STEP 6 - Then add water in small batches and make a stiff dough. 


STEP 7 - Add 1 teaspoon oil and mix well.


STEP 8 - Grease your hands and steamer plate with oil.


STEP 9 - Pre- heat the steamer by adding some water in it and keep it on the flame. Let the water come boil.


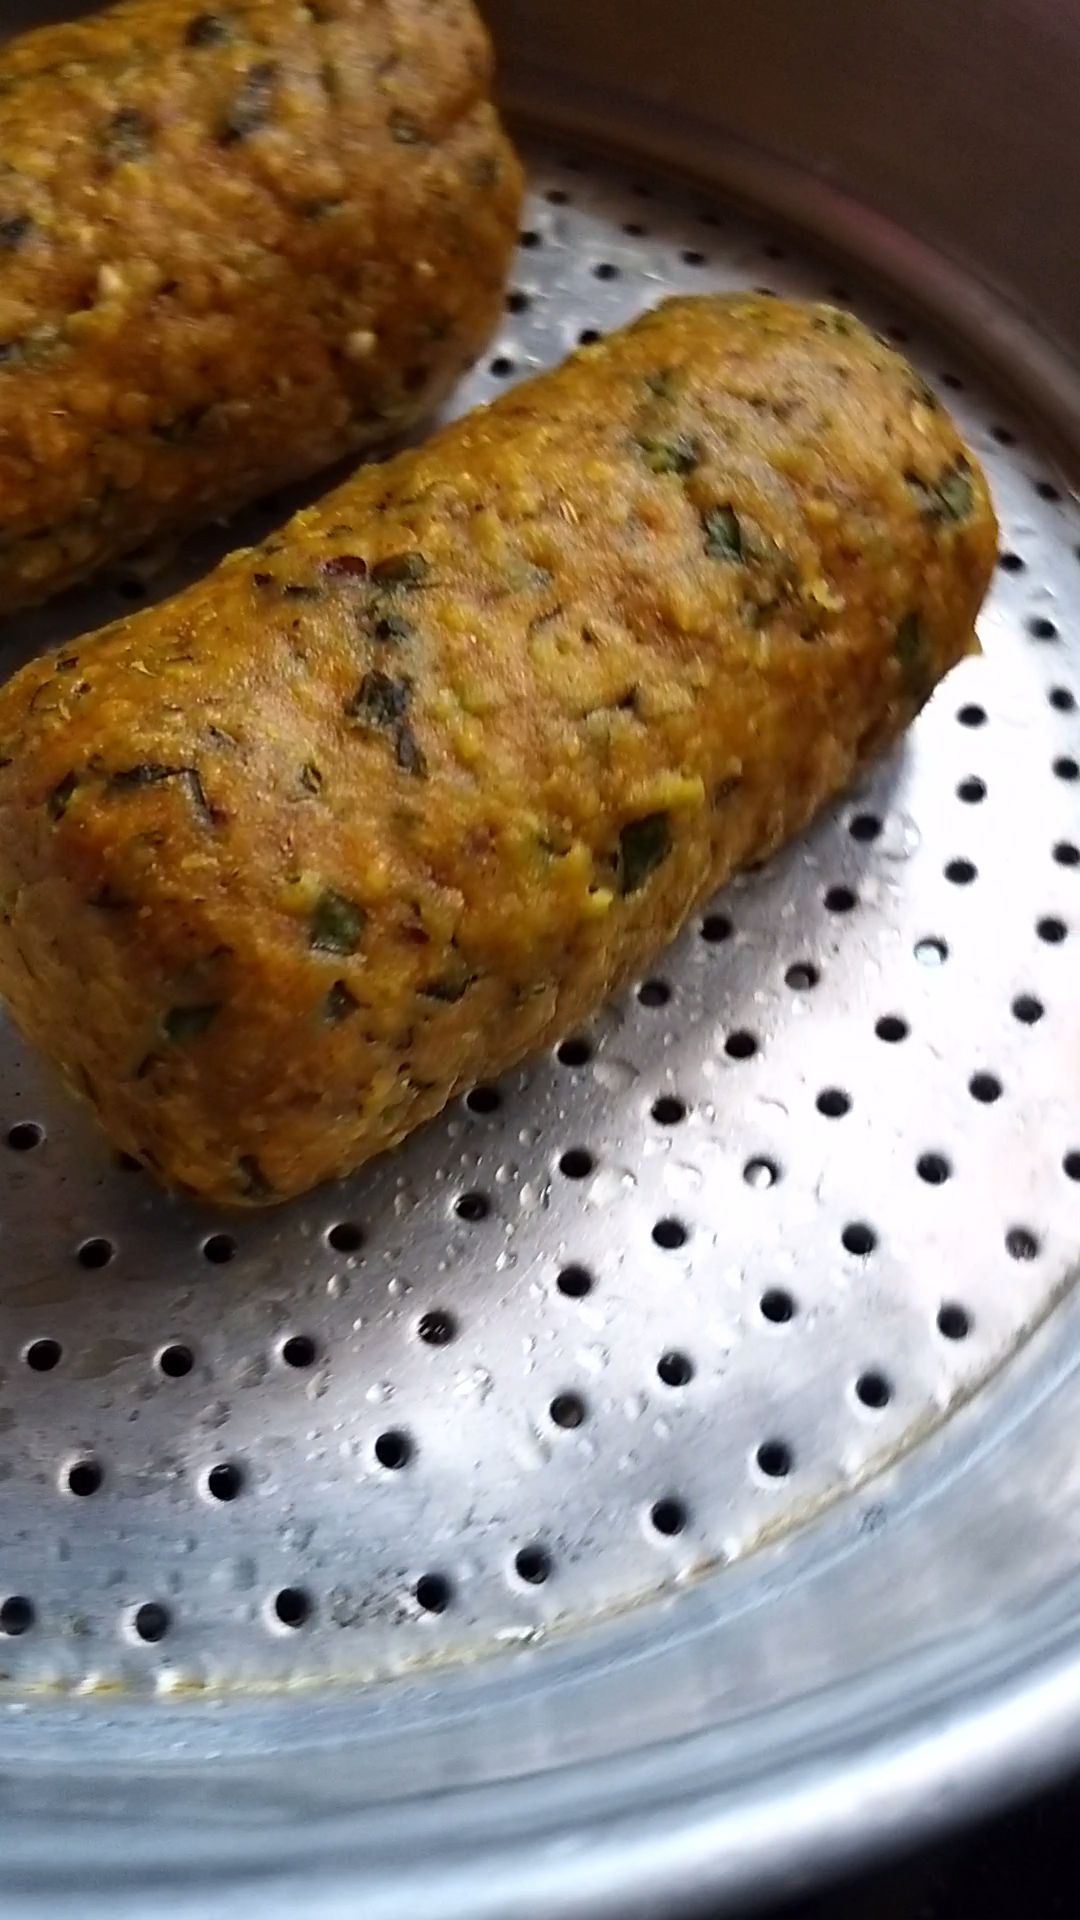
 STEP 10 -  Start shaping the dough and make roll/ log with it.


STEP 11 - Put the rolls on the steamer plate.


STEP 12 - Put it in the steamer and close the lid.


STEP 13 - Steam for 15-20 minutes on medium flame.

STEP 14 - Check by inserting a knife/ toothpick in the roll. If it comes out clean your alu vadi is perfectly cooked.


STEP 15 - Remove and let them cool to room temperature.


STEP 16 - Then apply oil on the edges of sharp knife and cut the roll into 1/2" thick discs.


STEP 17 - Heat oil in a wide pan, add some sesame seeds and then add the discs and shallow fry on medium flame. 


STEP 18 -  Change the sides and cook them from the other side until they turn nice golden brown and crispy from both sides.


STEP 19 - Put them on a kitchen towel/ tissue paper to drain excess oil and ready to serve.


Serve the crispy, crunchy alu vadi with a hot cup of tea/ coffee as as evening snack and enjoy.

NOTES - *The quantity of green chillies and jaggery in this recipe can be increased or decreased as per your taste.

Saturday, 15 July 2023

PHODNICHA BHAAT / फोडणीचा भात

 Do you have some leftover rice and wondering what can you do with it? Try Phodnicha Bhaat Recipe . This Indian-style fried rice is one of the easy and tasty ways to use leftover rice. Phodnicha bhaat or Fodnicha bhat is a Maharashtrian-style seasoned rice recipe. Here “Phodni refers to tempering (tadka) and Bhaat (or Bhat) means cooked rice in Marathi. So Phodnicha Bhaat is spicy tempered rice, Tadka rice, or a very simple and basic Indian-style fried rice in English. 


Phodnicha Bhaat is an easy Maharashtrian-style seasoned rice recipe and a great way to use leftover rice. This delicious and simple Indian fried rice is made with leftover rice, onion, turmeric, and herbs. Every region, state, family in India have their own version of making tempered rice using leftover. Leftover rice recipes are quite popular in various cuisines – like Curd rice, Vagharelo Bhat, Jeera rice, Lemon rice to name a few. It gives the rice from last night a completely different flavor, taste, and beautiful yellow color. It is a simple yet delicious, quick meal that you can make in and also makes an excellent  lunchbox option that is ready in less than 20 mins. At my home this recipe is loved soo much that I often have to prepare the rice in advance just to make this recipe. Sometimes it is also one of those recipes which you can cook with an almost empty refrigerator- simple, delicious and satisfying!

 Traditionally phodnicha bhaat is made to use the leftover rice but you can still make it using freshly cooked rice. Just ensure the cooked rice is cooled properly before making this dish. Hot rice used will cause the rice granules to stick & become lumpy. You can make this rice with veggies of your choice but personally I just love simply with onions and tomatoes in this recipe. Adding veggies make it more nutritious, so you can add veggies like green peas, carrots, cauliflower, corn. Green chili can be replaced with red chili. That will change the flavor and color but still be delicious.


I always love simple delicious recipes that can be prepared quickly and easily at home to use leftover rice, zero wastage. This recipe is my ‘go to recipes’ for a busy weekday meal. This stir-fried leftover rice recipe is very versatile and can be easily adapted to your tastebuds and the ingredients available. This recipe is perfect to make for beginners & bachelor’s. It hardly requires any ingredients and the main one being plain leftover rice.

Hope you enjoy this Phodnicha Bhaat recipe !! If you give this recipe a try, please rate by clicking stars ⭐️ on the recipe card. Thank you ❤️! You can also follow me on Facebook / YouTube / Instagram to see @ Kalpana's La Cucina..!!!

📌📌 Watch the video recipe here 📌📌


INGREDIENTS : 

2 Cups cooked Rice/ Leftover Rice 

2 tablespoon Oil / Ghee

2 tablespoon Peanuts

1 teaspoon Mustard Seeds /Rai

1 teaspoon Cumin Seeds / Jeera

10-15 Curry Leaves

1 Onion, finely chopped

1 Tomato, chopped 

¼ cup green peas fresh or frozen ( optional ) ( see notes )

1-2 Green Chillies, finely chopped ( adjust to taste)

4-5 Garlic Cloves, finely chopped 

½ teaspoon Turmeric Powder 

Salt to taste

1 tablespoon lemon juice ( optional )

Coriander leaves, finely chopped

METHOD : 

STEP 1 - Heat oil in a wok or pan.

STEP 2 - Then add mustard seeds, cumin seeds and let them pop up.


STEP 3 - Add peanuts and let them fry for 2 minutes.


STEP 4 - Add the onions, curry leaves, chopped green chillies, chopped garlic cloves and mix well and cook until raw flavour vanishes and onion turns translucent.


STEP 5 - Add turmeric powder and salt and saute on low heat for a min or so.


 STEP 6 - Them add tomato, green peas or any other veggies of your choice. ( see notes ) Mix well and cook for 2-3 mins or until the peas are cooked.


STEP 7 - Once the veggies are cooked , add in the cooked rice,  mix gently until well combined. 


STEP 8 - Saute it , cover it and cook 3-4  minutes. Stir occasionally to avoid the rice sticking to the bottom of the pan.


STEP 9 -  Finally, squeeze in some lemon juice and add chopped coriander. Mix gently. 


STEP 10 - Phodnicha bhaat is ready! 


Serve hot with a side of yogurt or raita or pickle or your favorite curry/dal.


NOTES - * Traditionally phodnicha bhaat is made to use the leftover rice but you can still make it using freshly cooked rice. 

 * If you don’t have left over rice, then make fresh rice and let it cool down completely before tempering it.

* You can use type of rice for this recipe like basmati, brown rice, long grain rice all works well.

*Refrigerated rice tends to get dry over time so if you are using rice which a couple of days old, here are a few ways to bring back the moisture. Splash some water (tablespoon or two not more) over it while stir-frying or add a tablespoon of water to the rice and microwave for 30 seconds.

* This is a very basic simple recipe, you can add asafoetida, cashews , whole red chillies in the tempering if you wish.

* Adjust the spice levels to your choice by adding or reducing the number of green chilies. If you are making it for kids' lunch box, you can omit the green chili or make a slight slit and add for flavor.

* You can add 1/2 teaspoon sugar which helps to balance all the flavors. I don't like so I skipped.

* You can replace green chili with red chili. That will change the flavor and color but still delicious!!

* Add veggies of your choice to make it more nutritious like green peas, carrots, cauliflower, corn, etc.

Friday, 14 July 2023

VIRAL TOMATO CHUTNEY

 Tomato Chutney is a popular condiment in many cuisines and its tangy and spicy flavors can indeed make it a hit as a viral recipe. On social media, this tomato chutney is viral so today I tried it with chapati as a side dish.....it tastes super delicious and absolutely worth try 😍❤️This tomato chutney is all things flavourful and has a taste that you have never had before. It is comforting, spicy, and makes for a perfect side dish. 

Indian meals consist of a variety of items. Be it dal, roti, rice, sabzi, salad, achar and even chutneys. All these things complete our thalis and leave us drooling. However, many people conceive of chutney just as a side dish to accompany a meal.  In different houses, chutneys are made in various ways. Although, the goal is the same- to make a side dish that will add variety to your meals. But, its importance in Indian cuisine is so much more than that. It not only adds flavours to our meals but also gives a punch of nutrition. This Tomato Chutney is a burst of flavors that will elevate your culinary experience! This extraordinary recipe takes the humble tomato and transforms it into a mouthwatering condiment that will leave everyone craving for more.  With its rich, smoky undertones and the perfect balance of tanginess and spiciness, this chutney has taken the internet by storm.


This recipe will surely be a hit, making you ask for more. Here’s a simple and delicious recipe for tomato chutney that you can try. If you try this recipe then I'd love to hear about it...!!! Leave a comment in the comment box below.....😍😍

Lets learn how to make this Viral Tomato Chutney recipe with step-by-step photos and video recipe. If you tried this recipe, Click on the stars ★ in the recipe card to let us know your feedback!  You can also click the recipe pic and share on Instagram and Facebook with hashtag #Kalpana's La Cucina.

📌📌 Watch the video recipe here 📌📌


INGREDIENTS :

3-4 Tomatoes, cut into halves

7-8 Garlic Cloves

2-3 Green Chillies, chopped

1 Onion, chopped

1 tablespoon Coriander, chopped

2 tablespoon Mustard Oil

1/2 teaspoon Red Chilli Powder

Salt as needed

1/2 Lemon Juice

METHOD :

STEP 1 - Wash and cut the tomatoes in halves. 

STEP 2 - Heat mustard oil in a wide non-stick pan on medium flame.


STEP 3 - Now place the tomatoes on the pan facing downward.

STEP 4 - Then put garlic cloves.


STEP 5 - Cover with lid and cook for 4-5 minutes.


STEP 6 - Change the sides once or twice while cooking. Cook until they are well cooked, turn soft and the skin starts to seperate easily from the tomatoes.


STEP 7 - Switch off the flame.


STEP 8 - Peel off and remove the skin from all the tomatoes.


STEP 9 - Now mash tomatoes and garlic with a fork or potato masher.


STEP 10 - Now add chopped onion, chopped green chillies, chopped coriander, salt, red chilli powder and finally squeeze the juice of lemon.


STEP 11 - Mix everything very well until well combined.


STEP 12 - Tomato Chutney is ready to serve.


Transfer into a serving bowl and enjoy.


Enjoy this tomato chutney with sandwich, nachos, chips, etc. You can also enjoy this as a side dish and enjoy it with chapati, phulka or paratha.


NOTES - *You can fry garlic seperately until golden in colour and mix while mashing tomatoes.

* Feel free to adjust the spices and flavors according to your taste preferences.