_________________I am Mrs. Kalpana Mhaske, a Home-Maker, from the city of 52-Gates, one of the famous heritage- destination of the world- Ajanta - Ellora Caves, Bibi-Ka- Maqbara (The Taj of Deccan) and Deogiri Fort. i.e. AURANGABAD. I admire cooking - tryout and innovate different cuisines. Basically, both of my gorgeous daughters are foodie, they have always encouraged me in the kitchen and forced to carve a Food Blog, that’s why, I am happy to share the makings with you. I am an artist too. Painting – especially, Canvas-Painting is my one more hobby. In total - Ours is an ART-FAMILY, my husband is an Architect. In the end, I keep the same belief with Louise Fresco - “ Food, in the end, in our own tradition, is something holy. It's not about nutrients and calories. It's about sharing. It’s about honesty. it’s about identity ”

Friday 16 February 2018

RED VELVET CAKE

Here I am with the easy, no fail and simple recipe of Red Velvet Cake as we have just celebrated Valentine’s Day and I prepared this cake which comes out so spongy, moist, soft and delicious. Mostly Red Velvet Cake is with cream cheese frosting but here I don’t get cream cheese, so frosted my cake with regular whipping cream. I must say that  this is the easiest version of Red Velvet Cake and I bet you should not control yourself from  trying  this for sure.  This Red Velvet Cake is moist and flavourful and always a show stopper!!! Here in the recipe we have to add cocoa powder but don’t take tension, the cake will not taste like traditional chocolate cake because of the addition of buttermilk and vinegar, which cut into the richness of the cocoa.  If you have never made a red velvet cake at home, now this is the time, just collect your ingredients and get started.  You just need to follow the step-by-step recipe below and within a few minutes your is ready. 
INGREDIENTS:
2 ½ Cup All Purpose Flour
1 ½ Cups Sugar 
2 tablespoon Cocoa Powder
1 teaspoon Salt
1 teaspoon Baking Powder
2 Eggs
1 ½ Cup Vegetable Oil
1 Cup Buttermilk
1 tablespoon Vinegar
1 teaspoon Vanilla Essence
2 Oz Red Food Colour [see notes]
METHOD:
STEP 1 – Pre-heat the oven at 350°F or 180℃. Two cake tins of 8 inch, grease and dust with all purpose flour and keep aside.
STEP 2 – Lightly stir eggs in a medium bowl with a wire whisk.
STEP 3 – Add remaining wet / liquid ingredients  in it and stir together with the whisk until blended. Keep the mixture aside.
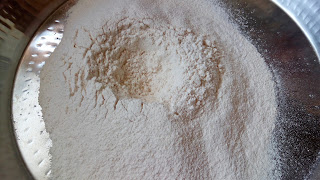
STEP 4 – Place all the dry ingredients in your mixing bowl
and stir together really good with another whisk.
STEP 5 – Add the dry ingredients to the wet ingredients mixture in 2-3 small batches and mix on medium-high for about a minute or until completely combined.
STEP 6 – Add red food colouring in the batter and mix well.

STEP 7 - Pour the batter into ready cake tins and then drop the pans on the kitchen counter a few times. This helps to remove the air bubbles in the cake batter if any.
STEP 8 – Bake it in a pre-heated oven at 350 degrees for 30 minutes
 or until the tooth pick inserted comes out clean.

STEP 8 - After that let demould cake and remove the butter paper from the base
and let it cool down on a wire rack for about 10 minutes. [see notes]
STEP 9 – Frosting will be done as per your liking. Here I just used whipping cream for frosting my cake. And garnished my cake with white chocolate hearts and cake crumbs.
Refrigerate the cake after frosting for 4-5 hours  and then cut it into slice and serve to your dear ones. Or you can cut it immediately and serve.


NOTES: *You can use beetroot juice with little food colouring which is the healthy option.

NO YEAST GARLIC NAAN ON STOVE TOP

Yummy Garlic Naan brushed with some butter goes very well with any side dish. I also added chopped coriander and onion seeds/ kalongi. You can also add sesame seeds to add more flavour. These can very easily be made on a tawa and gives a complete satisfaction in having then hot right in the comfort of your home. Actually, I want to make naan with saffron wash, which is very famous here in Aurangabad which is served with Kalia/ Masaledar Mutton Curry. But I never seen it before so made simple regular naan to accompany my Kalia gravy. I have already posted recipe of naan with yeast, but this time decided to make it without yeast or egg and I must say it turned out well. It was so soft and remained soft for a long time. Here for my recipe, I used 1: 1 proportion of all purpose flour and whole wheat flour instead of only all purpose flour to make it healthy. But it totally depends upon your preference, either you can use like I did or only all purpose flour or only whole wheat atta.  The method is really simple and no need of tandoor for this recipe. A simple tawa will work in an awesome manner. Though I love eating rustic pillowy soft naans in dhabas, cooked in a tandoor, trust me when I say, you won’t have to go to a dhaba again to enjoy naans. This make a hearty and filling meal when it is paired with a sumptuous side dish like paneer tikka masala or paneer butter masala or any simple non-veg gravy like me that gets done in only 15-20 minutes. This method is really helpful for those who do not want to use yeast for making naan. Follow the step-by-step picture recipe and make dhaba style soft naan in the comfort of your kitchen  whenever you are craving for it.
INGREDIENTS:
2 Cups All Purpose Flour [see notes]
2 tablespoon Oil
½ teaspoon Baking Soda
1 teaspoon Sugar
Salt as needed
¼ Cup Curd
Luke warm Water as needed
1 tablespoon chopped Coriander
1 teaspoon Sesame Seeds
1 teaspoon Nigella Seeds [optional]
METHOD:
STEP 1 – In a mixing bowl or plate take flour and make a well in the center.
STEP 2 – Add curd and sugar in it. Also add salt and baking soda.
STEP 3 - Combine the ingredients using your fingers.
STEP 4 – Add warm water in it and start kneading it. Make a soft dough with it. Do not use a lot of water.
STEP 5 – Add oil and knead it again for 4-5 minutes.
STEP 6 – Cover the dough and let it rest for at least 2 hours for fermentation.
STEP 7 – After 2 hours knead the dough again.
Divide it into equal parts and keep aside.
STEP 8 – Now dust a rolling board with some dry flour. Take one ball and start rolling it on it.[see notes]
STEP 9 – Sprinkle some sesame seeds on the board and roll it again.  
 
STEP 10 – Apply or sprinkle some crushed garlic and chopped coriander over the surface of the naan. [see notes]

STEP 11 – Heat an iron tawa/ griddle.
STEP 12 – Turn upside rolled down naan and apply water on the other side.
Take the naan in your hands and gently transfer it to the hot tawa keeping water side down. It will stick to the tawa and this helps to cook the naan.
STEP 13 – Cook until bubbles have formed on top and the bottom side gets lightly coloured.
STEP 14 – Pick up the tawa with the help of handle carefully and flip it up over the burner flame. Move the tawa and cook the naan evenly from all sides. You can see the brown patches on it. Keep the flame high here.
.
STEP 15 – Now remove it from the tawa and smear oil/ ghee or butter on the surface of naan and serve it hot.
Follow the same process and make soft, crispy and buttery naan on the stove top without tandoor or oven.

Remove from flame and brush with butter.
Serve it hot with any Punjabi gravy or non-veg dishes or any dry curry.

NOTES: *You can make it with ½ - ½ whole wheat flour and all purpose flour also. Here I used both the flours to prepare my naan. Choice is yours. You can used any one flour as per your liking.
              *You can make them circle or oval shape as you like.
              *You have to apply garlic, chopped coriander and sesame seeds on the same side of naan. If you don’t want to sprinkle garlic and coriander on the naan then you can add directly into the dough making process.


NAAN KHALIA/ KHALIYA / QALIA

Today I am in a mood for some traditional and historic recipe, yes you heard it right. Today I am going to share the recipe of Kalia or Qalia which is nothing but a mutton masaledar gravy. Naan Qalia of Aurangabad is meltingly tender mutton dish which is satisfying rich and is prepared by slow cooking meat with the mix of spices and oil.  This dish is unique to Aurangabad and is a tradition of Aurangabad since Mughal era. It is a concoction of mutton and a variety of spices. Aurangabad and Kolhapur are two places in Maharashtra which boast of a rich food heritage. Coming back to the history about Aurangabadi Naan Qalia, this Qalia is a thick gravy which was prepared with mutton, oil and amalgamation of various spices slowly simmered in a huge cauldron called Degh/ Degchi. The qalia is a rich dish and once prepared it has a top layer of oil / ghee called Tari, it is customary for people to request for the oil to be drunk in smaller portions. I am sure anyone who likes pani-puri know the sentiments..!!  This dish is currently available at very selective places in Aurangabad and heard about some muslim restaurants are serving this dish. This dish was introduced first by Mohammad Bin Tuglaq who shifted his capital from Delhi to Daulatabad [present day Maharashtra]. He wanted to exercise better control over the fertile Deccan plains. Unfortunately no buses and trains are there that time and people were exhausted   and starving, so he set up halting camps at every 2 mile distance . It was here that the royal Bawarchis [cook]  invented the recipe of Naan Qalia that could serve the grand army.  With the idea of mass feeding and preservation of food this indigenious  recipe was developed. This is basically served with the fluffy Golden Naan and the golden colour is because of smearing  of turmeric water before being baked in the furnace. They are very different from the modern day Naan which are available at most restaurants and dhabas. They are prepared in an open clay oven, which is mounted in a hole in the ground. Mohammad Tuglaq then left Daulatabad but soldiers and its families supported the dish and carried the tradition till date. It is customary at every muslim wedding to serve this dish in Aurangabad and if you don not then you face the disgust of the guests. The recipe and information is taken from google only.
INGREDIENTS:
500 gms of Mutton pieces, boneless and with bones
2 big Onions, very finely sliced
5-6 tablespoon Raw Mustard Oil
1-2 tablespoon Kashmiri Red Chilli Powder
Salt as needed
1-2 tablespoon Ghee
9-10 Green Cardamom
Chopped Coriander for garnishing

Masala to be ground:
2 Onions, finely sliced
30 gm Garlic
2 tablespoon Coriander Powder
1 tablespoon Turmeric Powder
10-12 Dry Red Chillies


METHOD:
STEP 1 – First wash the mutton pieces under tap water and keep it aside to drain excess water from it.
STEP 2 - Take all the ingredients under title “Masala to be ground” in a mixer grinder pot
and blend it.
STEP 3 – If not working add 2-3 tablespoon water in it which helps to grind the masala. Make a fine and smooth paste with it and keep aside.
STEP 4 - Add enough raw mustard oil in a pan. Heat it to its smoking point. Once smoky, turn off the flame and let it rest till the smoke vanish.[see notes]
STEP 5 – Now the oil stops smoke coming from it and cooled down slightly. Put it again on the flame and heat it.
STEP 6 – Here you have to add the sliced onions and sauté it well and 
cook for some time till it becomes light brown.

STEP 7 – Now add the mutton pieces in it
and give a nice stir and cook the mutton on high flame for few minutes until the raw smell disappears.
STEP 8 – Then add the ground paste,kashmiri red chilli powder and salt in it 
and mix well so that the masala get incorporated well with the mutton pieces. Fry it for 5-6 minutes.

STEP 9 - Add 2 cups of hot water in it and mix it well.
Simmer it till the water starts boiling and evaporating.
STEP 10 - Continue simmering the kalia or gravy in an open pan till the water evaporates completely. Give a nice stir in between and keep cooking till the water dries up .It takes about 20 minutes.
STEP 11 - When the water disappears completely, you can see the dark brown coloured gravy. Keep browning the meat till the oil starts separating.
STEP 12 - Add hot water to it,
cover it and cook it further for 15-20 minutes or until it get cooked.

STEP 13 - Here you have to add 1-2 tablespoon ghee in the pan or gravy and 9-10 green cardamoms
and again cover it and cook for more 10 minutes.
Check if the mutton is cooked or not and then switch off the flame.
STEP 14 – Adjust the gravy consistency as per your liking. Garnish with chopped coriander leaves and serve hot.
Serve hot kalia with naan, onion rings and lemon and enjoy.
NOTES:* You usually starts coughing when the oil is hot enough and smoky. Keep this in mind while heating the oil.