_________________I am Mrs. Kalpana Mhaske, a Home-Maker, from the city of 52-Gates, one of the famous heritage- destination of the world- Ajanta - Ellora Caves, Bibi-Ka- Maqbara (The Taj of Deccan) and Deogiri Fort. i.e. AURANGABAD. I admire cooking - tryout and innovate different cuisines. Basically, both of my gorgeous daughters are foodie, they have always encouraged me in the kitchen and forced to carve a Food Blog, that’s why, I am happy to share the makings with you. I am an artist too. Painting – especially, Canvas-Painting is my one more hobby. In total - Ours is an ART-FAMILY, my husband is an Architect. In the end, I keep the same belief with Louise Fresco - “ Food, in the end, in our own tradition, is something holy. It's not about nutrients and calories. It's about sharing. It’s about honesty. it’s about identity ”

Saturday 5 August 2017

CHICKEN RESHMI KEBAB

Chicken reshmi kebab is a very popular dish all over India and other countries. Love chicken kebabs??? If yes then here is a simple, easy and quick recipe of Chicken reshmi kebab at home. Yes you heard it right….!!! India is a land of diversities, which is well portrayed in its culture and cuisine. A land where taste changes at every 100 kms. Hence it has wide spectrum of food. Here I am sharing the recipe of reshmi kebab that is not only quick, but can be easily made at home.  This is super simple and mouthwatering “must try” reshmi kebab recipe. Bite size pieces of chicken are marinated in afresh and flavorful spicy creamy sauce. You can grill the kebabs on skewers in your oven or barbeque grill or simply grill them on grill pan. I have already shared many veg as well as non-veg recipes of kebabs and starters in my blog. This is my alltime favourite kebab and this is on my to do list from past many days.  So I tried it few days back and it come out so delicious.  Trying this reshmi kebab recipe at home is an easy way to get a delicious meal. Here is the step by step recipe with detail pics.

INGREDIENTS:
½ kg Chicken [cut into small pieces]
½ Cup Thick Curd [greek yoghurt]
½ Cup Fresh Cream [here I used Amul]
½ inch Ginger
5-6  Garlic Cloves
½ teaspoon Black Pepper Powder
Salt as per taste
9-10 Cashew nuts
9-10 Almonds
1 tablespoon Chopped Coriander
1 tablespoon Mint Leaves
1 teaspoon Lemon Juice
½ teaspoon Chaat Masala +1/4 teaspoon for sprinkling


METHOD:
For Marination:
STEP 1 – In a mixer pot, take cashew nuts, almonds, ginger, garlic, mint leaves, chopped coriander along with fresh cream and curd and blend it to a fine paste. Don’t add water while blending. The paste should be thick consistency.

STEP 2 – Remove the paste in the bowl and add lemon juice in it. Add some more chopped coriander in it and mix it well.

STEP 3 – Now add chaat masala and mix it.

STEP 4 – Add salt as per taste.

STEP 5 – Now add the chicken pieces in this marination and marinade with the creamy mixture.

STEP 6 – Keep this marinated chicken for minimum 30 minutes and maximum 4 hours to overnight in the refrigerator.[see notes]


STEP 7 – If using the wooden skewers, then soak the skewers for at least 1 hour before using them.
 STEP 8 – Thread the marinated chicken pieces into skewers and keep them aside.

STEP 9 – Pre-heat the grill pan with few drops of oil.
When it is hot, place the chicken skewers one by one on the grill pan.

STEP 9 – Sizzling sound comes when you place the chicken skewers on the grill pan.
STEP 10 – First cook them for 2 minutes on medium heat and then drizzle 1 teaspoon oil on the skewers and then turn them.[see notes]

STEP 11 – Cook evenly from all sides, in between drizzle oil, so that the marinate will not stick to the grill pan. Cook them till completely  cooked, it will take about 15 minutes to get done on medium heat. Remove them from skewers and serve.

Serve hot with mint chutney or tomato ketchup or any dip as per your liking, onion rings and lemon wedge and enjoy as a starter or with any meal. Sprinkle some chaat masala at the time you serve them.


NOTES: *The longer we allow the chicken pieces to rest, the softer they turn out.
              *The timings may vary which depends upon the size of the chicken pieces.
              *Turn the skewers carefully while cooking on grill.


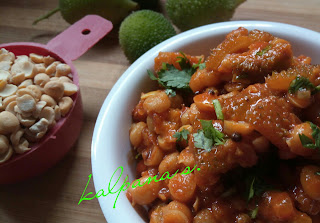
KANTOLA /KARTOLA WITH CHANA DAAL

Kantola / kartola is available across most parts of India during monsoons. Some may know it is as kekol, kekrol, kartoli or some other name, but cannot deny the health benefits of this vegetable. It belongs to the botter gourd family but is not as bitter in taste even with the skin on. So it is also known as spine gourd. It is a great health food as it is rich in proteins and iron and is low on calorie. It is high in fiber and anti-oxidants and thus very useful for easy digestion. It keeps your stomach in good shape during the monsoons by reducing the infections caused and controlling constipation. Carotenoids like Lutein present in this vegetable helps in prevention of various eye diseases, cardiovascular diseases and even cancers. Hence, this vegetable helps inlowering blood sugar and controlling diabetes. Since Kantola is mostly available during monsoons, it must be used regularly to keep seasonal cough, cold and other allergies away. Only the fresh green coloured variety of this vegetable is edible. The skin packs a lot of nutrients and hence should not be removed while cooking.

Kantola is often made in various regional Indian cuisines. During monsoons, we usually buy them and make this kantola sabji. It can be made dry like karela fry which I will share some other day. But here I am sharing the recipe which is gravy and not dry one. This is a must try dish which is good as a side-dish with dal-rice or chapatti or parantha. This is originally my Aai’s recipe which is simple as well as easy and  tastes delicious. As it look like Karela [bitter gourd] people generally avoid it as they think that taste can be same as Karela. So all the people I would like to tell its very different in taste from Karela. It is not bitter, so do try it once. It was more like a veggie rich in water content like cucumber and radish. It has many medicinal benefits, it is very good for kidney, cough and fever. So lets start the recipe with step by step pics.

INGREDIENTS:
1 Cup Chana Dal / Bengal Gram
500 Gms Kantola / Kartola / Spinegourd
½ teaspoon Turmeric Powder
2-3 teaspoon Red Chilli Powder
Salt as per taste
1-2 teaspoon Dry Coriander Powder
2 tablespoon Oil
5-6 Dry Red Chilli
1 teaspoon Ginger- Garlic Paste
1 teaspoon Cumin Seeds
1 Large Onion

METHOD:
STEP 1 – Wash and soak chana dal with water for ½ an hour.
Pressure cook for 3-4 whistles and keep it aside till the pressure released.
STEP 2 – Wash and slice kantola. Keep aside. [see notes]
STEP 3 – Heat oil in a wok, splutter cumin seeds in it.[see notes]
STEP 4 – Then add chopped onion and ginger-garlic paste in it and sauté well till the raw smell disappear.
STEP 5 – Add turmeric powder, red chilli powder and dry coriander powder. Saute it for a minute on low flame.
STEP 6 – Now add chopped kantola in it and sauté well for 2-3 minutes.
STEP 7 – Add pressure cooked chana dal in it and mix well.
STEP 8 – Season it with salt as per your taste.
STEP 9 – Add ½ cup water in it and let it cook.
STEP 10 – Cover the wok and cook the sabji till the kantola as well as chana dal get cooked properly.
Add more water if you want more gravy. Normally this dal consistency is thick only.
STEP 11 – Once it is done add chopped coriander in it and switch off the flame. Serve and enjoy hot or warm with roti, paratha or steamed rice.
NOTES: *If kantola are big then only you have to peel, if you get small variety which are very soft then no need to peel them.

             *Add small pieces of dry red chilli at this stage. Here I have not added dry red chillies in my gravy.

SAVJI/ SAOJI MUTTON MASALA


The saoji/ savji community has its origin in the Mlawa region of India. It is known for its hot and spicy non-vegetarian delicacies prepared with its special Saoji masala. This community is mainly non-vegetarian. Mutton, chicken and fish are an integral part of Saoji Bhojanalayas [eateries] are quite popular in place like Hubli, Bangalore, Belgaum, Nagpur and Solapur. Saoji food has been around a long time in and around Nagpur. But recent  years have elevated this simple recipe from the peripheral and made it synonymous with Nagpur food. Once known for its Oranges, the city is as well known for Saoji food and like most of the Varhadi recipes from the central part of India. 

This Saoji mutton recipe is super hot and spicy. Nagpur’s love for mutton flares up the moment dishes are pronounced- mutton masala, bhuna masala,mutton saoji and not to forget the tempting kheema kaleji and super tasting khur and nalli cooked in specific assortment of spices. I love to experiment the flavors of different cuisines and would like to cook at home to learn about the spices used by different  people across the country. So I thought of trying some of the popular recipes. Saoji mutton is one such recipe. It is aromatic dish which spice up the gravy with the whole spices. This gravy goes well with chapatti, naan, idli, dosa or steamed rice. So here is my step by step recipe with pics .
📌📌 Watch the full video recipe here 📌📌


INGREDIENTS:
500 grams Mutton pieces
4-5 medium sized Onions, sliced
1/2 cup Dry Desiccated Coconut
2 tablespoon Coriander Seeds
2 tablespoon Ginger-garlic Paste
8-10 whole Red Chillies
2 tablespoon Caraway Seeds
1 tablespoon Poppy Seeds
20 Black Peppercorn
3-4 Green Cardamom
4-5 Black Cardamom
4-5 Bay Leaves
1-2 Mace
1 tablespoon Stone Flower (Dagad Phool)
1 inch stick of Cinnamon
1 tablespoon Sorghum flour
Salt as per taste
4-6 Cloves
Oil
For Marination:
1 teaspoon Turmeric Powder
Salt

METHOD:
STEP 1 - Wash the mutton pieces under running water.
Remove water and add turmeric powder and salt in it and mix well. Keep this for 1/2 an hour.
STEP 2 - By that time, heat a non-stick pan with oil and add sliced onion in it. Roast it well golden brown stirring it time-to-time. Keep it aside.
STEP 3 - Now in the same pan, add 1 teaspoon oil, add cloves, bay leaves, cinnamon stick, cardamom, black peppercorn, dagad phool in it. Saute it for 1-2 minutes.
STEP 4 - Then add coriander seeds, caraway seeds in it and saute well and roast for another 1-2 minutes on low flame.
STEP 5 - After that add desiccated coconut and khus-khus in it and roast it well. Once the garam masala starts emitting an aroma, switch off the flame.
STEP 6 - Lastly, roast dry chillies with a teaspoonful oil. Remove it and cool down the roasted garam masala/sliced to room temperature.
STEP 7 - Add sorghum flour to it and transfer it to a mixer grinder. Grind all these ingredients to a fine paste. Remove it from the mixer jar.
STEP 8 - Now make a fine paste of roasted onion.
STEP 9 - Heat oil in a pressure cooker, add mutton pieces in it and saute the mutton till golden brown on high flame.

Then add ginger-garlic paste in it and mix well and cook till the raw smell goes away.
STEP 10 - Add the fine onion paste in the cooker, saute well then add the fine ground paste of roasted garam masala with salt. Mix well and then saute well for 3-4 minutes. Season it with salt.
STEP 11 -Then add water (about 3 cups) in it and mix. Bring a boil.
STEP 12 - Cover the pressure cooker with the lid and cook under pressure till 3-4 whistles.
STEP 13 - Let the pressure reduce completely before opening the lid. Add chopped coriander and serve.
STEP 14 - Serve hot with roti, paratha, bhakri or steamed rice.

ONION KACHORI

Jaipur pyaaz ki kachori ….a spicy, crisp, flaky, deep fried kachoris stuffed with an onion filling are so delightful. This glorious delicacy is not t be missed. It is one of the most famous spicy snack from Jaipur and vicinity. These days you can find this favoured Rajasthani snack dish in alomost all the parts of North India. Now this kachori has also become local snack dish of several regions of Indian subcontinent. Generally, I am not so fond of fried food, but when kids demand snacks I prefer the homemade. If you love spicy food, you can not stop at one kachori. Your stomach would be full, but your heart would ask for more…!!! If you don’t like fried food then simply bake these kachoris and taste would still be divine. It is very simple and quick recipe which is so very delicious and crispy. This traditionally prepared kachori is all about outer crispiness and spicy filling. Both are equally delicious and perfectly fried. They are perfect for an afternoon or as tea time snack or on a rainy day sure needs some piping hot savory snack. Last week it was cloudy and rainy days, and everyone requested me to make some spicy snack, nothing but any deep fried savory delights. So decided to make some kachoris and one quick and yummy onion filling. Onion Kachori are in my to do list since long time, long back tried matar ki kachori which is also hit at my place. So here I am sharing the step by step picture recipe for the crispy and flaky onion kachori..


INGREDIENTS:
For outer covering:
2 Cups Maida / All Purpose Flour
1 Cup Atta /Wheat Flour
1 tablespoon Oil.
Salt as per need
Water as required
For making filling:
2-3 Medium sized Onion, Chopped finely
2-3 Green Chillies
1 “ Ginger, chopped finely [optional]
5-6 Garlic Cloves, finely chopped [optional]
1 teaspoon Jeera /Cumin Seeds
¼ teaspoon Turmeric Powder/ Haldi
2 teaspoon Dry Coriander Powder/ Coarsely grinded Dhana
2 teaspoon Garam Masala Powder
1 teaspoon Fennel Seeds / Saunf
1 teaspoon Amchur Powder
A pinch of Hing/ Asafoetida
Salt as needed
Oil 1 tablespoon for roasting onion + for Frying
Chopped Coriander

METHOD:
For making the outer covering:
STEP 1 – In a bowl add wheat flour and maida, add salt in it.

STEP 2 – Make a well and mix hot oil in it. [see notes]

STEP 3 – Mix well and add water as needed and make a soft dough with it.

STEP 4 – Cover the dough with wet cloth for about 15-20 minutes.

For making filling:
STEP 1 – Heat 1 tablespoon oil in a wide pan, add jeera and hing in it.

STEP 2 – Add chopped chopped green chillies, ginger and garlic. Saute for a while.

STEP 3 – Add spices except amchur powder and salt. Mix it well.

STEP 4 – Now time to add chopped onion in it
and sauté well till the raw smell disappears.

STEP 5 – Then season it with salt as per your liking.

STEP 6 – Cover it and cook it for 2-3 minutes. Cook it well.

STEP 7 – Remove the lid and check it, if it done then add chopped coriander in it and mix well. Switch of the flame.

STEP 8 – Then finally add amchur powder and mix it. Let it cool for some time.

Making of kachoris:
STEP 1 – After 20 minutes again punch the dough and make it soft.

STEP 2 – Make equal pieces with the dough.

STEP 3 – Take one portion and roll it with some maida.

STEP 4 – Put a spoonful onion mixture in the centre.

STEP 5 – Then close the sides of it and make a ball.

STEP 6 – Sprinkle some maida on the platform and roll the kachories lightly.

STEP 7 – Heat oil in the kadai.

STEP 8 – Like this make all the kachories with the rest of the dough and onion mixture.

STEP 9 – When the oil is hot enough, drop a kachori in oil
and fry it till crispy and golden brown.

STEP 10 – Drain excess oil on the kitchen towel and serve hot.


Serve hot kachories with mint chutney, saunth and tamarind chutney and few fired green chillies. 


NOTES:  *Mixing hot oil in dough helps to make the kachories less oily.