_________________I am Mrs. Kalpana Mhaske, a Home-Maker, from the city of 52-Gates, one of the famous heritage- destination of the world- Ajanta - Ellora Caves, Bibi-Ka- Maqbara (The Taj of Deccan) and Deogiri Fort. i.e. AURANGABAD. I admire cooking - tryout and innovate different cuisines. Basically, both of my gorgeous daughters are foodie, they have always encouraged me in the kitchen and forced to carve a Food Blog, that’s why, I am happy to share the makings with you. I am an artist too. Painting – especially, Canvas-Painting is my one more hobby. In total - Ours is an ART-FAMILY, my husband is an Architect. In the end, I keep the same belief with Louise Fresco - “ Food, in the end, in our own tradition, is something holy. It's not about nutrients and calories. It's about sharing. It’s about honesty. it’s about identity ”

Thursday 18 August 2016

HOMEMADE KAJU KATLI

I have tried this Kaju Katli as Raksha Bandhan is round the corner. It’s the beginning of the festival season in India….Rakhi, Onam, Ganesh Chaturthi, Jamashtami are waiting their turn. Images and recipes for sweets and festive dishes from all around start flooding on FB . At my place we all have very sweet tooth, so I have tried so many sweets these days. A few days before I had  already shared the recipe of Besan Laddoo in my blog. Today I am sharing the recipe of Kaju Katli  which is very easy, quick and will fulfil your hunger for something sweet. Actually, my elder daughters most favourite sweets - Kaju Katli  and very happy that I tried it and it turn out exactly the same as we get at the Mithai Shop, the perfect texture and softness . I think it is one of the most appreciated sweets of Indian Cuisine. Contrary to popular belief, it’s one of the easiest sweet recipe to follow, requires only three ingredients and knowledge of very basic cooking techniques to make perfectly healthy sweet at home enjoy it without worrying about adulterations that you keep hearing about now a days for store bought ones. So get started with the step by step photos and cooking tips of this recipe, preparing it at home and surprising your family is super easy.

INGREDIENTS:
1¼ Cups Cashew Nuts
½ Cup Sugar
½ Cup Water
1 tablespoon Clarified Butter or Ghee
1 tablespoon Chopped Pistachios for garnishing
Silver Warq for garnishing

METHOD:
STEP 1 – First you have to make the powder of cashew nuts with the help of mixer grinder. Be careful here, just grind it in stretch.  [see notes]

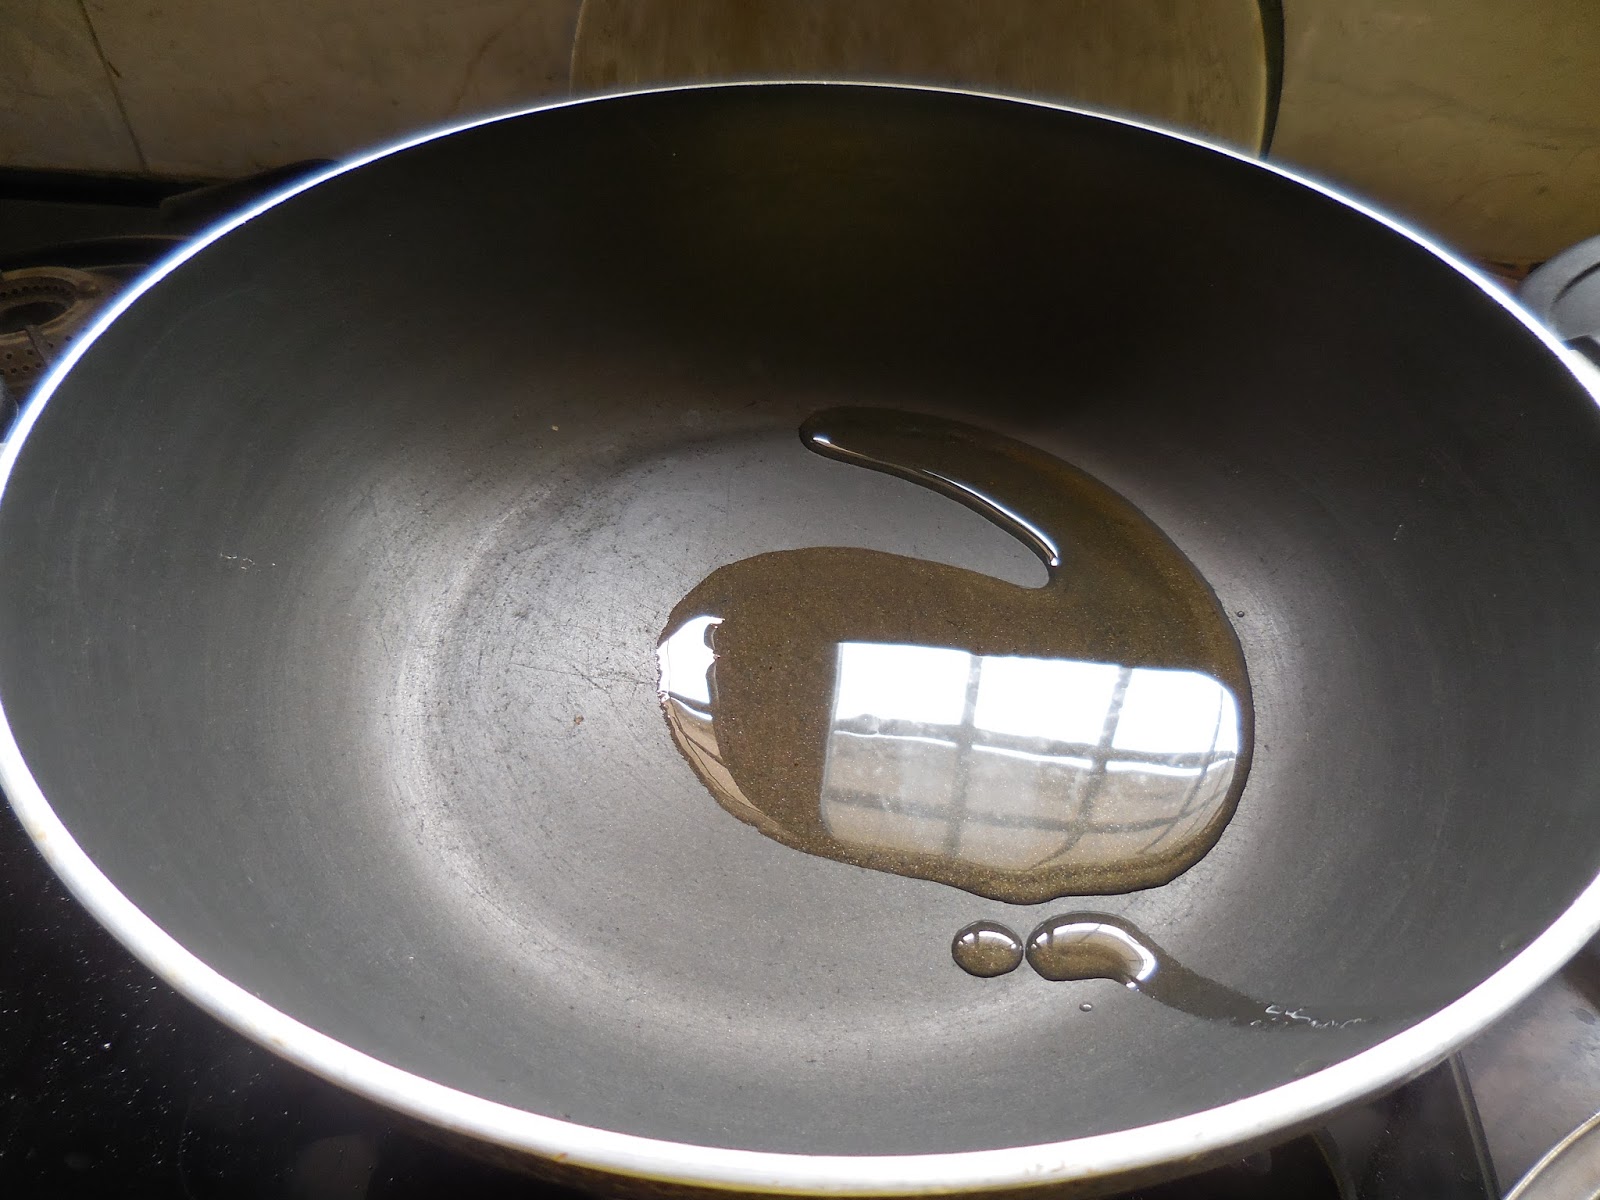
STEP 2 – Now heat the pan with clarified butter or ghee in it.

STEP 3 – Add cashew powder and sauté it for few minutes.

STEP 4 – On the other side boil sugar and water and keep stirring.

STEP 5 – Check the consistency of the sugar syrup. Cook it till the sugar get melted completely and we get the one string consistency.

STEP 6 – Now add sugar syrup in cashew powder and mix.
 Cook it with continuous stirring. 

STEP 7 – Here the mixture gets thick and starts boiling, switch off the flame.

STEP 8 – Remove it in another bowl and cool it. Now the mixture gets the dough evenness.

STEP 9 – Now spread it evenly on a greased plate or butter paper or cling sheet or plastic bag.
Leave it for some time.


STEP 10 – Then apply the silver warq over it
and sprinkle some chopped pistachios.

STEP 11 - Grease the knife and cut them into diamond shape and ready to serve.

Kaju Katli is ready to serve, let serve it to your family and surprise them with this melt in mouth Kaju Katli!

NOTES: While grinding, if you grind for more time, the powder sticks and gives a coarse looking powder.
             Never grind cashews cold directly from the refrigerator. Grind it when it is in room temperature.
            If your mixture looks dry at the time of kneading, you can add a little milk in it but then the shelf life is less in this case, so keep refrigerated.
           The right consistency of sugar syrup is very important. If it is not proper and you added it to the powder then the mixture will be sticky.
          Till the end your mixture will not be that smooth, but when you knead the mixture turns to a perfect, smooth dough. So don’t get panic. 


Monday 15 August 2016

MINI CHOCOLATE MUFFINS IN APPE PAN


Big, bakery style muffins topped with whipping cream and added with some sprinkles is very common now a days. Everyone is trying them but today I made some different styled mini muffins and I am happy to see that my family loved them. Normally I make muffins from all purpose flour but this time for instant hunger for some dessert, and don’t want the lenghty procedure and baking and all. So tried them with Parle-G biscuits and I am happy to say they turned out so well. I didn’t stop here, the real twist is, this time I tried them in appe mould side by side cooking for dinner. This is very simple, easy and quick recipe and even children can try this. Both my daughters like these chocolate muffins so I am sharing this with you all. Hope you will also like it and love to try it. 


INGREDIENTS:

20 Parle-G Biscuits

 2 teaspoon Cream from milk [Malai]

Milk as required  [to make the batter consistency]

2 tablespoon Sugar Powder

1 pack Eno

2 teaspoon Cocoa Powder

Melted chocolate or Chocolate syrup [optional]

Whipped Cream

Grated chocolate, Different types of sprinkles  and Mint leaves for garnish [optionl]


METHOD:

STEP 1 - Grind the biscuits in the mixie grinder.


STEP 2 – Remove in a mixing bowl.  
Add sugar, cocoa powder and malai to it and mix well.


STEP 3 - Add some milk to make the batter thick.

Check the batter consistency.
STEP 4 – At last add eno to it and mix well.

STEP 5 - Heat grease and heat the appe pan on low flame
and pour the cake mixture in each portion of appe pan and

 then cover it with the lid.

STEP 6 - Cook them for 5 minutes. No need to flip the muffins.

STEP 7 - Then turn off the flame of appe pan and let it cool for a minute or two.

STEP 8 - Simultaneously melt the chocolate.


STEP 9 - After cooling put the melted chocolate on it. Or coat the mini appe pan muffins with chocolate sauce.

STEP 10 – Whip some whipping cream till hard peaks and fill it in a piping bag, pipe it on mini muffin and garnish with some sprinkles of your choice and halved cherries.


Serve these mini muffins chilled.


NOTE: I made them in hurry so I skipped STEP 8 and STEP 9.

After adding whipping cream you can sprinkle some more biscuit crumbs for different garnish.

Sunday 14 August 2016

READYMIX CHAKALI


Chakali is a traditional Maharashtrian spicy food item which is round in shape. It is mainly prepared at the time of Diwali. But I made this as dry snacks for afternoon craving of my family. These are nothing but deep fried snack made from rice flour, gram flour, wheat flour or a mixture of lentil flours. They are also known as Murukku in South.   Chakalis are made as a part of the Diwali Faraal in Maharashtra and Gujrat. There are many versions of making chakali. Sharing today an Instant Readymix Chakali with you all. You will need a chakali maker to prepare these chakalis.  Basically, Chakali is made with rice flour and urad dal flour. There are many variations of amking chakali using Sago, Besan , Wheat Flour , Fried Gram, Rice batter, etc. all tend a different texture and taste. This one is very different with aroma of roasted urad dal and are crunchy as well light in texture.


INGREDIENTS:

500 gm Instant Mix Bhajni for Chakali

4-5 teaspoon Red Chilli Powder

Salt as per required

2-3 teaspoon Sesame Seeds

1 teaspoon Carom Seeds [ajwain]

2 tablespooon Hot oil

Warm Water as required for dough


METHOD:

 STEP 1 – Mix the dry ingredients and give a nice stir.


STEP 2 – Then make a well and add hot oil in to it. Mix it with spoon.


STEP 3 – Then add mild warm water slowly and make a dough.

STEP 4 – Dough should not be very tight.

STEP 5 – Grease the Chakali mould and fill with the dough.


STEP 6 – Make round chakalies with the help of mould.


STEP 7 – Likewise make the chakalies from the rest of the dough.


 STEP 8 – Heat oil in a wide pan.
Add chakalies in it one by one. [3-4 at a time]

STEP 9 – Fry the chakalies in hot oil till golden brown. Serve ready chakalies to your family as a tea time snack.


Serve chakalies to your family as a after noon tea time snack or you can serve them to your children for their chhoti chhoti bhuk.


NOTE: Chakalis absorb less oil as we added the hot oil at the time of making dough.

           Storage is very crucial else chakalis might become soft and your effort will go in vain.

           Fry the chakalis on low flame. If you keep the heat high then your chakalis might burnt  or break so be careful. 

           Readymade Instant Chakali Mix contains-wheat, Pulses of Gram, Black Gram , Poha, Dalva, Cumin Seeds, Coriander Seeds and Ajwain[ carom seeds].

          Chakali Maker are also easily available in any utensil shop which comes with different kinds of blades.

METHI MATHARI


Mathri is a popular snack in North India and there are many versionds of making mathri.This recipe is for Punjabi style mathri which is flaky and is spiced with ajwain [carom seeds], black pepper powder [kaali mirch ], kasuri methi [dry fenugreek leaves] and cumin seeds. You can use these spiced flour crackers with tea , as a teatime snack. Once made in bulk you can store them in an air tight container and enjoy it for the next few weeks. So the shelf life is long. The trick to get perfect not so hard and not so soft melt in the mouth crispy texture of methi mathri lies in the ingredients that goes into preparation of its dough and how it’s deep fried.  I have made fried ones which is definitely better, but you can also bake them which is also good for health conscious people as a low calorie option. You can make them in a circular or triangle shape as per your cooking skills and preference and enjoy it with tea, coffee or just simple assortment of sweet, sour and hot chutney as a snack. Make this super crispy and salty snack at home which is super easy and quick. 


INGREDIENTS:

250 gms Maida

125 gms Wheat flour

100 gms Ghee [vanaspati ghee/ dalda]

Salt to taste

1 teaspoon Crushed Cumin

2 teaspoon Kasoori Methi

1 teaspoon Red Chilli Powder

1 teaspoon Seasame Seeds

1/8 teaspoon Turmeric Powder

1 teaspoon Crushed Black pepper

For sprinkle masala:

1 teaspoon Salt

¼ teaspoon Rock Salt

1 tablespoon Sugar Powder

1/8 teaspoon Red Chilli Powder

Oil for frying


METHOD:

STEP 1 - Put all the dry ingredients in a bowl  

and give a nice stir with a spoon and make a well in it.

STEP 2 – Add melted vanaspati  ghee in it
and mix the mixture using your fingers until the mixture turns crumbly.

STEP 3 - Knead a tight dough. Add little water if needed.
The dough should be harder than paratha dough.

STEP 4 -  Take a portion from the dough and roll thin chapatti with the help of rolling pin [belan]
. No need to make perfect round shaped chapatti and cut its sides.

STEP 5 – Using a fork prick on the chapatti which helps to prevent puffing fyring deep frying.

STEP 6 – Cut them vertically and horizontally in to small strips.


STEP 7 – Heat oil in wide frying pan.

STEP 8 - Fry them  medium flame till light brown .


STEP 9 - Keep them on absorbent paper to drain excess oil from it. Repeat the same with the rest of the dough. 

STEP 10 – Mix all the ingredients for sprinkle and sprinkle masala powder on the ready matharis and mix well.
Your crunchy snack is ready to serve.


Serve them with a hot cup of tea or coffee for breakfast or as evening teatime snack.


NOTE: Size and shape of mathari depends upon you. Give shape of your liking.

Be patient while frying as it takes more time for frying. Fry them on low heat. If you deep fry them on high flame then it will turn golden brown immediately but may remain uncooked from inside.

Do not over crowd while deep frying to allow them cook evenly.

You can make variations by adding cumin seeds, sesame seeds and carom seeds.