_________________I am Mrs. Kalpana Mhaske, a Home-Maker, from the city of 52-Gates, one of the famous heritage- destination of the world- Ajanta - Ellora Caves, Bibi-Ka- Maqbara (The Taj of Deccan) and Deogiri Fort. i.e. AURANGABAD. I admire cooking - tryout and innovate different cuisines. Basically, both of my gorgeous daughters are foodie, they have always encouraged me in the kitchen and forced to carve a Food Blog, that’s why, I am happy to share the makings with you. I am an artist too. Painting – especially, Canvas-Painting is my one more hobby. In total - Ours is an ART-FAMILY, my husband is an Architect. In the end, I keep the same belief with Louise Fresco - “ Food, in the end, in our own tradition, is something holy. It's not about nutrients and calories. It's about sharing. It’s about honesty. it’s about identity ”

Friday, 21 July 2017

CHEESE CORN BALLS

Cheese corn balls is an amazing dish for the starters during the dinner party, kids birthday party ro kitty party. These deep fried hot cheese balls are also best savored at tea-time on a cloudy and cool day. These are made with easily available ingredients, and it makes a great snack idea when we have unexpected guests. corn and cheese is a wonderful combination, which I knew. Here we used boiled poatato and bread crumbs for binding purpose. Its favourite snack of my daughters. Outer crisp covering with inside cheesy stuffing. It tastes good with green coriander chutney or you can serve it with your favourite dip. You can make all preparations and rolled cheese balls can be prepared beforehand and refrigerated. Fry them at the time your guests arrived or at the time of party. You can freeze them in an air tight container for a week also. Whenever you want to fry it just take out of freezer and let it to room temperature and then fry. These homemade cheese corn balls are so delicious and tasty that you don't need to go out for this snack.So next time when you are searching for some snack recipes give a try to this yummy cheese corn balls which are crunchy and crispy but very gooyee and cheesy from inside...!!!!
INGREDIENTS:
1 Cup Sweet Corn Kernels
2 Cup Boiled Potatoes
2-3 Cheese Cubes, cut into small cubes[see notes]
2-3 Bread Slices [broken into small pieces]
2 teaspoon Ginger+ Garlic+ Green Chillies Paste
Salt as per requirement
1 Cup Jeera Butter, crushed / Bread Crumbs
4 tablespoon Maida+Water Paste for coating
Oil for deep frying
METHOD:
STEP 1 - Blanch corn kernels, drain, cool them completely
and coarsely blend into mixer grinder.
STEP 2 - Boil, cool and peel the potatoes and keep aside.
STEP 3 - Now in a bowl, add boiled potatoes along with crushed corn, bread, green paste and salt.
STEP 4 - Now mix it with hands and make a dough. If needed add more bread crumbs for binding.
STEP 5 - Divide the dough in equal parts. Take one small portion and make a hole in it with finger.
STEP 6 - Put 1 cheese cube in it and
 close the sides and make a ball.
STEP 7 - Make all cheese balls with the rest of the dough mixture.
STEP 8 - Make a thin paste with maida and water.
Deep them in a maida+ water paste and coat them with maida paste.
STEP 9 - After that coat the cheese balls with the crush of jeera butter or bread crumbs.
STEP 10 - Likewise make all the ballls and keep them for about 1/2 an hour in the refrigerator.[see notes]
STEP 11 - Heat oil in a wide vok/ kadai.
STEP 12 - Remove the cheese balls from the refrigerator and deep fry them.

STEP 13 - Fry them till crunchy and golden brown in colour.
STEP 14 - Remove from kadai and keep them on a tissue paper or kitchen towel to drain excess oil.
STEP 15 - Fry the remaining balls likewise and serve hot.
Serve hot, crunchy and  cheesy corn balls with green coriander chutney, mint chutney or tomato ketchup and enjoy.
NOTE: * You can store the ready cheese balls in the refrigerator for about 1 month. Store them in an air tight container. Remove from freezer and bring them to room temperature and then fry.
            * Here I have used Amul processed cheese for stuffing but you can stuff Mozzarella cheese or any other cheese which is available.

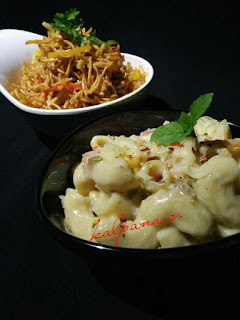
VEGETABLE PASTA IN WHITE SAUCE

 Before some days, I am not a big fan of pastas, but my daughters love pasta. So I tried many pasta recipes and today I must say that I am also loving pasta very much. Since my family like pasta recipe a lot, once in 8-10 days I make pasta for them and this time its white pasta. This recipe is on my to do list from last so many days, so today I tried this white sauce creamy Macaroni Pasta and everyone at my place like it. This is very delicious, filling and very easy to prepare.You can replace the Macaroni pasta with any other pasta as per your liking. White sauce creates a nice aroma of herbs and tastes amazing. Long back, after my schooling, I tried white sauce but it did not come out well so after that I did not want to try it. But I saw a post on FB food group before some days and again tempted to try it. So I searched for a recipe of white sauce on Internet and tried it and it turned out too good, my family loved it. I was also so excited to see the perfect creamy white sauce.  So from now pasta in white sauce  and veggies is also my kids favorite.

INGREDIENTS:
1 cup Shell Pasta/ Macaroni
1 1/2 cup Chopped Button Mushroom (You can minimise the quantity)
1 small Carrot cut in juliens
1/2 cup Corn Kernel
1 Onion, sliced thinly
1 cup Bell Pepper, chopped (All coloured)
1/2 teaspoon Garlic, chopped finely/paste
2 cups Whole Full Fat Milk
2 1/2 tablespoon All purpose flour
1/2 teaspoon Oregano
1/2 teaspoon Chilli Flakes
Salt as needed
2-3 tablespoon Butter
2-3 tablespoon Grated Cheese (optional)
1/2 teaspoon Black Pepper Powder
2 teaspoon Olive Oil
Water to boil pasta

METHOD:
STEP 1 - First boil water in a pan and add salt and 1 teaspoon oil in it.
Boil the pasta in it till cooked completely.
STEP 2 - Boil water in another small pan and add carrot julienes and corn in it and boil for about 5-10 minutes or till get cooked.
STEP 3 - Strain the pasta and rinse with cold water. Drain and add 1 teaspoon oil on it. Mix it well and keep aside. Oil helps to keep the pasta separate.
STEP 4 - In a non-stick pan, melt butter, add the onion and garlic and saute well till the onion are softened and get cooked.
STEP 5 - Then add mushrooms, stir and saute on high flame till mushroom are lightly browned.
STEP 6 - The mushrooms will release their juices initially and after continuous sauteing, the juices will evaporate. There should be no moisture in pan.
STEP 7 - Keep stirring, then add chopped bell peppers and saute well and cook for about 10 minutes.
STEP 8 - Add all purpose flour and saute for 4-5 minutes. Add boiled vegetables in it and mix well and saute for a minute.
STEP 9 - Now pour milk in a gentle stream to the pan and keep on stirring. The flour get combined with the milk and you will see the sauce getting thickened slowly.
STEP 10 - Add oregano, chilli flakes, black pepper powder and salt as per your liking and mix well.
STEP 11 - Add black pepper powder and salt as per need n check the seasoning.
STEP 12 - Add the boiled pasta, when you feel the sauce get thickened as per your liking consistency.
STEP 13 - If sauce is too thick or lumpy, add some hot water or milk and thin the sauce.
STEP 14 - Lastly add some grated cheese if required.
STEP 14 - Serve the vegetable pasta in white sauce hot with some toasted bread or baguette


Wednesday, 19 July 2017

PANEER LABBABDAR

Paneer labbabdar is a rich onion-cashews-tomato based, restaurant style paneer gravy. I come to know about this recipe few days back and decided to try it and post it. I don't know the exact recipe for this dish but I have noted down the recipe of paneer gravy on Cookery show on television long back.This lovely recipe is so different from the ususal paneer dishes that we eat. Any paneer gravy recipe is my family favourite and I love to make variations with paneer sabzi but our all time fav is paneer butter masala. No gravy can beat the rich and yummy taste of paneer labbabdar and it is an awesome side dish for naans. Paneer labbabdar is a creamy and mildly sweet gravy dish. It is prepared with butter. This creany and smooth gravy is a pleasure for taste buds. It is not so commonly cooked at home but it is very common to find Paneer Labbabdar in the restuarants in Punjabi Dishes. Everyone at my place loved the recipe and enjoyed a lot. You can serve this with chapatti, parantha or steamed rice. Though the recipe has many steps but it is quite easy and worth trying too.

INGREDIENTS;
For the tomato-cashews paste:
250  gms Tomatoes
10-12 Cashews
1/2 inch Ginger, chopped finely
3-4 Garlic, chopped finely
1/2 Cup Water
1-2 Green Cardamoms
1-2 Cloves
Other Ingredients:
200 gms Paneer / Cottage Cheese, cut into cubes
2 tbsp Grated Paneer
100 gms Onions, chopped finely
1 Tej Patta/ Indian Bay Leaf
2-3 Green Chillies, slit vertically
1/2 teaspoon Cumin Powder
1/2 teaspoon Dry Coriander Powder
1 teaspoon Red Chilli Powder
/ Kashmiri Red Chilli Powder
1/2 teaspoon Garam Masala
1/4 Cup Low Fat Cream [Amul Cream]
1 teaspoon Kasuri Methi
1 tablespoon Butter+ 1 tablespoon Butter to be added later
1/2 teaspoon Sugar
 1 Cup Water [as required]
Salt as per needed
For Garnish:
1 tablespoon Chopped Coriander
1/2 inch Ginger Julienne

METHOD:
For preparing Tomato-Cashews Paste-
STEP 1 - Heat a small non-stick pan and add chopped toamtoes, cashews and other ingredients under the title'ingredients for tomato-cashwes paste' and 1/2 cup water.

STEP 2 - Cook it on slow flame till tomatoes are softened. If the mixture dries up and the tomatoes are not softened add 2-3 tablespoon more water in it and continue cooking.


STEP 3 - Allow the mixture to cool completely and add to a mixer grinder or blender.

Grind to a smooth paste with any cashews or tomato chunks or pieces. You may add some water if required. Keep this paste aside.


Preparing paneer labbabdar gravy-
STEP 1 - Heat butter in a kadai/ wok and add bay leaf in it. Saute for a couple of seconds.
STEP 2 - Add sliced onion in it and stir and cook it till onions become light brown or golden.
STEP 3 - Add tomato-cashews paste in it and stir it well. The mixture will splutter if there is water in it, so be careful. Stir it very well.


STEP 4 - Then add cumin powder, coriander powder and red chilli powder in this pan and mix well and saute the masala well. You will see the masala clumping and around itself.


STEP 5 - Saute till you see fat leaving the sides of the masasla paste.
STEP 6 - Add 1 cup of water and mix well.


STEP 7 - Now add slit green chillies, stir and allow the gravy to come to a simmer.
Then season with salt and sugar.


STEP 8 - Add paneer cubes which have been cubed with the grated paneer.
STEP 9 - Then sprinkle kasuri methi which has been crushed along with 1/2 teaspoon garam masala. Stir it very well again and simmer for a minute.
STEP 10 - Lastly add 2 tablespoon low fat cream. Switch off the flame and stir very well.[see notes]


STEP 11 - Granish paneer labbabdar with coriander leaves and your paneer recipe is ready to serve.


Serve hot paneer labbabdar with a garnish of chopped coriander and ginger julienne. You can enjoy this paneer gravy with chapatti, tandoori rotis or naan. Paneer Labbabdar also goes well with jeera rice, steamed rice or veg pulao.
 NOTES: You can add 1 tablespoon butter at stage no. 10.