Learn to make Vegetable Dum Biryani with step by step pictures. This is
simple Vegetable Dum Biryani delivers big on flavour and it has also been
modernised from the traditional method, to reduce effort. It is believed that
this very famous legendry and authentic royal dish is originated from Hyderabad
State. Vegetable Biryani is a traditional Mughlai main course item loaded with
chopped vegetables, spices, saffron and dry fruits and were introduced by
Mughals and Nawabs in India. On a normal day, you can make it as a one-pot
meal. Even as ingredients as capsicum and coriander spread their aroma, scents
of saffron and other spices rise above all and pamper your senses. It takes
hardly ½ an hour to make this biryani and that includes cooking time. Here for this
recipe I simply heated up the oil, added the onions and rest of the chopped
veggies while the onions cook, get the final ingredients ready while veggies
cook. Then all I need to layer them alternatively with cooked basamati rice,
fried onions, coriander-mint leaves and saffron and close the lid and sit aside
watching TV while the biryani gets done. End it up with the rice layer and
sprinkle some barista, chopped coriander and mint leaves. I am a huge fan of
Biryani as they are indulgent and flavourful and they make any meal extra
special.
INGREDIENTS:
For Sabzi:
½ Cup French Beans
¼ Cup Green Peas
½ Cup Carrot, cut into cubes
1-2 Potato, cut into cubes
½ Cup Capsicum
1-2 sliced Onion
2 Tomatoes
2 teaspoon Ginger- Garlic Paste
Whole Spices:
7 -8 Cloves
2-3 Bay Leaf
7-8 Cardamom
2 Star Anise
10-12 Black Pepper corn
Other Ingredients:
4 tablespoon Cooking Oil/ Ghee
1 teaspoon Turmeric Powder
2 teaspoon Red Chilli Powder
2 tablespoon Mint Leaves
2 tablespoon Coriander Leaves
2-3 Green Chillies
2 teaspoon Garam Masala Powder
For Making Steamed Rice:
2 Cups Basamati Rice
2 teaspoon Ghee
1000-1200 ml Water
For Garnishing:
1 Cup Fried Onion/ Birista
Handful of Mint Leaves
Handful of Coriander Leaves
Few strands of Saffron soaked in Milk
METHOD:
For Making Steamed Rice:
STEP 1 – Clean and wash rice for 2-3 times.
Then soak for 30 minutes. Drain
excess water on a colander.
STEP 2 – In a vessel take 1000-1200 ml water, heat it and let it come to
boil.
STEP 3 – When it starts boiling, add 2 teaspoon ghee and salt as needed and
mix it.
STEP 4 – Add soaked rice and give a nice mix.
STEP 5 – Keep the flame on high and let it boil for 2-3 minutes.
STEP 6 – Make the flame low-medium and cook the rice for 10-12 minutes or
until ¾ done. Don’t cook it completely.
STEP 7 – Now switch off the flame
and remove excess water from rice using a
strainer. Keep it aside and cool it.
How to proceed:
STEP 1 – Heat oil in a kadai/ pan. Add whole spices and fry for 15-20
seconds.
STEP 2 – Add sliced onion and let it cook until translucent.
STEP 3 – Then add chopped tomato and cook for 3-4 minutes.
STEP 4 – Add ginger and garlic paste, mix well and cook until raw smell goes off.
STEP 5 – Now add turmeric powder, red chilli powder, garam masala powder and
mix it well.
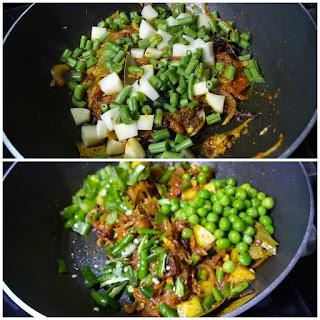
STEP 6 – Add green peas, carrot, chopped french beans, potato cubes, bell
pepper, slit green chillies and mix it very well.
STEP 7 – Add salt according to taste as we have already added salt while
cooking rice.
STEP 8 – Cover and cook the veggies for 5-6 minutes. Stir it in between for
once or twice. [add some water over the lid, which helps to avoid the burning
and sticking the veggies to the bottom of the pan]
STEP 9 – Check the veggies after 5 minutes, here we needed half cooked
veggies, so adjust time accordingly.
STEP 10 – Now switch off the flame. Remove the vegetable masala mix to a
different bowl and keep the veggies aside.
How to layer the Biryani:
STEP 1 – Grease a pan with ghee/oil in which we are going to layer the
biryani.
STEP 2 – Now add the first layer of rice, sprinkle few drops of saffron milk
over it, add 1 teaspoon ghee,
spread some fried onions and some chopped mint and coriander leaves.
STEP 3 – Top it with the veggies layer.
STEP 4 – Repeat the layers. Keep in mind, the top layer should be rice
layer.
STEP 5 – On the top of rice layer, add few slices of fried onion, chopped
mint leaves, chopped coriander and sprinkle few drops of saffron milk.
STEP 6 – Cover it with tight lid.
STEP 7 – Now keep a tawa/griddle on gas stove and heat it.
STEP 8 – Keep the vessel/ pan in which we layered the biryani on the hot
tawa.
STEP 9 – Cook it for 15-20 minutes. Switch off the heat and dum biryani is
ready. Keep it as it is with lid for next 10 minutes and then open the lid. Biryani is ready to serve.


