_________________I am Mrs. Kalpana Mhaske, a Home-Maker, from the city of 52-Gates, one of the famous heritage- destination of the world- Ajanta - Ellora Caves, Bibi-Ka- Maqbara (The Taj of Deccan) and Deogiri Fort. i.e. AURANGABAD. I admire cooking - tryout and innovate different cuisines. Basically, both of my gorgeous daughters are foodie, they have always encouraged me in the kitchen and forced to carve a Food Blog, that’s why, I am happy to share the makings with you. I am an artist too. Painting – especially, Canvas-Painting is my one more hobby. In total - Ours is an ART-FAMILY, my husband is an Architect. In the end, I keep the same belief with Louise Fresco - “ Food, in the end, in our own tradition, is something holy. It's not about nutrients and calories. It's about sharing. It’s about honesty. it’s about identity ”

Sunday, 18 September 2016

RAWA DOSA


Rawa dosa is an Indian crepe of South India. It is a derivative of Dosa. It is also known as Ravvattu or Rave Dose. Rawa stands for suji/ semolina. Hence this is named one of its main ingredient. It is made with a batter of Rawa/ Samolina, rice flour and water along with cumin seeds, diced onion, diced carrot, curry leaves, asafoetida, black pepper, chopped coriander and chopped green chillies. The mixed ingredients are then poured thinly [to ensure crispiness] onto a heated, lightly oiled tawa using a ladle in a circular motion. Then, oil or ghee is sprinkled around the dosa and it is cooked for about two minutes, after which it is ready to be served with a variety of chutnies or sambar.
This is my first try so I am only using chopped green chillies with chopped coriander for the batter. Rawa dosa is crisp and has netted texture. This texture and crispiness can be achieved if you make the batter thin. So always remember that the batter for rawa dosa should be thin and easy to flow. Also allow some soking time for suji /semolina, so that they soften. Keep the batter for 30-40 minutes rest.When you make the first dosa then you will come to know whether you are getting crisp and netted effect or not. If not then you will need to add some more water. I here used butter milk instead of water for my recipe.
This recipe is super handy on a busy weeknight when the last thing you want to do is to cook the dinner. Easy to make since there is no need for soaking [not for a long way], grinding and fermenting. I made this with green chillies and coriander but you can easily omit them and make a plain rawa dosa. So here is my recipe for Instant Rawa Dosa…..!!!! Happy cooking.


INGREDIENTS:
1 Cup Fine Suji/ Rawa /Samolina
½ Cup Rice Flour
1 tablespoon Oil
2- 2 ½ Cup Butter Milk [as required]
2-3 Chopped Green Chillies
 1-2 tablespoon Chopped Coriander
1/8 teaspoon Soda Bicarb/ Cooking Soda
Salt as per taste

METHOD:
STEP 1 – In a big bowl, take rawa and add rice flour, cooking soda and salt to it.

STEP 2 – Then add chopped green chillied and chopped coriander to it.

STEP 3 – Then add butter milk to it as required to get the thin consistency.

STEP 4 – Check the consistency and add more butter milk if needed.

STEP 5 – Keep the batter aside for 20-30 minutes.
STEP 6 – Heat a tawa/ griddle and add little oil on it.

STEP 7 – Pour 1 large ladle full batter on it. Spread it gently rotating the ladle.

STEP 8 – Put some more oil over the dosa.
STEP 9 – When  the first side cooked, the edges will start to rise from the tawa. Flip the dosa and cook from the another side with some oil.

STEP 10 – When done from both the sides remove from the tawa and serve it.
STEP 11 – Repeat the same with the remaining batter and make some more dosa.


Serve hot and crispy dosa with your favourite coconut chutney and sambar. Chutney recipes are already shared in my blog in chutney section.


NOTES: You can add  finely chopped ginger, peeper, onion, etc according to your preference.
               Add 3-4 finely chopped cashew nuts to your batter for some texture in your dosa.
               If the dosa is sticky and hard to leave the tawa in one piece, add more rice flour to the better.
               Be patient with yourself because making rawa dosa takes some practice especially pouring the dosa.
               Due to large amount of water/ butter milk in the batter, dosa will take way longer to cook than regular dosas.
              Keep the flame to medium-low, to make the dosa crispy maintain the flame low and let the dosa cook longer, taking your time to flip it.

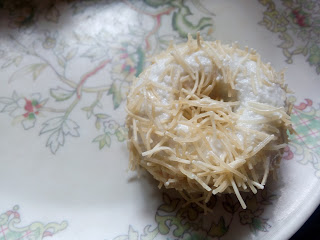
POTATO BIRD NEST / SEVAYI CUTLET


Sevayi Cutlet / Potato Bird Nest is a delicious Malabar starter, tea time snack. Crunchy outside, yummy inside, resembles to bird’s nest, makes a perfect appetizer. What more do you need??? I highly recommoned you guys to give it a shot and you will be glad that you tried it. This is simple and easy reacipe with a twist. The twist in this is to make the cutlet to look like bird’s nest and coat them with the vermicelli and fry them. Fried vermicelli make them crunchy outside and gave a real fancy look as well. This cutlet makes a perfect appetizer and your guests will be fascinated by your creativity.


INGREDIENTS:

4-5 Potaoes

2-3 Green Chillies

¼ Cup Green Peas

2 tablespoon Chopped Coriander

1 teaspoon each Ginger-Garlic Paste

1 teaspoon Chaat Masala

½ teaspoon Turmeric Powder

½ teaspoon Amchur Powder

1 teaspoon Garam Masala

1 teaspoon Fennel Seed Powder

Salt as per taste

Oil for frying

6-7 Bread Slices

FOR Coating 1:

3-4 tablespoon All Purpose Flour

Water as required

Salt as required

FOR Coating 2:

Broken Vermicelli as required


METHOD:

For Making Potato Balls:

STEP 1 – Boil the potatoes, peel them and keep aside.


STEP 2 – Boil green peas,
remove water
and cool them and mash them.


STEP 3 – Now mash boiled potatoes, add mashed peas, chopped green chillies, chopped coriander and ginger-garlic paste in it and mix it.


STEP 4 – Now add the dry spices in it and mix well.


STEP 5 – Mix it well and make a dough.


STEP 6 – Divide it into equal portions.
Take one of the portion and roll it into small balls with some oil on your palms.

STEP 7 – Repeat this and make equal balls with the rest of the dough.[ you will get 14-15 balls from this dough]


Other Preparations:

STEP 1 – Mix all purpose flour, water and salt and make a thick batter.


STEP 2 – Take vermicelli in a plate or bowl and keep it ready.

STEP 3 – Remove the sides from the bread slices and keep them aside.


How to proceed:

STEP 1 – Take a bread slice and just dip it water for 1 second only.


STEP 2 – Remove the water from it by pressing it in between your palms.


STEP 3 – Now keep a single ball of potato mix over the bread slice.


STEP 4 – Bring the sides together.


STEP 5 – Form a finished ball by sealing all the sides.


STEP 6 – Then make a small impression with your thumb on the upper side of each ball.


STEP 7 – Repeat the same with the rest of the balls.


STEP 8 – Dip the balls in all purpose flour batter.


STEP 9 – Then coat them with the crushed vermicelli.
Keep them in refrigerator for 15 minutes.


STEP 10 – Heat enough oil in a wide kadhai. Let fry the potato balls in the oil on medium flame.


STEP 11 – Flip them upside down and fry form another side till golden brown.


STEP 12 – Remove from kadhai and drain excess oil on kitchen towel and serve them hot.


Serve the ready bird’s nest hot to your dear once with tomato ketchup and let them surprise.

NOTE: You can use whole wheat bread, multi grain bread or white bread.

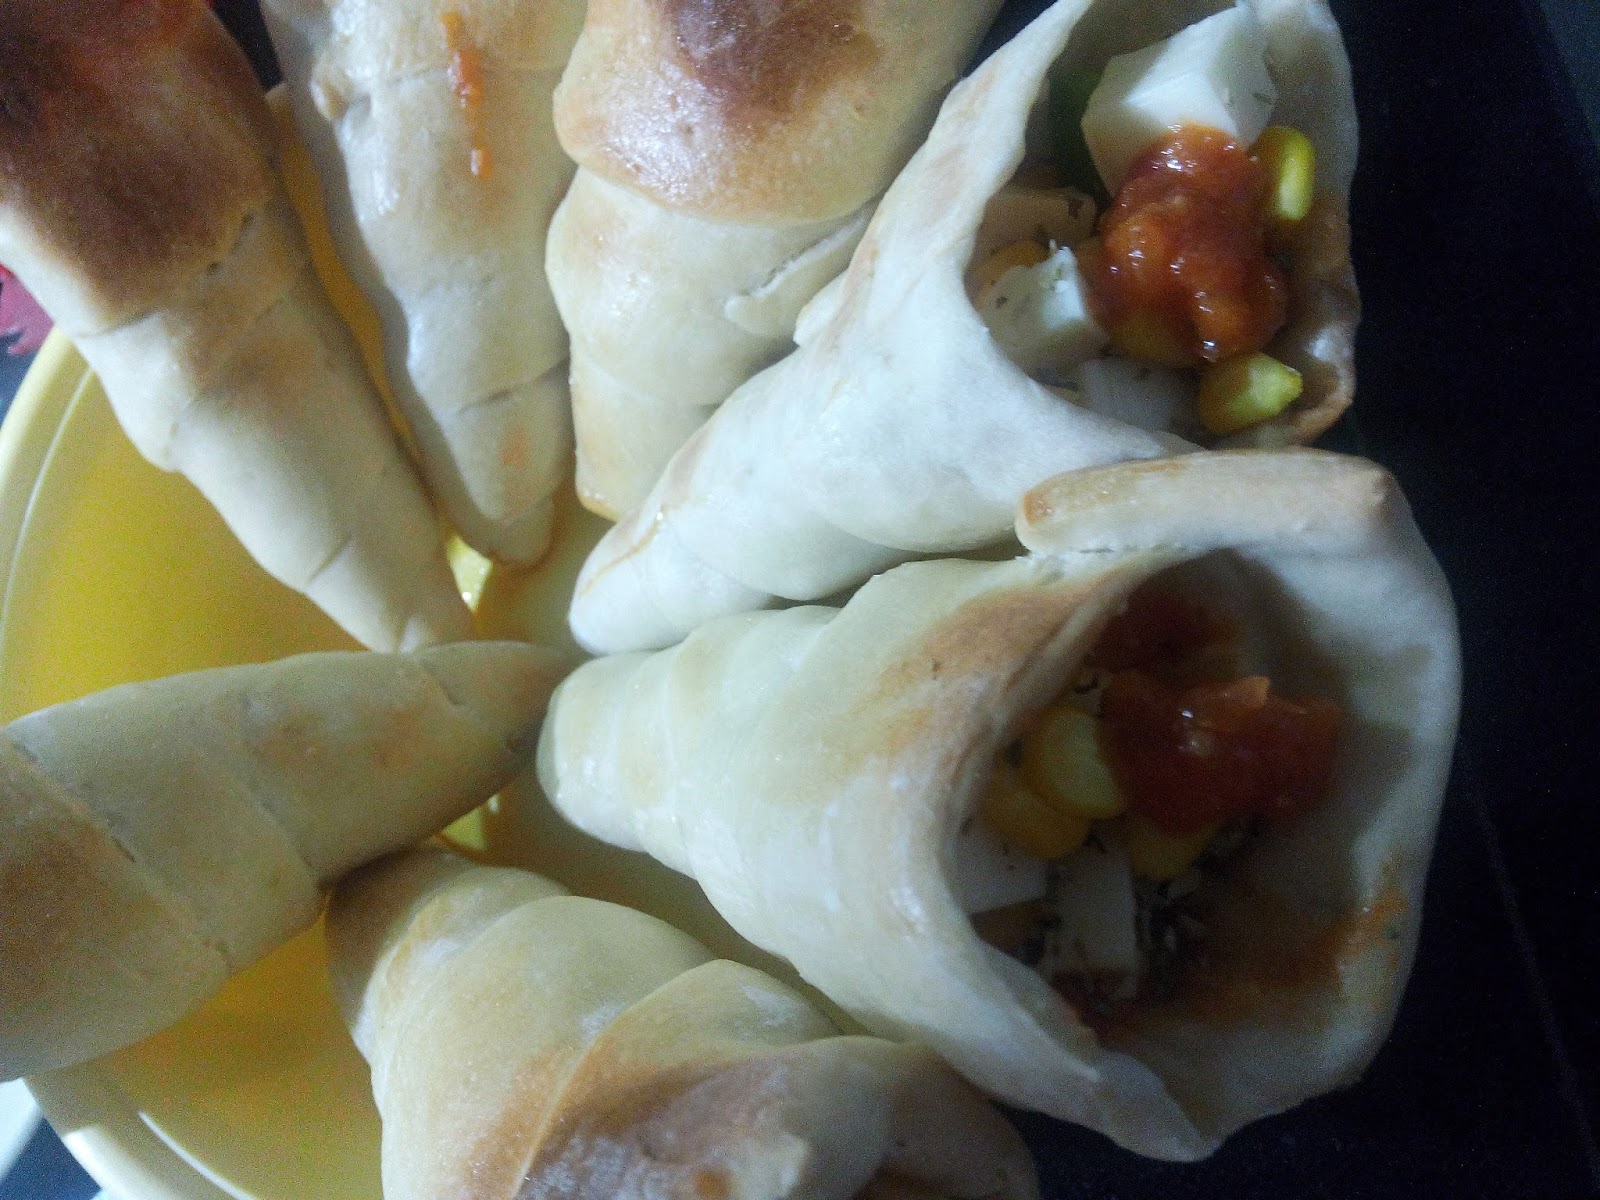
PIZZA CONE


Pizza in a cone…….yes you heard it right!!!!! Portable, personalized, plentiful pizza cones!!! Make your own pizza cones at home with this fun and simple food hack. Make the pizza cones with the pizza dough and take a new twist on a classic Italian dish. This cones are great for kids birthday parties or just for a fun way to make any pizza more awesome. Pizza dough is really easy to make and ingredients can be substituted to suit your tastes.  


INGREDIENTS:

FOR Pizza Cone:

500 gm All Purpose Flour

1 teaspoon Sugar

Salt as per taste

25 gm Active Dry Yeast

1 tablespoon Olive Oil

OTHER INGREDIENTS:

1 Bell Pepper [you can use different coloured pepper]

½ Cup Boiled Corn Kernels

1 teaspoon Oregano

1 Cup Pizza Sauce

1 Egg

Aluminium Foil

Butter Paper


METHOD:

Make a Pizza Dough:

STEP 1 – First we have to activate the yeast.
Take a small bowl, add dry yeast granules to it.
Then add 1 teaspoon sugar and ½ cup of luke warm water.

STEP 2 - Give a vigorous stir and keep it covered for about 10 minutes.  When the yeast become bubbly and foamy, it ia active and ready for use.

STEP 3 – Combine all the ingredients except the olive oil in a bowl
and knead into a soft dough using enough water until it is smooth and elastic.

STEP 4 – Add the olive oil and and knead again.

STEP 5 – Cover the dough with a wet muslin cloth / cling wrap and allow it to prove till it doubles in volume.

STEP 6 – Press the dough lightly to remove the air.

STEP 7 – Divide the dough in equal portions.


OTHER Preparations:

STEP 1 – Make cones with the butter paper.

STEP 2 – Then cover them with the aluminium foil and keep ready the cones.


HOW to Proceed:

STEP 1 – Make pizza sauce. [recipe is already shared in my blog under the title FUSION , in Homemade Whole Wheat Pizza Recipe.]

STEP 2 – Boil the corn kernels with turmeric powder and salt till soft. Chop the bell pepper cube sized and keep aside. Cut the cheese cubes in small sized cubes.

STEP 3 – Now take a small potion from the dough.
Sprinkle some flour on the platform and roll it like cookie sheet.

STEP 4 – Cut it into 1 inch long strips.

STEP 5 – Wrap the strips over the paper cone we made earlier and seal the edges.


STEP 6 – Give a egg wash to your cones with a bursh.

STEP 7 – Grease a baking tray with little oil and line it with butter paper and brush it with little oil again.

STEP 8 - Now place the ready cones on the baking tray and bake them for 25 minutes in pre-heated oven at 180 degree or till the surface golden brown.


STEP 9 – Cool enough the cones, remove and discard the foil paper cones.


How to proceed further:

STEP 1 -   Put a spoonful of pizza sauce in the cone.

STEP 2 – Add some corn kernels, bell pepper, cheese cubes and oregano.
Fill the cones with this manner. Repeat the same with the other cones.

STEP 3 – Microwave the cones uncovered on medium temperature till 2-3 minutes or till the cheese melts.

Let them cool for few seconds and serve.


 Serve hot pizza cones with tomato ketchup and enjoy.