_________________I am Mrs. Kalpana Mhaske, a Home-Maker, from the city of 52-Gates, one of the famous heritage- destination of the world- Ajanta - Ellora Caves, Bibi-Ka- Maqbara (The Taj of Deccan) and Deogiri Fort. i.e. AURANGABAD. I admire cooking - tryout and innovate different cuisines. Basically, both of my gorgeous daughters are foodie, they have always encouraged me in the kitchen and forced to carve a Food Blog, that’s why, I am happy to share the makings with you. I am an artist too. Painting – especially, Canvas-Painting is my one more hobby. In total - Ours is an ART-FAMILY, my husband is an Architect. In the end, I keep the same belief with Louise Fresco - “ Food, in the end, in our own tradition, is something holy. It's not about nutrients and calories. It's about sharing. It’s about honesty. it’s about identity ”
Showing posts with label BREAD BAKING. Show all posts

Tuesday, 8 August 2023

EGGLESS WHOLE WHEAT BANANA BREAD/ CAKE

 I love baking bread at home. So, made this Eggless Whole Wheat Banana Bread today. I wanted to try and make this bread more healthy without using all purpose flour and butter.  It is a soft, crumbly bread and your children will love this sweet healthy treat. Bit because we have used  whole wheat flour, it has milder flavour and pale color. This whole wheat banana bread brings warmth in the kitchen and it is perfect for sweet breakfast. Whole Wheat Banana Bread Eggless is moist and delicious and infused with sweet banana and choco chips. This recipe is very simple and easy to make.


While made without butter or all purpose flour, this 100% whole wheat banana bread tastes just as flavorful and moist as the regular banana bread. In this healthy banana bread recipe, swap butter with any vegetable, unflavoured oil and all-purpose flour with whole wheat flour, and if you want you can replace the refined sugar with honey/ jaggery powder. My whole wheat banana bread completely blew my mind. To be honest, I didn’t have high expectations. This loaf was merely a way to get rid of 2 overly ripe bananas. You can use frozen and thawed bananas in this recipe. I have earlier posted a recipe of Eggless Banana Bread with all purpose flour.


 This banana bread is wholesome, healthful & hearty. Its extra moist and not overly sweet, so the banana flavor shines. And it takes hardly 10 minutes preparation. This banana bread is very moist and because of bananas, it will stay at room temperature for only a day or two. But store it in the air tight container and keep in the refrigerator for up to a week.

📌📌 Watch the video recipe here 📌📌


INGREDIENTS:

2 ripe Banana

1/2 Cup Sugar

1 Cup Whole Wheat Flour

1/2 Cup Curd

1/2 Cup Milk 

1/4 Cup Vegetable Oil

1/2 tablespoon Corn Flour

1 teaspoon Baking Powder

1/2 teaspoon Baking Soda

1/3 Cup chopped Chocolate/ Choco chips

METHOD :

STEP 1 - Prepare a 7" cake tin and keep aside. Pre-heat oven at 180°C for 10-15 minutes.


STEP 2 - In a mixing bowl, take two peeled bananas and mash them with the help of masher/ fork. 


STEP 3 -  In that, add sugar, oil and curd and whisk it well using a hand whisk until well combined.


STEP 4 - Sift in dry ingredients - whole wheat flour, corn flour, baking powder, baking soda and mix well using a whisk.


STEP 5 - Add milk in small batches, mix to make a smooth flowing, runny batter.


STEP 6 - Add banana essence and chocolate/ choco chips/ nuts and give it a nice mix. 


STEP 7 - Pour the batter into the prepared cake tin, tap it once or twice on your kitchen platform. It helps to remove the air bubbles if any.


STEP 8 - Garnish it with sliced banana and some chopped chocolate on the top.


STEP 9 - Bake in pre-heated oven at 180°C for 45-55 minutes.

STEP 10 - Insert a toothpick/knife in the center , if it comes out clean your cake is ready. 


STEP 11 - Remove from oven and cool for 10 minutes and then demold.
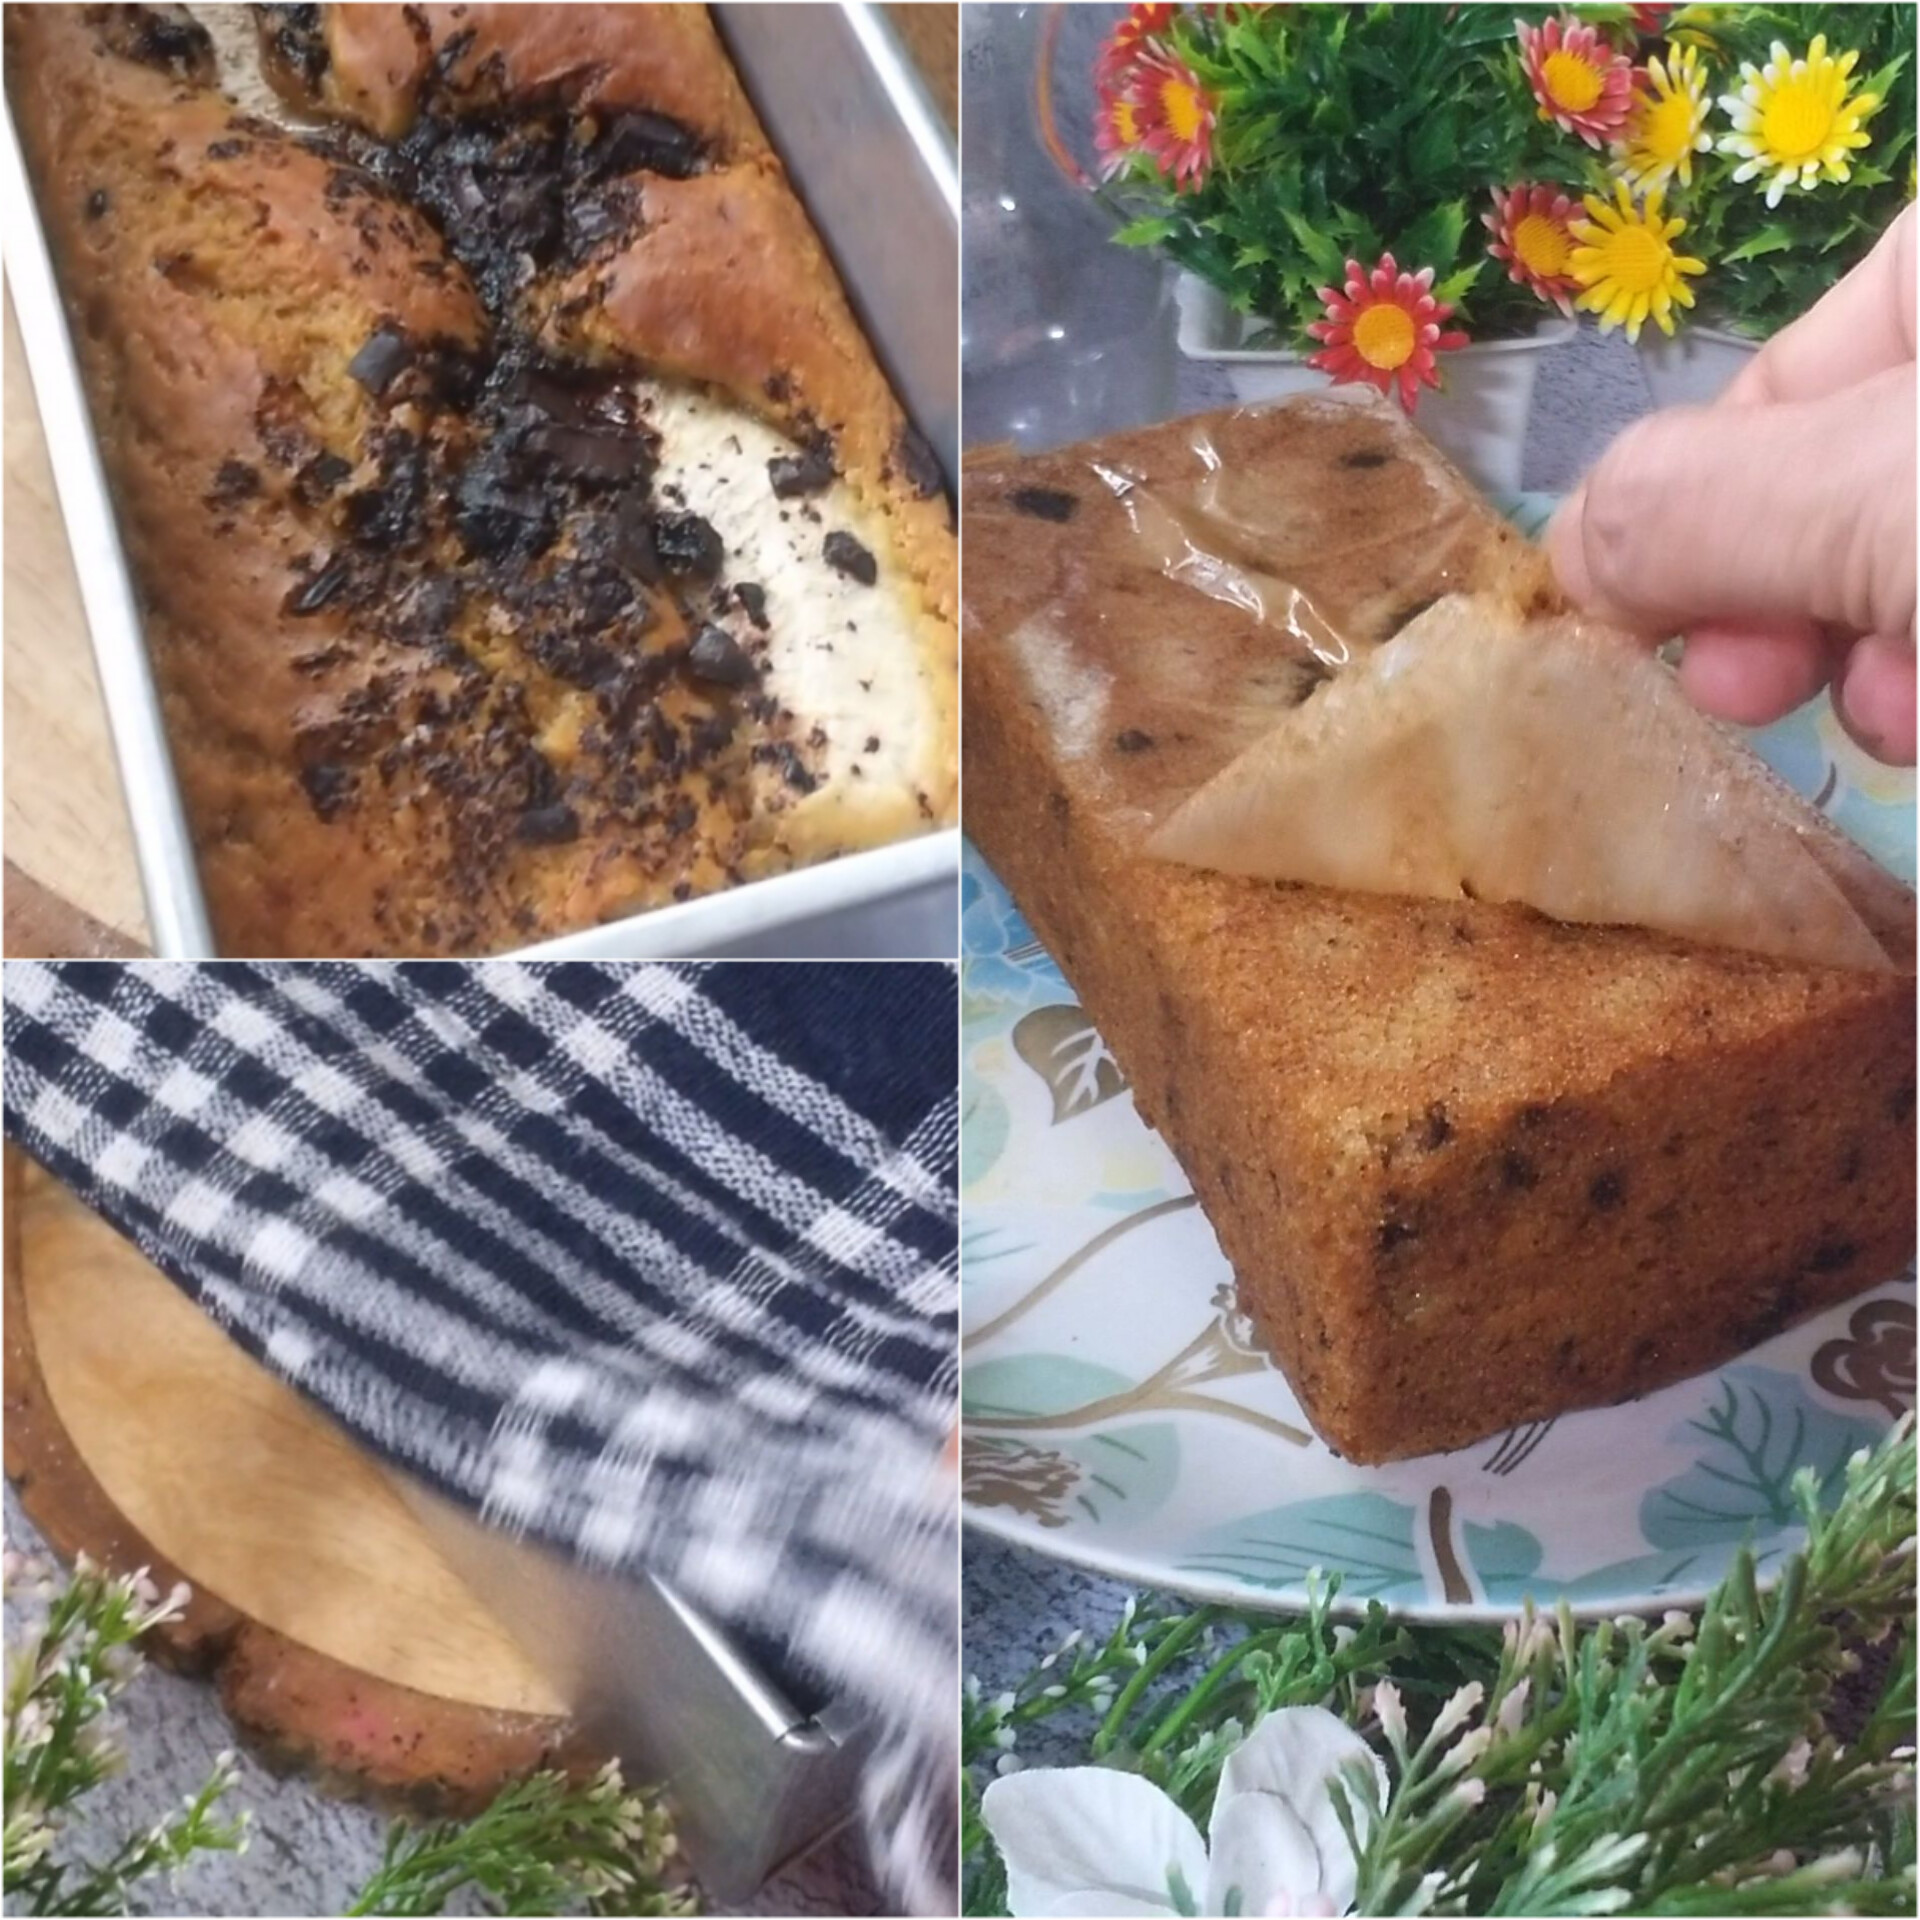

STEP 11 - Cut into pieces and ready to serve.


Serve it with a hot cup of tea as sweet breakfast or evening snack and enjoy...😍

NOTES - *Always add the remaining wet ingredients after you mash the bananas.

* Whisk the flour, corn flour, baking soda, baking powder, and then pour into the wet ingredients in batches.

*  I used dairy milk, but any milk fat is OK. Dairy/ nondairy milks work the same.

* The chocolate/ chocho chips are completely optional. Sometimes I add sliced nuts or raisins instead.

* Time may vary depending upon the brand of oven and ingredients. It may take 5-7 minutes less or more. So start checking it after 40 minutes.

* Remove from the oven and allow the bread to cool completely in the pan set on a wire rack before slicing and serving.

* Cover and store banana bread at room temperature for 2 days or in the refrigerator for up to 1 week. Banana bread tastes best on day 2 after the flavors have settled together.


Monday, 20 April 2020

HOW TO MAKE LADI PAV [In oven]

Ladi Pav is a delicious and mouth-watering dish which is enjoyed by everyone. I never imagined I would be baking bread at home. But this lockdown forced me to try my hands on baking breads. As intimidating as baking bread seem, it really isn’t, once you get past that initial fear…!!!I still consider myself an amateur in this area and still have a long way to go. Ladi Pav is a hearty homemade buns which is very famous in Mumbai. These are easy to make, light and fluffy with a good flavour and hearty texture. Pav mostly enjoyed with bhaji/ batata vada/ dabeli / missal pav. The aroma of freshly baked ladi pav is enthralling that makes you want to eat it and I am sure you will enjoy each and every bite of this. You will surely love the outcome. It is so soft and pillowy, you will look forward to making ladi pav and of course , eating it again and again.
                                                                     
                                                                      [1 cup=240 ml]
INGREDIENTS:
1 ½ Cup/ 220 gms All Purpose Flour/ Maida
½ teaspoon Salt
1 tablespoon Butter, at room temperature
¾ Cup/ 185 mi Lukewarm Milk/ Water
1 teaspoon Sugar
¾ teaspoon Instant Active Yeast
1 tablespoon Milk, for brushing
1 tablespoon Butter, for brushing
METHOD:

For Proofing Yeast:

STEP 1 – In a bowl, add sugar, yeast and lukewarm water. Give it a nice mix.
STEP 2 – Cover it with a lid and rest it for 5 minutes or until yeast activates. I kept it in the microwave with lights on.
STEP 3 – After 5 minutes, yeast activated by turning frothy and foamy.
How to Make Dough:
STEP 1 – Add maida and salt in a bowl and give it a nice mix. If yeast comes directly in contact with yeast then it kills the yeast. So mix it properly before adding yeast mixture.
STEP 2 – Add the yeast mixture in it and mix well.
STEP 3 – Now transfer the dough mixture on your kitchen platform and start making dough.
STEP 4 – Knead the dough well for about 10-15 minutes. If your dough is dry add little milk and if it is too sticky and you are unable to manage then add 1 teaspoon-1 tablespoon maida.
STEP 5 – Knead the mixture to smooth and soft dough.
STEP 6 – Now apply 1 tablespoon butter over it and continue kneading the dough. Knead to the super-soft dough by kneading it for at least 5-10 minutes.
STEP 7 – Now, oil a bowl, keep the dough in it and spread oil/ butter from the top.
STEP 8 – Cover dough with a cling wrap and rest it for 1- 1 ½ hour or until the dough double in size.
How to Proceed:
STEP 1 – After 1 hour when the dough doubles in size indicated it is well proofed.
STEP 2 – Now punch/ knock the dough and remove the air trapped in it. Knead with light hands for 5 minutes.
STEP 3 – Divide the dough in equal 9 pieces.
Grease a tray with some butter and keep aside.
Pinch a small ball sized dough and tuck the dough forming a small ball. Make sure to tuck the dough to prevent from any scars appearing.

STEP 4 – Place the dough balls into a greased baking tray. Place the dough balls in it leaving equal spaces in between.
STEP 5 – Now cover with a cling wrap and allow to rest for 20 minutes or until the dough doubles.

Keep it at a warm place.

STEP 6 – Brush the dough balls with milk without damaging the balls.
STEP 7 – Place the baking tray in the middle rack and bake for 30-32 minutes at 180 degree C.
STEP 8 – Temperature may vary depending upon the brand of the oven so don’t worry. When you see nice light golden colour from the top, take them out.
STEP 9 – Now immediately brush them with some butter to get a shiny look.
STEP 10 – Cover them with a wet kitchen cloth and allow to cool completely.
Finally, demould and cut them and enjoy with some pav bhaji/ vada pav / missal pav/ dabeli
or you can just enjoy it like a maska bun. Just spread butter in the pav and enjoy.
NOTES:  *You can replace the maida with whole wheat flour.
                     *Additionally, knead the dough well to have super soft pav.
                     *To activate yeast check the instructions on the packet.


Saturday, 18 April 2020

BURGER BUNS [by Japanese Technique – Tangzhong Method]

Bread baking is an art, albeit a very enjoyable and satisfying one. It requires a bit of practice but completely worth the effort because the aroma of freshly baked buns is sure to delight the senses and the scene gets even happier when you watch your loved ones savour the homemade breads.  Nothing can beats the mouthwatering aroma of freshly baked buns that comes right out of the oven. They are so light, fluffy and simply the best. Deliciously soft and fluffy Homemade Burger Buns topped with sesame seeds. Perfect for making burgers. A must try recipe. My daughter love freshly baked breads and buns and also burgers prepared by me. This step by step tutorial helps you hoe to make these best, softest burger buns at home. Just follow the recipe exactly and you will end up with a great product.
                                                                       
                                                                                                              [ 1 Cup = 240 ml ]
INGREDIENTS:

For Roux:
1 tablespoon All Purpose Flour
60 ml/ ¼ Cup Milk
For The Dough:
250 gms / 2 Cups All Purpose Flour
2 tablespoon Sugar
2 tablespoon Milk Powder
½ Cup Water/ Milk [lukewarm]
2 teaspoon Instant Active Yeast
1 teaspoon Salt
2 tablespoon Soft Butter

For Brushing:
1 teaspoon Sesame Seeds
2 tablespoon Milk
Soft Butter
METHOD:
For Making Roux:
STEP 1 – In a pan, add all purpose flour and milk and give a nice mix.
STEP 2 – Heat it and cook with continuous stirring until it becomes thick and pasty.
STEP 3 – Transfer it in a bowl and keep aside to cool.
Yeast Proofing:
STEP 1 – In a bowl, add half of the sugar i.e. 1 tablespoon, yeast and warm milk and give a nice mix.
STEP 2 – Cover it and keep it in a warm place for 5 minutes or till it’s frothy. I kept it in oven with lights on.

STEP 3 – Remove after 5 minutes and you will see the mixture is frothy, foamy and thick.[see notes]
Making Dough:
STEP 1 – In a big mixing bowl, add all dry ingredients- all purpose flour, milk powder, sugar, salt and give it a nice mix.
STEP 2 – Now make a well in the centre. Add cooled roux, proofed yeast and give a mix using a spatula.
STEP 3 – If the mixture looks too dry, add 1 tablespoon milk and mix well.
STEP 4 – Transfer the mixture on the kitchen platform and try to make dough.
STEP 5 – Knead well for 8-10 minutes as shown in the picture below. Dough is sticky and not manageable at start but use a scrapper and try to make a soft and non-sticky dough.
STEP 6 – Now spread the dough and apply 1 tablespoon butter and knead it again till it becomes non-sticky dough. 
Knead it again for 8-10 minutes.
Kneading helps to form a gluten in the dough which helps to make the bread soft and pillowy.
STEP 7 – To check, take a small lemon size ball from the dough.
STEP 8 – Stretch the dough with your fingers and when you see light passing through it, it means your dough is perfectly kneaded.
STEP 9 – Now brush a big bowl with butter, keep the dough in it and apply some butter from the top.
STEP 10 – Now cover it with a cling wrap or a damp cloth and keep it at a warm corner or in the oven for 1 hour or until it double in size. 
Let the dough rise undisturbed.

STEP 11 – Once the dough has risen, punch it for a couple of times to remove the air.
Knead it for 5 minutes. This step is must so don’t skip. It helps to make the pav lighter.

How to Proceed:
STEP 1 – Now divide the dough in equal 6 pieces.
STEP 2 – Make soft and smooth top balls by pinching them downwards to the bottom. Seal the bottom by pinching.
STEP 3 – Place them on the baking tray lined with baking sheet / butter paper.
STEP 4 – Cover the buns with the same damp cloth and keep aside for 1 hour or until it double in size.
STEP 5 – After 1 hour, brush them with milk, and sprinkle some sesame seeds on the top.
STEP 6 – Buns are ready for baking. Bake in a pre-heated oven at 200 degree Celsius or until the top is light brown in colour.
STEP 7 – Remove from oven and brush them with soften butter which gives it a nice shiny top.

STEP 8 – At last, cover them with wet cloth to get a super soft and pillowy texture.


 NOTES:  *Please follow the exact measurements and you can’t go wrong.
                      *When you see the yeast is bubbly and foamy shows that yeast is alive and active.                          *Yeast needs to be froth and bubbly, if it doesn’t then discard and start all over again.
              *Do not proceed if the yeast is not frothy, as the flat yeast will result in dense and sticky pav.
             *Use lukewarm milk/ water. Because hot milk/ water will kill the yeast and it will fail to rise.