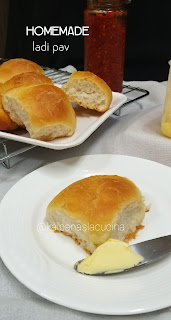
Ladi Pav is a delicious and mouth-watering dish which is
enjoyed by everyone. I never imagined I would be baking bread at home. But this
lockdown forced me to try my hands on baking breads. As intimidating as baking
bread seem, it really isn’t, once you get past that initial fear…!!!I still
consider myself an amateur in this area and still have a long way to go. Ladi
Pav is a hearty homemade buns which is very famous in Mumbai. These are easy to
make, light and fluffy with a good flavour and hearty texture. Pav mostly
enjoyed with bhaji/ batata vada/ dabeli / missal pav. The aroma of freshly
baked ladi pav is enthralling that makes you want to eat it and I am sure you
will enjoy each and every bite of this. You will surely love the outcome. It is
so soft and pillowy, you will look forward to making ladi pav and of course ,
eating it again and again.

INGREDIENTS:
1 ½ Cup/ 220 gms All Purpose Flour/ Maida
½ teaspoon Salt
1 tablespoon Butter, at room temperature
¾ Cup/ 185 mi Lukewarm Milk/ Water
1 teaspoon Sugar
¾ teaspoon Instant Active Yeast
1 tablespoon Milk, for brushing
1 tablespoon Butter, for brushing
METHOD:
For Proofing Yeast:
STEP 1 – In a bowl, add sugar, yeast and lukewarm water.
Give it a nice mix.


STEP 2 – Cover it with a lid and rest it for 5 minutes or
until yeast activates. I kept it in the microwave with lights on.


STEP 3 – After 5 minutes, yeast activated by turning frothy
and foamy.
How to Make Dough:
STEP 1 – Add maida and salt in a bowl and give it a nice
mix. If yeast comes directly in contact with yeast then it kills the yeast. So
mix it properly before adding yeast mixture.
STEP 2 – Add the yeast mixture in it and mix well.


STEP 3 – Now transfer the dough mixture on your kitchen platform
and start making dough.
STEP 4 – Knead the dough well for about 10-15 minutes. If
your dough is dry add little milk and if it is too sticky and you are unable to
manage then add 1 teaspoon-1 tablespoon maida.


STEP 5 – Knead the mixture to smooth and soft dough.


STEP 6 – Now apply 1 tablespoon butter over it and continue
kneading the dough. Knead to the super-soft dough by kneading it for at least
5-10 minutes.


STEP 7 – Now, oil a bowl, keep the dough in it and spread
oil/ butter from the top.


STEP 8 – Cover dough with a cling wrap and rest it for 1- 1 ½
hour or until the dough double in size.


How to Proceed:
STEP 1 – After 1 hour when the dough doubles in size
indicated it is well proofed.


STEP 2 – Now punch/ knock the dough and remove the air
trapped in it. Knead with light hands for 5 minutes.


STEP 3 – Divide the dough in equal 9 pieces.
 Grease a tray with some butter and keep aside.
 Pinch a small
ball sized dough and tuck the dough forming a small ball. Make sure to tuck the
dough to prevent from any scars appearing.
Pinch a small
ball sized dough and tuck the dough forming a small ball. Make sure to tuck the
dough to prevent from any scars appearing.


STEP 4 – Place the dough balls into a greased baking tray. Place the dough balls in it leaving equal spaces in between.


STEP 5 – Now cover with a cling wrap and allow to rest for 20 minutes or until the dough doubles.

Keep it at a warm place.

STEP 6 – Brush the dough balls with milk without damaging the balls.


STEP 6 – Brush the dough balls with milk without damaging the balls.

STEP 7 – Place the baking tray in the middle rack and bake
for 30-32 minutes at 180 degree C.


STEP 8 – Temperature may vary depending upon the brand of
the oven so don’t worry. When you see nice light golden colour from the top,
take them out.


STEP 9 – Now immediately brush them with some butter to get
a shiny look.


STEP 10 – Cover them with a wet kitchen cloth and allow to
cool completely.
Finally, demould and cut them and enjoy with some pav bhaji/
vada pav / missal pav/ dabeli
 or you can just enjoy it like a maska bun. Just spread butter in the pav and enjoy.


NOTES: *You can replace the maida with whole wheat flour.
*Additionally, knead the dough well to have super soft pav.
*To activate yeast check the instructions on the packet.
No comments:
Post a Comment