_________________I am Mrs. Kalpana Mhaske, a Home-Maker, from the city of 52-Gates, one of the famous heritage- destination of the world- Ajanta - Ellora Caves, Bibi-Ka- Maqbara (The Taj of Deccan) and Deogiri Fort. i.e. AURANGABAD. I admire cooking - tryout and innovate different cuisines. Basically, both of my gorgeous daughters are foodie, they have always encouraged me in the kitchen and forced to carve a Food Blog, that’s why, I am happy to share the makings with you. I am an artist too. Painting – especially, Canvas-Painting is my one more hobby. In total - Ours is an ART-FAMILY, my husband is an Architect. In the end, I keep the same belief with Louise Fresco - “ Food, in the end, in our own tradition, is something holy. It's not about nutrients and calories. It's about sharing. It’s about honesty. it’s about identity ”

Saturday, 9 September 2023

SOUTH INDIAN STYLE LAYERED PAROTTA

 Internet popular String Parotta Recipe is this South Indian Style Layered Parotta. South Indian Style Layered Parotta - The soft and flaky Parotta, also known as Barotta or Porotta, which is very popular in the Southern states of Kerala, Tamil Nadu and Karnataka. It is a common sight to find crowds thronging the road side stalls where heaps of layered parottas hot off the stove are served with a curry both for breakfast and evening tiffin or dinner. It is popular recipe in and around Kerala.  This is Made using plain flour, salt, sugar, oil and water/ milk. I have seen many videos and Instagram reels for this Parotta recipe which inspired me to create my own version. I want to make this Parotta for a very long time. This Parotta Recipe is made like regular paratha dough except it has the technique for creating the flaky thread like layers. You will see a very simple and cool technique is applied to create this soft and flaky flatbread. Made this recipe couple days back and it turned out near to perfect. 

There are numerous avatars of Parotta where the shape and accompaniments vary from region to region. The key is to spread it out super thin and as large as you can. Keep smearing oil as you spread the sheet. The shape is really not important. Even if there are a couple of tears, it is completely fine. Take a rolled out thick roti and spread it out thin using a rolling pin or using your palms and fingers to stretch out into a thin sheet.

This popular street food fare is usually served with salna or kurma. The side dish with parottas include both vegetarian and non vegetarian style gravy dishes. Follow  this Parotta recipe with step-by-step pictures. If you tried this recipe, Click on the stars ★ in the recipe card to let us know your feedback!  You can also click the recipe pic and share on Instagram and Facebook with hashtag #Kalpana's La Cucina..😍

📌📌 Watch the full video recipe here 📌📌

INGREDIENTS -

2 Cup Maida

1 tablespoon powder Sugar

¼ teaspoon Baking Soda

½ teaspoon Salt

Milk, for kneading the dough

¼ Cup Oil

METHOD -

STEP 1 - Firstly, in a large parat / mixing bowl take  maida, powder sugar, baking soda and ½ salt.


STEP 2 - Mix well making sure everything is well combined.


STEP 3 - Now add milk in small batches and start to make the dough.


STEP 4 - Add milk as required and form a sticky dough. Knead the dough well for 5-7 minutes.


STEP 5 - Further, add 2 tablespoon oil and start to knead well. Make a smooth and soft dough.


STEP 6 - Apply oil on the top, cover it and rest the dough for atleast 20 minutes. More resting time will not harm, the longer you rest, the better is the parotta.


STEP 7 - After resting time, the dough turns more soft.


STEP 8 - Now make a log and divide the dough into equal portions.

STEP 9 - Roll them uniformly and again coat them with oil and 
keep aside for more 20-25 minutes.

STEP 10 - Take the dough and start to flatten by spreading using greased hand on a greased platform.

STEP 11 - Using a rolling pin, roll out thick roti and spread it out thin using a rolling pin or using your palms and fingers to stretch out into a thin sheet.


STEP 13 - Apply oil evenly, give cuts using a pizza cutter or sharp knife and then start collecting the strips at one end. Make sure the layers are uniform.


STEP 14 - Bring the strips together and form a spiral as shown below.


STEP 15 - Once its pleated hold one end of the long strip and roll it towards the other end to create a rosette and tuck the end under the rosette. Secure the end by pressing gently and repeat for all dough circles


STEP 16 - Now roll the spiraled dough into a disc of  3-4 inches with the help of rolling pin. Add a little oil on it and spread it like a parotta with medium thickness. You can do this process with greased hands. 


STEP 17 - Now gently transfer the parotta on hot tawa. 


STEP 18 - Make sure the pan is hot. Roast the parotta on medium high flame. 


STEP 19 - Roast for 2 minutes from one side, and then flip over carefully. 


STEP 20 - Roast on both sides cooking uniformly. Turn the parotta 2-3 times and to cook evenly from both the sides.


STEP 21 - Apply oil and roast the parotta until golden brown on both sides.


STEP 22 - Transfer on a plate.


STEP 23 - Prepare parottas with rest of the rosettes in a similar fashion. Now take each parotta when it is still hot, place on the work surface and using both your hands, crush them together similar to clapping action. This helps to open up the layers of the parotta.


STEP 24 - Finally, bun parotta is ready to serve with any spicy veg or nonveg curry.


Serve parotta with vegetable salna/ curry or chicken salna.


NOTES : * Firstly, adding sugar helps to give nice golden colour to parotta.

* Also, we are not using eggs in this recipe, so i have added ¼ tsp baking soda.

* Additionally, kneading the dough with milk makes paratha soft. But feel free to use water if you don't want to make it with milk.

 * Finally, bun parotta recipe tastes great when made with a generous amount of oil.

* The longer you rest the dough the more soft the paratha is.

* Roll the dough into thin sheets. The thinner the sheets are the flakier the paratha.

* Using pizza cutter / sharp knife is easy way for making thread like strips. Make sure to cut  the strips as thin as possible.

* The key is to spread it out super thin and as large as you can. Keep smearing oil as your spread the sheet. The shape is really not important. Even if there are a couple of tears, it is completely fine.

* After the paratha is cooked, crust it really well to expose the flakiness which we created.


Thursday, 24 August 2023

MATAR PANEER PULAO ( in pressure cooker )/ मटर पनीर पुलाव

 Rice is the staple food of many places in India and many different delicious dishes are made from rice. Pulao is a delicious, less spicy as compared to vegetable biryani and popular rice dish that can be easily made at home. Pulao is a famous rice dish of India which can be vegetable pulao, matar pulao or matar paneer pulao. Matar Paneer Pulao is an easy, protein packed, one-pot rice dish. Pulaos are of various kinds. They can be made with various kinds of ingredients. Usually, Rice is made as Paneer Rice or Peas Rice or combining both. This recipe mixes both too but the method and the ingredients vary a little. That is how I have created this Rice. It is quite a simple recipe.


 Pulao can be served with many dishes and cool raita of your choice. It make a great comforting meal or lunchbox option .  If you like Paneer then this matar paneer pulao is no exception, pair along raita or any side dish of choice. This matar paneer pulao can make any meal fancy and grand even just served along raita this can be satisfying meal provided you like paneer. This Paneer Spicy Rice is a great one for not just parties and weekends. It has the great aroma of Ghee and spices and has a combined taste of sour, strong and less spicy.

My family love paneer so paneer is always available at my place. I'm always making paneer almost every week and switching up between the different paneer recipes and serving them with roti/paratha or rice. Yesterday, when I was feeling a bit lazy thought of making Matar Paneer and Rice but as one-pot dish. It turned out delicious! That is how Matar Paneer Pulao came into existence.  It turned out super delicious and my family just loved it. You can make paneer at home or use store brought one. Likewise, make it when fresh green peas are in season or with the frozen ones like me. I prefer adding just peas to this as we as a family love the paneer peas combo. But you can definitely add more veggies to it. Always use any long grain basmati rice to make this pulao. Love how flavorful and good it looks with basmati. I used oil or ghee for cooking. Ghee gives it own flavor to the recipe so definitely give it a try! Also, I have used a combination of whole spices and powdered spices which are easily available in any Indian household pantry. I have used Biryani Masala Powder but if you don't have feel free to use garam masala powder. Last but not least some lemon juice ( which I forgot to add 😀😀) and cilantro (coriander) to finish the recipe. 


If you tried this recipe, Click on the stars ★ in the recipe card to let us know your feedback!  You can also click the recipe pic and share on Instagram and Facebook with hashtag #Kalpana's La Cucina. Follow this recipe of Matar Paneer Pulao and make delicious pulao easily at home. 

📌📌 Watch the full video recipe here 📌📌


INGREDIENTS :

1 Cup Basmati Rice, soaked for 15-20 minutes

200 gm Paneer, cubes 

Whole Spices :

1 teaspoon Cumin Seeds

1-2 Bay Leaf

1 Balck Cardamom

2 Green Cardamom

2-3 Cloves

1" Cinnamon Stick 

1 Star Anise

Veggies and Other Ingredients :

1 teaspoon Oil

1 tablespoon Pure Ghee

1/2 Cup Green Peas

1/4 Cup Carrot, cut into cubes

1 Onion, sliced

1 teaspoon Ginger-Garlic Paste 

1/2 Cup Birista/ fried Onion 

1 teaspoon Red Chilli Powder

1/2 teaspoon Turmeric Powder

1 teaspoon Coriander Powder

1/2 teaspoon Cumin Powder 

1 teaspoon Biryani Masala

Salt to taste 

1 tablespoon chopped Coriander

1 tablespoon each Fried Raisins and Cashew nuts

1 tablespoon Lemon Juice

METHOD :

STEP 1 - Wash rice for 2-3 times and then soak for 15-20 minutes.( see notes )


STEP 2 - By the time, heat 1 tablespoon oil in a pan and fry cashews, raisins and paneer cubes seperately and keep aside. ( I skipped adding raisins )


STEP 3 - Heat 1 teaspoon oil and 1 tablespoon ghee in pressure cooker.


STEP 4 - Add cumin seeds followed by the whole spices and cook them until fragrant. ( for 30 seconds)


STEP 5 - Add sliced onion and ginger-garlic paste and cook until raw flavour vanishes.


STEP 6 - Now add carrot and green peas, mix and cook for 2 minutes.


STEP 7 - Then add all the powder spices and mix well.


STEP 8 - Add soaked basmati rice and give it a nice mix.


STEP 9 - Add fried paneer cubes, fried cashews, raisins and birista ( fried onion ). Give it a nice stir. ( see notes )


STEP 10 - Add chopped coriander and 1-1/2 cup water and mix well. ( see notes )


STEP 11 - Add lemon juice ( missed the picture ) salt according to your taste and mix well.


STEP 12 - Close the lid and cook it for 1 whistle on medium high heat. ( see notes )


STEP 13 - Let the pressure release, open the lid and matar paneer pulao is ready to serve.


Serve it with any raita, papad and pickle of your choice.


NOTES  - * I used Basmati Rice, soaked for  20 minutes. This Rice takes 1.5 cups of Water per cup. So adjust the quality of water depending upon the quality of rice you are using. 

* I have used Ghee and Oil to get a balanced taste to the Rice but you could use only  Oil or Ghee.

* Heat ghee in a pressure cooker and once hot add the whole spices.

* Once they begin to sizzle add the sliced onions and cook on medium-low flame until golden brown.

* Then add the ginger garlic paste and cook until the raw garlic smell disappears.

* After adding all the spices, cook them for few seconds. 

* Allow the steam to go away naturally. Once the steam has escaped, open and fluff it with a fork.

* To make it vegan, use tofu instead fo paneer. 

* If you prefer crispy paneer like me, pan fry the paneer separately and add. Otherwise you can add paneer without frying.

* Fry paneer pieces until they turn light golden. If they are fried too much, they do not absorb the spices for the Rice.

* Never cook the paneer for longer time as they turn hard and rubbery.

* If you are using frozen green peas , add them at the very end. If you are using fresh peas, add them immediately after the onions are fried.

* Additionally, if you prefer, add more green chilis to increase the spiciness.

* If you don't have biryani masala then feel free to use garam masala powder for this recipe.

* Cook for 1-2 whistles (I cook for 1 whistle but may vary depending on rice quality) and then switch off the gas.

Friday, 11 August 2023

ZERO OIL CHOLE MASALA in PRESSURE COOKER

 The food from the state of Punjab is extremely popular throughout India and one can find many restaurants catering to this world famous cuisine. I am sure everyone  is fond  of the world famous combo food Chole-Bhatura but as it’s high on oil and calories we eat that once in a while. As if it's not enough, that the traditional chole recipe is usually cooked with loads of oil and served with calorie laded bhatura s/ pooris.

Today I am going to share this extremely popular combo food recipe cooked in my style and in a healthy way. I guess all Indian food blogs will surely have the recipe to this, so one might ask, what’s new here? New is that, I have still not read any one contributing to a NO OIL CHANA, yes this recipe has absolutely ZERO OIL but is high on taste and one surely does not miss out the oil factor. Here's the healthy zero oil variation without unnecessary calories . You will be amazed how something so simple to make can be so delicious to eat!!

Everyone wants to eat healthy food without oil and ghee, but due to taste, everything is not eaten.  But denying this, today we are going to make chickpeas without ghee and oil.  Now because it is made without ghee and oil, then it will be beneficial for health.  Also, due to its taste, you will not feel even for a moment that it is a healthy dish made without ghee and oil. Chole Bhature is  all-time favorite dish of  both my daughter's ever since they were kids. I used to be the happiest mom whenever I make chole bhature for them. And the other interesting part of this recipe is we are making it in pressure cooker.


 Chickpea or chole is such a versatile ingredient used in different ways, across the world. Making this curry in a pressure cooker will save your time. The long cooking time allows the spices to be properly absorbed by the garbanzo beans and the gravy. Another benefit of using a pressure cooker is that it is hassle-free because you are making this side dish in a single pot. As the name suggests, Hero ingredients of the recipe are chickpeas and other ingredients used here are few whole spices, onion, chole masala powder and other regular spices. If you don't have chole masala powder then you can use garam masala powder. This recipe is a pressure cooker recipe and pretty easy to prepare. The maximum amount of time required here to soak chickpeas. You can even use canned chickpeas too. If you love to have healthy Indian curries, you will love this style chana masala. The recipe is one-pot and comes together in under 30 minutes.

REASONS TO LOVE THIS OIL-FREE CHOLE RECIPE -

📝100% oil-free recipe

📝very flavorful

📝super delicious

📝easy to prepare

📝perfect tiffin box recipe

📝ingredients are easily available

When served with one meal of your day is thankfully guilt-free. This is one of the easiest Indian dishes you can make, and a great one to start out with if you are new to Indian cooking. No-Oil chole recipe is delicious and healthy. Chole masala recipe is a spicy side dish often served and can go best with poori or batura. This curry goes well with any type of flatbread, pancake, roti, chapati, fried rice, jeera rice or steamed rice, etc. 

A quick pressure cooker zero oil chole masala with detailed step-by-step pictures and video. You will be amazed how something so simple to make can be so delicious to eat!!   This recipe has 0% oil yet super delicious. If you try this recipe please let me know by clicking on the stars ★ in the recipe card to let us know your feedback!  Also click and do share the recipe pic and with us on Social Media Channels - Instagram and Facebook with hashtag #Kalpana's La Cucina.

📌📌 Watch the full video recipe here 📌📌

INGREDIENTS:

1 Cup Chickpeas / Chole / छोले 

2-3 medium Onions, chopped / कांदे 

1 tablespoon Ginger Paste/ अद्रक पेस्ट 

1 teaspoon Garlic Paste / लसूण पेस्ट 

1 teaspoon Ginger Juliennes 

2-3 Bay Leaf/ तमालपत्र 

2 Green Cardamom/  वीलायची 

1 teaspoon Black Peppercorns  काळे मिरे 

1/2" Cinnamon Stick/ दालचिनी

1 teaspoon Carom Seeds / ओवा 

Around 500 ml Water

1 tablespoon Tea Powder चहा पावडर 

1/2 teaspoon Baking Soda ( optional )

1 tablespoon roasted Gram Flour / भाजलेले बेसन 

1 tablespoon Coriander Powder/ धना पावडर

1 tablespoon Red Chilli Powder /लाल तिखट

1 teaspoon Cumin Seeds Powder/ जीरा पावडर

3-4 slit Green Chillies / हिरवी मिरची 

2 tablespoon Chole Masala  छोले मसाला

1 teaspoon Aamchur Powder /आमचूर पावडर

1 tablespoon Anardana / सुखा अनारदाना

1 teaspoon Kasuri Methi 

Salt as per taste

METHOD :

STEP 1 -  Take a deep bowl , add chickpeas and wash them with tap water. Soak chana for 6-7 hours or overnight. 

STEP 2 -  After soaking, strain excess water and wash them with fresh water.


STEP 3 - In a pan, boil 2 cups water 1 tablespoon tea powder for 2-3 minutes to make tea concoction. Strain and keep it aside for further use.( see notes )


STEP 4 - Heat a pressure cooker on medium heat, add chopped onion and pinch of salt and cook onions till the colour changes to golden in colour. 


STEP 5 - Add a splash of water while cooking the onions if it sticks to the bottom of the pressure cooker.


STEP 6 - Add soaked chickpeas, salt, ginger- garlic paste, carom seeds, whole spices, 


STEP 7 - Add strained tea concoction and some more water and mix well. ( see notes )


STEP 8 - Stir and cook for 2 minutes. Add 2 1/2 cups of water. Now, the mixture should become thinner. However, once the chickpeas become cooked, the gravy should thicken. 


STEP 8 - Add baking soda, stir it once and close the cooker with its lid and place cooker on medium heat. Cook till you hear 5 whistles and simmer for 10-15 minutes.

STEP 9 - Switch off the flame and open the lid once the pressure releases naturally. Check whether chickpeas have cooked properly. If not, cook for more time.


STEP 10 -  Stir the mixture once. Once again put it on the heat and bring it to boil.


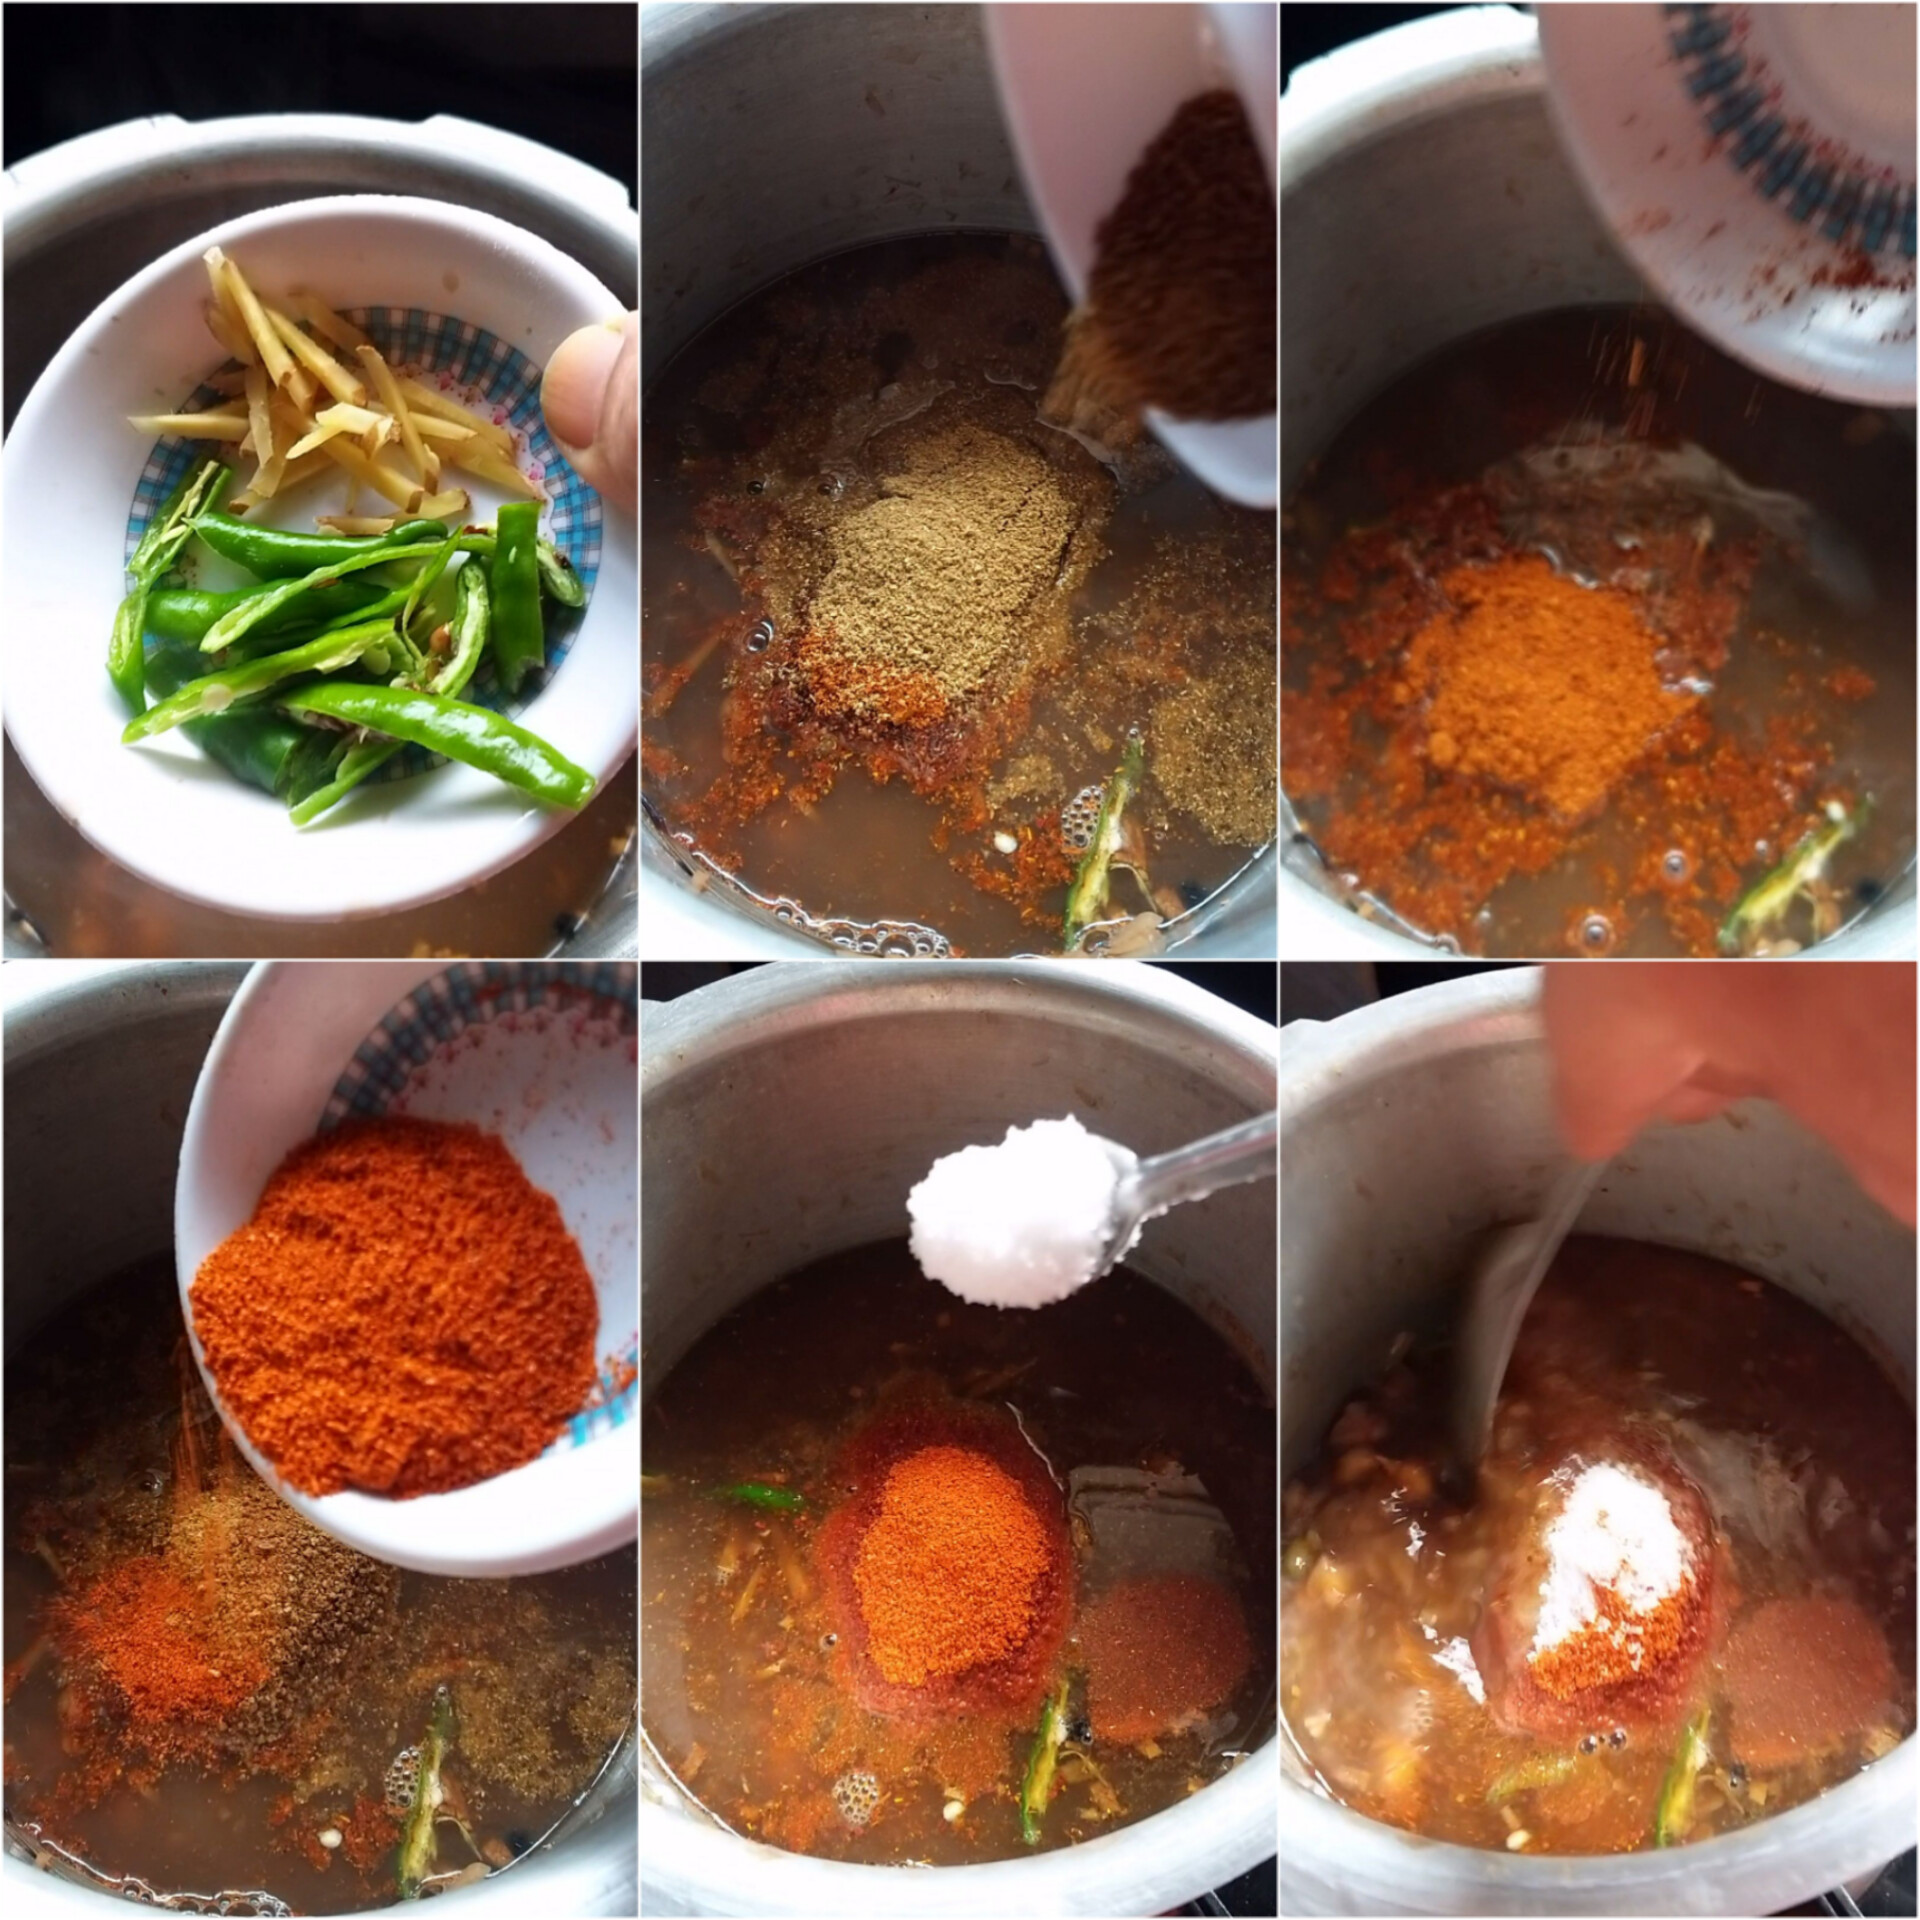
STEP 11 - Add roasted besan, coriander powder, red chilli powder, cumin seeds powder, slit green chillies, ginger juliennes, salt and chole masala. [ I missed pics of adding coriander powder and besan.]


STEP 12 - Give it a nice mix.


STEP 13 - Add amchur powder red anardana and cook for 8-10 minutes. 

STEP 14 - If need to adjust the consistency, add some hot water and adjust the consistency of the gravy.


STEP 15 - Bring it to a boil, add kasuri methi and mix it well.

STEP 16 - Cook for another 2-3 minutes. Switch off the flame.


STEP 17 - Garnish with chopped coriander leaves and your zero oil chole is ready to serve.


Punjabi Chole Masala tastes best with bhature. But today we relished it with Jeera Rice and everyone just loved it. However, you can also serve it with steamed rice, puri, tandoori roti, paratha or kulcha.

NOTES - * Make sure to soak chole overnight in enough water. Wash them nicely before soaking.

* You can use garam masala powder instead of chole masala powder. if using, add 1 teaspoon of garam masala powder ONLY as garam masala has a very strong flavour.

* You can use canned chickpeas as well.

 * Add sufficient water and make sure that water level is 1" above the chole.

* Make a tea decoction with using a tea bag/ tea powder. It is used only to give chole a dark color, they add nothing to the taste. You can skip them if you don’t care about the color of the chole. You can even use dried amla (gooseberry) to get this dark color.

Tea Decoction - 

📝 Boil 2 cups water and add 1 tablespoon tea powder. 


📝Let it boil for 3-4 minutes.


📝 Strain it strainer and ready to use in your recipe.

* Tea decoction is totally optional .

* The flame should be low while cooking onion and adding ground spices. Add a dash of water if it starts to burn.

*Bite chole to check it there are properly cooked.

* You can mash a little bit of chole after adding it to the gravy to get nice thick consistency.

* You can increase or decrease the quantity of water according to your preference.

* The recipe is one-pot and comes together in under 30 minutes.