_________________I am Mrs. Kalpana Mhaske, a Home-Maker, from the city of 52-Gates, one of the famous heritage- destination of the world- Ajanta - Ellora Caves, Bibi-Ka- Maqbara (The Taj of Deccan) and Deogiri Fort. i.e. AURANGABAD. I admire cooking - tryout and innovate different cuisines. Basically, both of my gorgeous daughters are foodie, they have always encouraged me in the kitchen and forced to carve a Food Blog, that’s why, I am happy to share the makings with you. I am an artist too. Painting – especially, Canvas-Painting is my one more hobby. In total - Ours is an ART-FAMILY, my husband is an Architect. In the end, I keep the same belief with Louise Fresco - “ Food, in the end, in our own tradition, is something holy. It's not about nutrients and calories. It's about sharing. It’s about honesty. it’s about identity ”

Thursday, 22 February 2024

SATTU KA PARATHA / सत्तू का पराठा

Sattu Ka Paratha Recipe is made out of sattu which is essentially the roasted channa dal flour. It is one of the vegetarian sources of protein for people of Bihar and used in many authentic Bihari recipes like -​Sattu and Milk Porridge, ​Sattu Sharbat, ​Sattu and Jaggery Balls, ​Sattu Litti, Sattu Bharta, ​Sattu Cheela, Sattu Kebab, Sattu and Coriander Chutney and many more. A most common way to use Sattu is in parathas.


Sattu ka paratha is an immensely popular recipe of paratha in North India. It is a pure Bihari delicacy and one of the most frequently prepared breakfast or lunch in Bihar, Uttar Pradesh and few parts of Bengal. This healthy stuffed paratha is prepared with spicy and flavoured Sattu stuffing. The stuffing is inserted into the wheat dough portions and roll out to flat parathas. Sattu ka paratha is shallow fried in pan with little oil. It is mostly relished with yogurt, pickles or mild curries.

 What is Sattu??

The difference between  besan and sattu because they both look about the same. The difference being that whereas besan is the flour of raw gram, and sattu is the flour of the roasted gram. Roasting the besan it is not same as the flour of roasted chana. Sattu is also high in protein.

Sattu flour is available nowadays in shops but if you cannot find them, then you can always make some right in your own home by grinding some roasted gram dal aka chutney dal/ फुटाणे.

Sattu ka paratha is a very simple and easy recipe. It requires very common ingredients which are very easily available in kitchen pantry. Though the recipe is simple, but it tastes divine. I heard many times about ‘Sattu Ka Paratha’ being one of their traditional food. Today morning, I was wondering what I should make for breakfast. Suddenly, it clicked my mind that I got pair of Sattu packets. Whenever I get Sattu, I always make sure to prepare Sattu ka paratha. The best thing of the Sattu paratha is that it will make you feel full for a long time. So, it is always a great option for heavy breakfast. Hence, everyone loves it in our family. The best part of the dish is that it does not require any side. Yogurt, pickle, chutney or ketchup any of these condiments is enough to accompany the luscious paratha recipe. 


Health benefits of Sattu -->>

[ Sourc -timesofindia.indiatimes.com ]

Sattu is a great ingredient to add to your daily diet if you want to stay fit and disease free. Here are a few health benefits of Sattu-->>>

➡️Natural summer cooler: A drink made out of Sattu is a great drink to quench your thirst during summer. It prevents the body from overheating and brings down the body temperature significantly.

➡️High nutritional value: The dry-roasting process by which Sattu is made, seals in all the nutrients. It is rich in protein, fibre, calcium, iron, manganese and magnesium.

➡️Great for digestion: Sattu has high amounts of insoluble fibre which is great for the intestines. It cleanses the colon, detoxifies it of greasy food, constipation and acidity.

➡️Helps fight diseases: Sattu is a low-glycemic index food and is a great option for diabetics. It keeps blood sugar levels in control and regulates blood pressure. The high fibre in it is great for those suffering from high cholesterol.

➡️Aids weight loss: If you want to reduce weight, start consuming Sattu on an empty stomach. It helps reduce bloating and also enhances metabolism and burns calories effectively.

Read Also - Sattu Benefits for Fitness Freaks

These shallow fried flat breads are a speciality of the Bihar region where the paratha is stuffed with a mildly spiced roasted gram flour filling that makes a great breakfast/ lunch option. My family just loved it  and I am happy that I can include this recipe in our regular diet too. Friends, do try this easy and yummy sattu ka paratha and enjoy for your breakfast/ lunch or dinner ! Do try this recipe and if you ever try this, do share your feedback with us in the comment section bellow. For more updates and new recipes, #Facebook #Instagram and #Google+.


For more simple and easy recipes follow  me on my blog @kalpanaslacucina❤️

📌 Watch the full video recipe here 📌

INGREDIENTS :

For Making Dough -

2 Cups Whole Wheat Flour

1 teaspoon Oil

Salt as needed

1 teaspoon Carom Seeds 

 Water as needed to make a dough

For Stuffing -

1 Cup Roasted Gram Flour ( सत्तू का आटा )

1 Onion , finely chopped

2 Green Chillies , minced ( हिरवी मिरची )

6-7 cloves Garlic , minced ( लसून )

1 inch Ginger , finely chopped / grated  ( अद्रक )

2 teaspoon Carom Seeds ( ओवा )

1 teaspoon Onion Seeds ( कलोंजी )

3-4 tablespoon Coriander  Leaves , chopped

1 tablespoon Mustard Oil/ Ghee

Half Lemon Juice 

2 tablespoon Mango pickle 

More Ghee  or oil for frying the पराठास

METHOD :

How to make the dough -

STEP 1 - To prepare the dough, in a wide bowl, bring all the ingredients together for making dough.


 STEP 2 - Mix all the ingredients and water together, knead in a mixing bowl to make a soft dough.
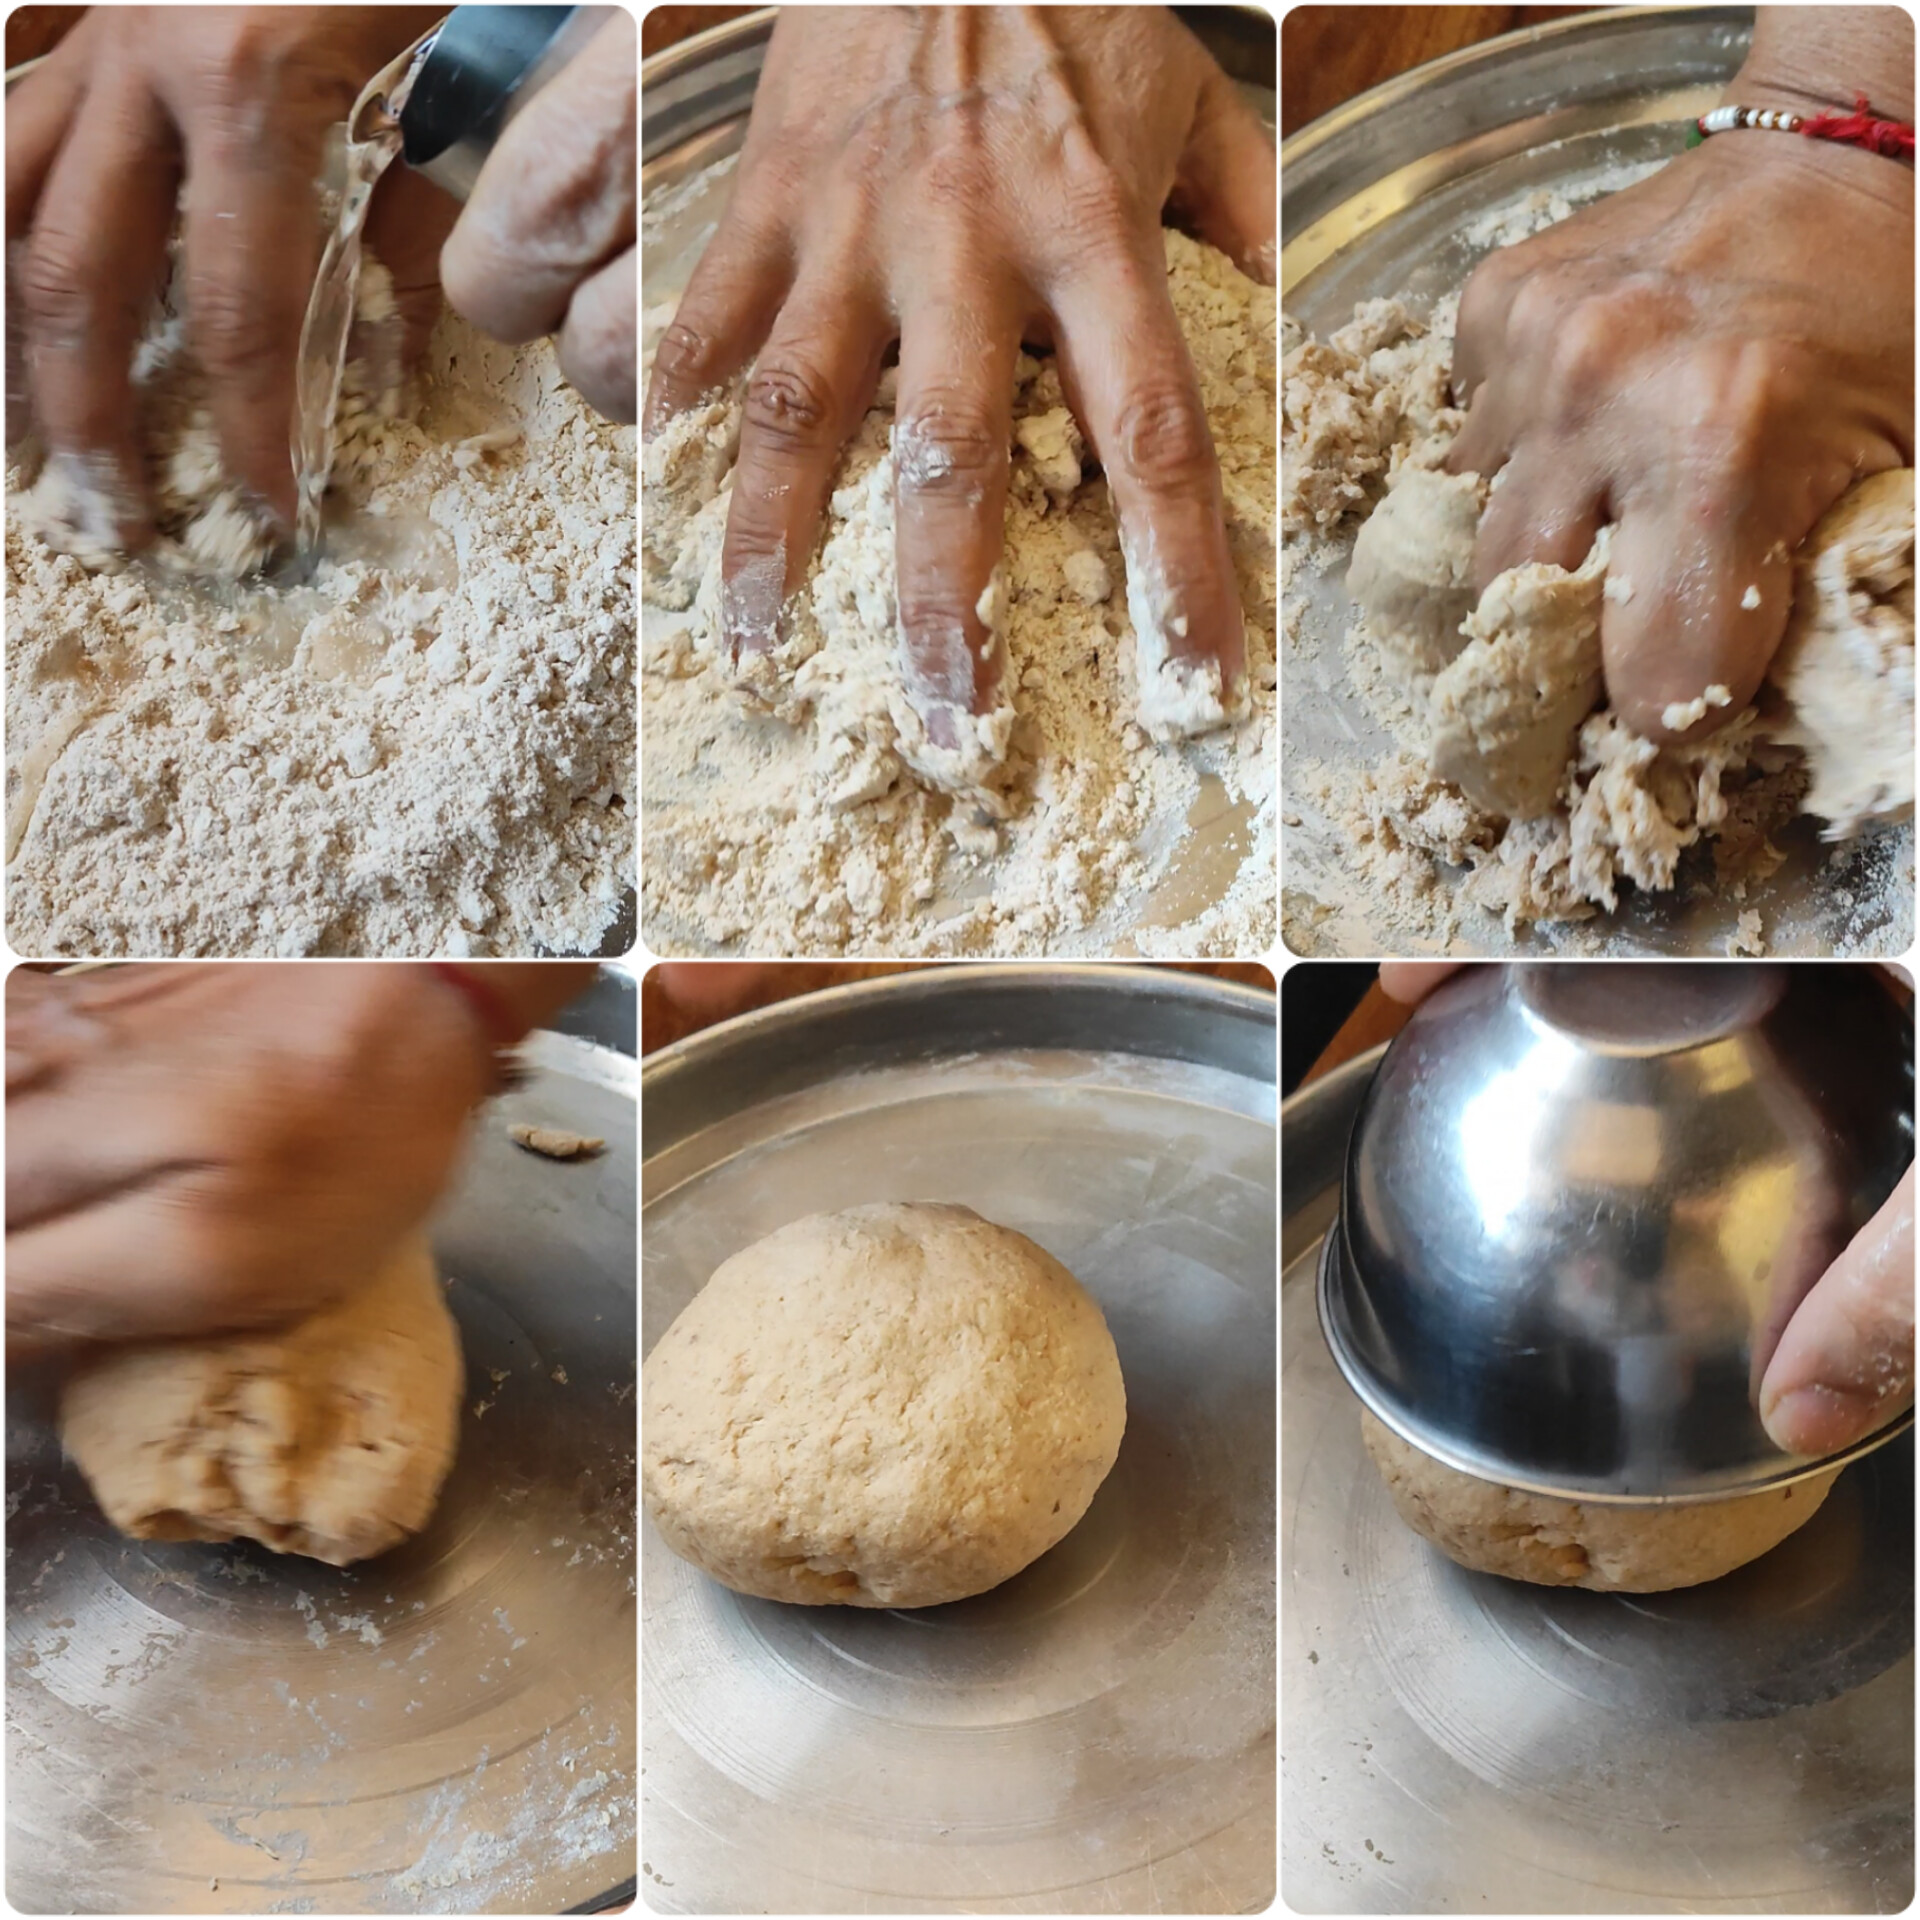

STEP 3 - Keep aside covered till you prepare the stuffing. ( 10-15 minutes )


For Making Stuffing - 

STEP 1 - In a bowl, add all the stuffing ingredients one by one.

STEP 2 - Mix very well with your finger tips till it resembles like bread crumbs.

STEP 3 - Then add pickle masala, ghee and lemon juice and mix really well. Keep aside.


For Making Sattu Ka Paratha -

STEP 1 - After the said time, once again knead the dough for 2 minutes and then divide the dough in small 6 balls.

 STEP 2 - Take one dough ball, gently flatten it and shape it like a bowl/ cup.

STEP 3 - Place 2-3 tablespoon stuffing in the centre.

STEP 4 - Now bring all the edges together and seal it properly.

STEP 5 - Gently flatten it, apply some dry flour.

STEP 6 - Dust some dry flour on your rolling board and roll each ball 1/2 inch thick and 4-5" diameter disc.

STEP 7 - Heat a tawa/ griddle on low flame.

STEP 8 - Slowly slide the paratha on hot tawa and cook each side of the paratha evenly.


STEP 9 - Apply ghee / oil and roast paratha from both sides until golden brown and few black spots on the top puffs up.


STEP 10 - Repeat the process for the rest of the parathas.


Serve these hot Sattu Ka Paratha with curd and your favourite pickle.

 When sided with baingan ka bharta, Sattu ka Paratha makes a wholesome weeknight dinner.


NOTES - *A well kneaded soft dough leads to softer parathas.

* If the mixture feels very dry, sprinkle a little warm water and mix well.

* Parathas can be kept at room temperature for up to two days wrapped in aluminum foil or in a covered container.  For later use, parathas can be refrigerated three to four days or frozen for up to a month. Re-heat using a skillet or oven.


Thursday, 14 December 2023

MAKHANA RAITA

 Raitas are our all-time favorite accompaniment with lunch. Fresh home made yogurt tastes awesome on its own, but the minute you whip up the curd and add a little something to it, it turns into delicious raita. A little something! What can that little something be? Any fruit, vegetable, it could be raw or cooked, some kind of nuts and seeds, gram flour dumplings – there’s so much of this something. The variations are enormous and every time I make new raita’s, I am somehow pressed for time and as a result, do not document it. The most common among raita’s is the Boondi Raita. 


I mostly make Punjabi gravies during the weekends. Whenever I make a sabzi or dal, I often pair it with a raita . So I make different types of raita just to have some newness and variety in the food. I did not know raita can be made with makhana too. It was only when I was browsing Instagram that I came to know about this healthy raita. Then I searched, is there a real thing called makhana raita and yes we Indian love experimenting with things and are so innovative that we can present so many recipes with one ingredient. This makhana raita is interesting raita and  I have made this makhana raita, the way I make regular raita. I have not tempered this one. If you want, you can temper it with a pinch of asafoetida or some cumin seeds to make it more flavorful. The raita really tasted good. I first felt it would have a similar taste like Boondi raita. but it did not taste like boondi raita. It tasted even better than boondi raita. Do give it a try.  It is a light & delicious curd recipe combined with the health benefits of fox nuts. This is also the perfect recipe if you are fasting during Navratri.


My husband is a big fan of roasted foxnuts and his other favorite thing is yogurt. He never starts his meal unless there is a bowl of yogurt on his plate. So one day I thought of combining these two things together and to my surprise, he gulped all of them. Before this I did not know raita can be made with makhana too. Foxnut/ makhana is neutral in taste and when its roasted in ghee it gives a really nice nutty flavor.  But toasting with ghee is totally optional,  you can either roast them without ghee. Foxnuts are a good source of magnesium, potassium, phosphorous, and protein. Makhanas are low in cholesterol, sodium, and saturated fats and are good for your heart. This high nutrition value of Makhana makes them an ideal snack to satiate those in-between meal hunger pangs. They are beneficial to those suffering from high blood pressure, heart diseases, and obesity. They are a perfect snack for diabetics! Makhanas are gluten-free, protein-rich and high in carbohydrates. This Low-calorie snack helps to reduce weight.


This Makhana Raita is a spiced cooling raita variety made with phool makhana or fox nut, spices and coriander leaves. You can serve it as a side dish with any North Indian meal or pulao or biryani. If you ever try this recipe, do share your feedback with us in the comment section bellow. For more updates and new recipes, #Facebook #Instagram and #Google+.

For more raita recipes  this follow  me on my blog @kalpanaslacucina ❤❤


📌📌 Watch the full video recipe below 📌📌

INGREDIENTS :

1 Cup Curd

1/2 Cup Phool Makhana / Fox Nut Seeds

1 teapoon Ghee

1 teaspoon roasted Cumin Powder

1/4 teaspoon Black Pepper Powder ( optional )

1 teaspoon Sugar 

1/4 teaspoon Rock Salt 

Regular Salt to taste

1/4 Cup Pomegranate arils

1 teaspoon Flax Seeds / Alsi ( optional )

1 Green Chilli,  finely chopped 

1 tablespoon finely chopped fresh Coriander Leaves

METHOD  :

STEP 1 - Heat ghee in a pan on low flame and toast the lotus seeds for about 5-10 minutes. Keep stirring intermittently to avoid burning. Roast until makhana are crisp and crunchy like popcorn. Keep aside and let them cool.


STEP 2 - In a bowl whisk the chilled curd .


STEP 3 - Then season it with rock salt, regular salt, roasted cumin powder, black  pepper powder and sugar . 


STEP 4 - Add flaxseeds and stir everything well and keep aside until use.


STEP 5 - Now crush 1/2 of the toasted makhana with your hands or you can add them to a zip lock bag/ morter pestle and crush them roughly. Keep some whole. 


STEP 6 - Add the crushed and whole makhana to the seasoned whisked curd with chopped green chilli and mix well.


STEP 7 - Lastly, add pomegranate arils and coriander and give  a nice mix.


STEP 8 - Makhana Raita is ready to serve.

Serve the healthy and delicious makhana raita immediately with biryani , kichadi , any rice based dish or any meal as a side dish.

NOTES - * Ghee toasting adds a lovely nutty flavor to the bland makhana so, i would highly recommend it. However you may dry roast the makhana if you do not want to use ghee.

* Be patient while toasting makhana or foxnut and make sure to roast them on low-medium flame. Do not hurry while roasting the makhana. A perfectly roasted makhana should be crisp and crunchy like popcorn.

* Add the toasted makhana to the seasoned curd just before serving as it may become soggy if kept for long time.

* If you chill the raita further, it thickens slightly. So you can add some water to thin the raita.

* The recipe can be easily scaled to make a bigger or smaller batch.

* You can adjust the quantity of spices as per your taste.

* Addition of flaxseeds is totally optional.  You can skip it, if you don't like.

* If you want to make this makhana raita as a fasting food for ekadashi vrat keep it simple and just add roasted cumin powder and rock salt. You may add red chili powder, chopped green chilies, powdered dry mint etc also to spice the raita if desired.

* I like my raita to be little sweet so I have added some sugar to balance the heat and the sourness , if you don’t want then skip sugar.


Wednesday, 22 November 2023

MAKHANA NAMKEEN

 I  recently started to use phool makhna and I am already loving it. So handy when you want something to snack on, light on tummy and easy to make too. Phool makhna or lotus seeds is a power house of nutrition. Rich in fiber and they are low on calories too. Phool makhna is widely used in Indian cuisine like roasted makhna, makhna kheer, raita, curry etc. I tried some of them and yet to try some of those. I made this super easy and delicious makhna namkeen. We all love sweet and spicy chivda recipe or mixture recipes at home. To make makhna namkeen / chivda I just followed my traditional poha chivda recipe. I have just replaced poha with roasted makhana. As usual I tried a no deep fry version and it was such a light, healthy and non greasy snack. If there is a chance in any recipe to be tweaked with less oil I just do that and save the deep frying for another recipe 🙂Keeping in mind the nutritious benefits of Makhanas, I have come up with this healthy yet delicious Makhana Namkeen Recipe.


The benefits of eating this desi snack are endless and very well known in every Indian household but its time to eat this wonder nut beyond your pooja and prasad!If you are a Makhana lover like myself and want to relish a good recipe or two without having to  worry about those extra pounds you can try this Namkeen Makhana recipe.


If you found this post useful, I would really love it, if you pin it or share it with your Facebook Instagram fans followers or Google+ circles today. All it takes is a simple click on the “pin it” “like,” “share,” “tweet,” or Google+ buttons below the post. It will keep me motivated. Thank  you!

📌📌 Watch the full video recipe here 📌📌


INGREDIENTS :

2 Cup Phool Makhana / मखाने 

1/4 Cup Peanuts / शेंगदाणे 

2 tablespoon Coconut Flakes

15-20 Cashewnuts / काजु 

15-20 Almonds / बदाम 

15-20 Raisins / मनुके 

Few Curry Leaves / कढी पत्ता 

1/4 teaspoon Turmeric Powder / हळद 

1 teaspoon Red Chilli Powder / तिखट 

1/4 teaspoon Black Pepper Powder / मिरे पूड 

1/2 teaspoon Cumin Powder/ जीरा पावडर 

1/2 teaspoon Chaat Masala / चाट मसाला 

1/2 teaspoon Aamchur Powder / आमचूर पावडर 

1/4 teaspoon Asafoetida/ हिंग 

Salt to taste

2 tablespoon Ghee / Oil

METHOD :

STEP 1 - Heat ghee in a pan - add makhana roast until crisp. Check if you break and see it should be crisp that is the correct stage. ( see notes )


STEP 2 - Transfer to plate and set aside.


STEP 3 - In the same pan, heat 1 tablespoon ghee/oil .


STEP 4 - Add  peanuts roast until golden then add coconut flakes, cashews, almonds and raisins. Roast until golden brown. Transfer on a plate. Keep aside.


STEP 5 - Then add curry leaves and fry until crisp. Transfer on a plate.


STEP 6 - Heat the remaining ghee in the pan. 


STEP 7 - Add all the spice powders, salt and mix and cook for 30 seconds.


STEP 8 - Finally add roasted makhana with all the other ingredients and toss it well on low flame.


STEP 9 - Switch off the flame and transfer it to a serving bowl.


STEP 10 - Cool down Makhana Namkeen for a while, then store in an airtight container or serve immediately.


Namkeen Makhana keeps well for 7-10 days when stored airtight. Serve this chivda with evening tea or coffee.


NOTES - * To make it more healthy, dry roast makhana without any oil / ghee.

* Roast makhana on low flame for 8-10 minutes.There will not be much of color change. Just check by breaking it between two fingers.

* Increase or decrease spice level as per taste.

* Add any nuts of your choice.

Thursday, 2 November 2023

CHANDRAKALA/ चंद्रकला

 Chandrakala is a very elegant and royal Indian sweet usually made during Diwali and Holi in North India. With a lot of variation it is also made in Maharashtra and south Indian States. It is quite similar to the humble Gujiya  but richer in taste and looks. Unlike the Gujiya, it is round in shape and hence the name Chandrakala. It is also rightly called Rasbhari Chandrakala because when you bite into it you can taste the sugar syrup and sometimes it might drip down also. Making Chandrakala is an art, but with a little patience you can sail through this process easily . The outer covering is made of flour and the stuffing is traditionally made using dry fruits like raisins, coconut, almonds, and cashews, along with khoya, semolina, cardamom, sugar, and pistachio. 


CHANDRAKALA gets the name from the shape. Chandrakala in Chandra means Moon, so it can half-moon shaped. Chandrakala recipe is very famous and very rich Indian sweets found in sweet stalls but we can make it at home too. Chandrakala sweet, is Indian Diwali sweets prepared with maida and khoya as main ingredients. These are prepared during Deepavali festivals or on special occasions at home. Quite a rich sweet as we stuff with koya and drynuts mixture and a syrupy outer layer, perfect for celebrations and festivals.  The difficult part is the folding method of the sweet. But by practise you can make a super perfect foldings of the sweet. The beauty of the sweet is the foldings and then the taste of the sweet. Though the preparation of this sweet is little bit lenghty process but the sweets tastes so delicious.


If you found this post useful, I would really love it, if you pin it or share it with your Facebook fans or Twitter followers or Google+ circles today. All it takes is a simple click on the “pin it” “like,” “share,” “tweet,” or Google+ buttons below the post. It will keep me motivated. Thank  you!

📌📌 Watch the full video recipe here 📌📌

INGREDIENTS :

TO MAKE THE DOUGH -

1 Cup Maida

2 tablespoon Ghee

Salt a pinch

Oil to deep fry

FOR SYRUP -

3/4 Cup Sugar

½ Cup Water

1 or 2 drops of Rose Essence OR  1 Cardamom powder 

Few Saffron strands 

FOR STUFFING - 

1 Cup Khoya

1 tablespoon roasted Semolina/ Rava

2 tablespoon desiccated Coconut 

2 tablespoon powder Sugar

1/2 teaspoon Cardamom powder

1/4 teaspoon Nutmeg powder 

2 – 3 tablespoon chopped Dry-fruits 

1 tablespoon Raisins 

METHOD :

PREPARATION OF DOUGH -

STEP 1 - Prepare dough by mixing maida + salt +  melted ghee . 


STEP 2 - First mix this well to resemble bread crumbs. Take some mixture in your hand and try to press. If it holds the shape then the moyan is perfect.


STEP 3 - Add water little by little to make dough.


  STEP 4 - Cover and keep aside for 30 mins.

PREPARATION OF STUFFING -

STEP 1 - Heat a heavy bottom pan, add crumbled khoya & roast for 2-3 minutes. Switch off the flame.


STEP 2 - Transfer into a bowl. 


STEP 3 - Now roast the semolina for 2-3 minutes and mix with khoya. 


STEP 4 - Let it cool completely. Mix all the ingredients of filling together and give a nice mix.


STEP 4 - Finally, add powder sugar and mix everything well until combined.


PREPARATION OF SUGAR SYRUP -

STEP 1 - Add sugar and water in a sauce pan and cook it on low flame.


STEP 2 - Prepare sugar syrup by boiling on medium- low flame till sticky consistency. ( half string consistency ). Off the flame and add rose essence / cardamom powder and saffron strands. Keep aside.


MAKING & SHAPING CHANDRAKALA -

STEP 1 - After the resting time, knead the dough again to make it into smooth and soft without any cracks.

STEP 2 - Divide the dough into 2 parts.

STEP 3 - Take one dough ball, roll to a thin sheet ,cut with lid as shown in pic .

Remove the extra dough and mix with the remaining dough.

STEP 4 - Take 2 circles ,add 2 tsp stuffing in the centre of one disc.


STEP 5 - Apply water on the edges. 

STEP 6 - Cover with another circle. The edges should have less dough part, if too much dough is there, then you can trim with knife. Otherwise the edges will take long time to get cooked. Also the edges too thin, if the edges are thin then it may turn very crisp.


STEP 7 - First press at the edges to seal completely. Make sure to fold properly otherwise the stuffing  might ooze out  and spoil the oil

STEP 8 - Pinch fold and twist the edges continuously with your thumb and first finger to get pattern as shown in pic . The folding comes by practice.

Likewise, make all and keep covered with a damp cloth.

STEP 9 - Heat oil in a kadhai .


STEP 10 - Slide in  2- 3 chandrakala at a time. 


STEP 11 - Cook on a  medium to low  flame.  If the oil is too hot, khoya will sure come out, so do not let the oil become very hot .

STEP 12 - Keep turning to ensure even browning. and fry until golden brown.


STEP 13 - Drain the excess oil and then add it to warm sugar syrup.


STEP 14 - Let it soak for 5 mins. After that turn so that the other side is also well coated with sugar syrup.


STEP 15 - Drain the extra sugar syrup and remove it from the syrup. Similarly, fry all and soak in sugar syrup.

STEP 16 - Arrange them on a plate / box .


STEP 17 - Decorate each chandrakala with a small piece of silver varq on top and sprinkle a little chopped pista.


Your ROYAL looking and delicious Chandrakala sweet is now ready to serve.


NOTES - * After mixing ghee, take some mixture in your hand and try to press. If it holds the shape then the moyan is perfect.

* Stuff with enough khoya mixture to get good looking chandrakala. Otherwise it will look flat.

* Make sure to fold properly otherwise the khoya might leak and spoil the oil. If the oil is too hot, khoya will sure come out, so do not let oil smoke.

* While folding, the edges should have less dough part and the beauty of the sweet is the folding design.

* While frying the Chandrakala, once they start to puff up reduce the heat to low and fry till light brown.

* If you cook in low to medium flame only the outer layer will be soft enough to absorb the syrup.

* You can use ghee/vanaspati or mix with oil and fry for best taste .

* Do not let the syrup pass more than 1 string consistency. For this sweet 1/2 string consistency is more than enough. For safer side you can add few drops lemon juice to prevent crystallization.

* See that the chnadrakal absorves sugar syrup well . The syrup should go inside the sweet, so make sure to soak for enough time 2-3 mins is enough. Keeping the syrup hot helps.

* The chandrakala sweet becomes soft next day and tastes, smells best from next day.