_________________I am Mrs. Kalpana Mhaske, a Home-Maker, from the city of 52-Gates, one of the famous heritage- destination of the world- Ajanta - Ellora Caves, Bibi-Ka- Maqbara (The Taj of Deccan) and Deogiri Fort. i.e. AURANGABAD. I admire cooking - tryout and innovate different cuisines. Basically, both of my gorgeous daughters are foodie, they have always encouraged me in the kitchen and forced to carve a Food Blog, that’s why, I am happy to share the makings with you. I am an artist too. Painting – especially, Canvas-Painting is my one more hobby. In total - Ours is an ART-FAMILY, my husband is an Architect. In the end, I keep the same belief with Louise Fresco - “ Food, in the end, in our own tradition, is something holy. It's not about nutrients and calories. It's about sharing. It’s about honesty. it’s about identity ”

Saturday, 17 June 2017

RAWA IDLI / SAMOLINA IDLI

I have been wanting to try rawa idli for a while now. I had seen the rawa idli recipe some time back and the idlis were supposed to be instant. So I thought I will make rawa idli which is Instant Rawa Idli which is prepared with semolina and curd with veggies. This is one of my favourite idli recipe. South Indian cuisines are known for their variety of idli and dosa collection. I love this recipe because it is instant. For example, sometimes I feel lazy to soak, grind and ferment the idli batter. During those period, I go for instant breakfast recipes. Rawa idli gets made at home when we want some quick and easy idlis. As I love lidli and dosa anytime of a day, I never say no to the different idli varities. In this recipe you have to use veggies according to your choice. Just grate them and add it in the batter. If you are adding green peas then just boil the peas beforehand and also keep ready the grated veggies. So here is my Instant Rawa Idli recipe with step by step pictures.

INGREDIENTS:
2 Cups Semolina (rava)
1 Cup Curd
2 tablespoon Oil
½ tablespoon Mustard Seeds
½ tablespoon Cumin Seeds
1 tablespoon Split Bengal Gram (Chana dal)
2 Green Chillies
10 Cashew nuts, broken
Few strands of Curry Leaves
1 ½ tablespoon Fruit Salt
Salt to taste
Desiccated  Coconut[optional]

METHOD:
STEP 1 -  Heat the 1 tablespoon oil in pan. Add mustard seeds, cumin and Bengal gram splits.
STEP 2 -  When seeds crackle add cashew nuts, curry leaves, green chili and mix well.
STEP 3 -  Add semolina (rava) and sauté for 5 minutes on low flame or till it becomes light brown.
STEP 4 - Remove semolina in bowl from pan and let it cool down.Add desiccated coconut, chopped coriander in it.
STEP 5 -  When it cools down, add curd, 1 ½ cup water, and salt and mix well.
(Add the water if needed to make it idli batter consistency).
STEP 6 -  Mixture is ready, cover the bowl and keep aside for 10 minutes.
STEP 7 - Put steamer on stove with sufficient water. And grease the idli mold with oil.
STEP 8 - In the mixture add fruit salt and whisk well
and pour the mixture in a greased idli mold.
STEP 9 -    Steam it for 10 minutes in the steamer.
STEP 10 -  Remove and serve hot with chutney or sambhar.
 Serve hot idlis with coconut chutney and sambar and enjoy instant rawa idlis.


STUFFED PANEER BREAD PAKODA

We have seen earlier how to make regular bread pakodas/pakoras. This time give your desi fritters a delicious twist with some cottage cheese[paneer] stuffing with this paneer bread pakora recipe.Bread paneer pakora makes an amazing snack whenever you want to eat something different. You can make this crispy snack and serve it piping hot as evening snack or breakfast in rainy days with a hot cup of tea.  Serve these delectable paneer bread pakoras with green mint chutney and tomato ketchup or any other chutney. 

INGREDIENTS:
4 Bread slices
1 1/2 cup Besan
150 grams Paneer
3-4 tablespoon Coriander, chopped
1 teaspoon Ginger-Garlic Paste
2 teaspoon Red Chilli Powder
1/4 teaspoon Turmeric Powder
Salt for taste (for besan batter + for Paneer stuffing)
A pinch Baking Soda
1 teaspoon Sesame Seeds
1 teaspoon Caram Seeds
1/2 teaspoon Chaat Masala
Oil, for frying
Mint/ Coriander Chutney[optional]

METHOD:
For Making Besan Batter:
STEP 1 - Take a bowl, add besan flour, caram seeds, sesame seeds, red chilli powder, turmeric powder with water.
STEP 2 - Make a lump free batter. The batter should not be very thick or thin.and salt in the besan batter and mix well.
STEP 3 - At last add baking soda to the batter and mix it. Your batter is ready. Keep it aside.

For Paneer Stuffing:
STEP 1 - Take paneer in a bowl and crumble it.
STEP 2 - Add salt, chopped green chillis, chopped coriander and chaat masala.
Mix it well and your paneer stuffing is ready.

How to Proceed:
STEP 1 - Place one bread on a kitchen platform or a plate. Put stuffing over it and spread evenly.[see notes]
STEP 2 - Now place another bread slice over it.
STEP 3 - Cut the bread slice diagonally with the help of knife. Keep aside.
STEP 4 - Heat oil in a wide kadai. Check it by putting little batter in it. If it comes out then your oil is reday for frying.
STEP 5 - Now pick the bread stuffed with paneer filling and put it in besan batter.
STEP 6 - Coat it from all the sides with besan batter carefully.
STEP 7 - Slide it gently in oil for frying. Fry till golden brown from both the sides.
STEP 8 - Remove from kadai and keep them on tissue paper or kitchen towel to drain excess oil.
STEP 9 - Paneer stuffed bread pakoda is ready to serve.
STEP 10 - Serve it with green mint chutney, or tomato sauce or tamrind chutney.

NOTE: *If you want to make small sized pakodas. Then cut the bread into four pieces and then dip in besan batter and fry.
            *If you like you can use chopped ginger-garlic instead of paste. If chaat masala is not there then you may use garam masala + amchur powder + coriander powder.
            *You can use veggies with the paneer for stuffing. Coat the bread and immediately take out from the batter, because there are chances of breaking.
            *You may spread mint/ coriander chutney on bread slices.

CABBAGE VADA


Here is a very, simple crispy yet delicious vada recipe that is popular in south India. This cabbage vada is easy and quick to prepare. Deep fried made with crushed lentils and chopped cabbage, coriander leaves and onions. Cabbage vada are a kind of vada that are made with either mixed dals or only with chana dal and cabbage. This is tasty and the best rainy season snack. Rainy season started here and we relished this yummy snack during last night when it’s raining heavily outside at my place. No doubt we enjoyed it a lot. I already shared few pakoda and vada recipes before in my blog. I have used as chillies as well as red chilli powder for my recipe. You can of course adjust the amount of spices as per your liking spiciness. It makes a lipsmacking combo with your hot cup of coffee or tea.Here goes the super delicious and simple recipe with step-by-step pictures.


INGREDIENTS:
1 cup Chana dal
1 cup Shredded Cabbage
1/2 cup Onion, chopped
1/4 cup Coriander, chopped
1/4 cup Capsicum, chopped
1 teaspoon Garam masala
2-3 teaspoon Red Chilli Powder, as per desired taste
Salt, for taste
1 teaspoon Sesame Seeds
1 teaspoon Caram Seeds
1 teaspoon Ginger-Garlic Paste
Besan , for binding
1 teaspoon Saunf
Oil, for deep frying
Hing, a pinch

METHOD:
STEP 1 - Wash, rinse and soak the chana dal in enough water for 2-3 hours.
STEP 2 - Drain the dal and add it to mixer grinder and grind it coarsely without water.
Transfer to a bowl.
STEP 3 - Add red chilli powder and other spices with chopped veggies in it.
STEP 4 - Mix well and your batter is ready. Adding besan to this helps to bind the batter good.
STEP 5 - Heat oil in a wide vok on medium flame.
Take a small ball out of the batter and flat it to vada shape.
STEP 6 - Make vadas with the rest of the batter.
Drop it out in hot oil carefully for frying.
STEP 7 - When done from one side, flip it over and continue frying in low medium flame.
STEP 8 - Fry the vada till golden brown and crisp on both sides. Drain on paper towel/ kitchen towel to remove excess oil from vadas.
STEP 9 - Cabbage vadas are ready to serve. Serve hot vadas with mint chutney/ tomato ketchup or any of your favorite dip.


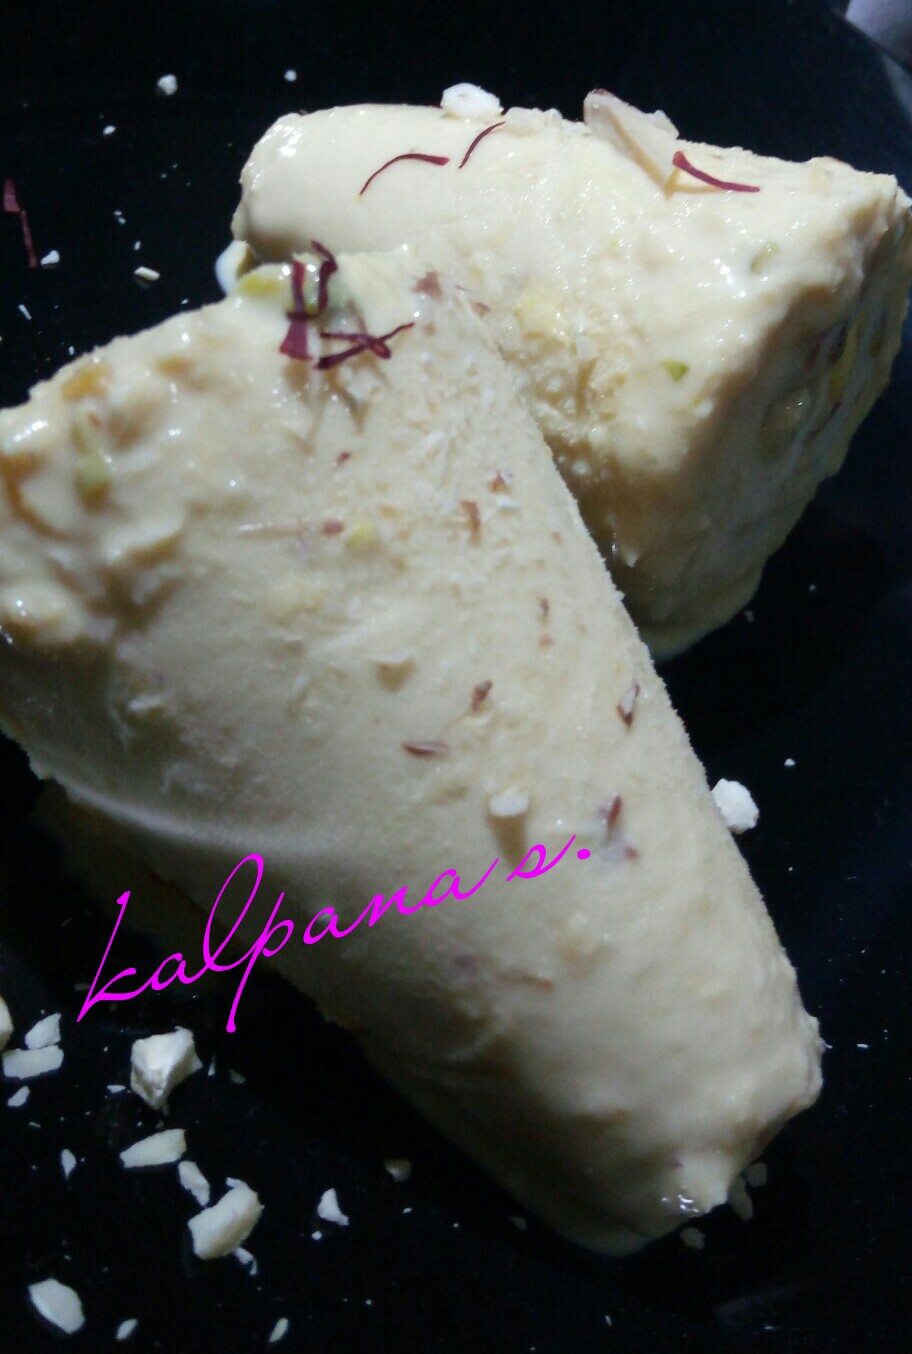
MALAI KULFI

Kulfi recipe, a traditional Indian ice cream made with full fat milk. Kulfi is undoubtedly India’s best sweet dessert on stick and is a delicious summer treat!  This classic, creamy traditional ice cream is centuries old and has been passed down from the Mughal kitchens. A rich frozen dessert that has made with reduced full fat milk and flavoured with either cardamom or saffron. Easy to cook and very popular frozen dessert. Malai kulfi has similarities to ice cream in appearance and taste; however it is denser and creamier. I really believe that I have finally found the perfect recipe for everyone’s favourite malai kulfi! Seriously for me, kulfi over ice cream any day. Not saying I don’t like ice cream but when I crave kulfi, I want kulfi and ice cream is not a substitute.It is popular throughout places such as India, Pakistan, Bangladesh, Nepal and Middle East and widely available in Indian Restaurants in Australia, Europe and North America. These days you gets all sorts of kulfi in the market- mango, chocolate, paan and even strawberry kulfi. My daughters and husband declared it as the best kulfi ever, so friends you really need to try this recipe. This is not only easy but hygienic to make kulfi at home so do try and surprise your kids, I am sure they will enjoy homemade kulfi.

INGREDIENTS:
1 liter Full Fat Milk
1/3 cup Sugar
1/4 teaspoon Cardamom Powder
1 pinch Saffron
10-12 Almonds, chopped
10-12 Pistachio, chopped
10-12 Cashews, chopped
1/2 cup Whipping Cream/ Low Fat Cream
2 teaspoon Rose Water/ Kewra Water (optional)
Keep some chopped nuts for garnishing

METHOD:
STEP 1 - Take milk in a heavy bottom pan on a low flame. Bring it to a boil.
STEP 2 - Do stir when the milk gets heated up, so that it does not burnt from the bottom.
STEP 3 - Stir once the milk comes to a boil and add the malai back to the milk.
STEP 4 - Continue to cook on low flame till it reduce to 1/2 of its original volume.
STEP 5 - Keep on stirring and remove the clotted cream which forms on the top of the milk and add it back to the milk.
STEP 6 - This way stirring often, reduce the milk to 1/3 of its original volume.
STEP 7 - Keep the flame to a low and add 1/3 cup sugar. Stir so that the sugar gets dissolved.
STEP 8 - Then add 1/4 teaspoon cardamom powder and a pinch of saffron strands with chopped nuts.
STEP 9 - Add 1/2 cup whipping cream (you can use low fat cream), mix the cream very well.
STEP 10 - Keep the flame low, just bring a gentle boil. When the kulfi mixture comes to boil, the switch off the stove.
STEP 11 - Add 2 teaspoon rose/kewra water, mix it.
STEP 12 - Cover and let the mixture cool at room temperature.
STEP 13 - Once cool down, pour the kulfi mixture in kulfi moulds or popsicle moulds or kulhads or matka.

STEP 14 - Cover tightly with lids or aluminium foil. Freeze the kulfi for about 7-8 hours or overnight.
STEP 15 - Before serving the kulfi take the kulfi mould and just warm it by moving it between your palms.
STEP 16 - With knife or back of spoon, slid through the sides. If using kulhads then directly have the kulfis from it.
STEP 17 - Place the malai kulfi on a serving plate and sprinkle some finely chopped nuts. If you don't like you can skip this step.
STEP 18 - Serve the kulfi immediately.

NOTE: *Some khoya/ milk powder can be used.
            *Use full fat milk to get the best results.
            *Do make sure that the milk does not get burnt, so simmer on a low flame and stir often. Use a heavy bottomed pan.
            *You may add heavy cream instead of low fat cream.