_________________I am Mrs. Kalpana Mhaske, a Home-Maker, from the city of 52-Gates, one of the famous heritage- destination of the world- Ajanta - Ellora Caves, Bibi-Ka- Maqbara (The Taj of Deccan) and Deogiri Fort. i.e. AURANGABAD. I admire cooking - tryout and innovate different cuisines. Basically, both of my gorgeous daughters are foodie, they have always encouraged me in the kitchen and forced to carve a Food Blog, that’s why, I am happy to share the makings with you. I am an artist too. Painting – especially, Canvas-Painting is my one more hobby. In total - Ours is an ART-FAMILY, my husband is an Architect. In the end, I keep the same belief with Louise Fresco - “ Food, in the end, in our own tradition, is something holy. It's not about nutrients and calories. It's about sharing. It’s about honesty. it’s about identity ”

Friday, 5 April 2024

ROOH AFZA THANDAI

 I know I am little late but Happy Holi and Ramzan Mubarak to all of you. Not only Holi but the Holy month of Ramadan is also here. So thought about sharing this recipe which goes well for both the occasions .


Rooh afza milkshake - I know you all know about this summer drink which is very easy to make recipe and it's very cooling and refreshing. But do try this Rooh Afza Thandai and I bet you will definitely going to love it. Well, it is very popular summer cooling drink that every Indian has tried. If not then you must.

I hope everyone know what is Rooh Afza but if you don't know, " Rooh Afza "is a concentrated syrup made from fruits, vegetables, herbs, flowers and roots with sweet rose scent. The meaning of the name is rooh = soul and afza = enhances or nourishes. As per the name, it does its job too, this drink enhances or nourishing the soul. More about it read wikipedia. Rooh Afza is a staple drink for most people in India, Pakistan and Middle East during Ramadan and Summer. It has a nice aromatic rose flavor and cooling ingredients that make it a perfect thirst quencher for Summer. Rooh afza can be added to water, milk, ice cream, yogurt, kheer, kulfi or falooda. This syrup adds sweet and aromatic flavor to the dish. Few days back I made this thandai with rooh afza syrup.

Thandai or Sardai is a refreshing Indian drink, loaded with goodness and richness of nuts, saffron, fennel seeds, cardamom, white poppy seeds, peppercorns! I love the fact that you can prepare it in advance by making thandai powder /paste. And on the day of the festival, you can make this drink in a matter of minutes. This way, you can enjoy celebrating the vibrant festival of Holi and save time in the kitchen. 

As Holi comes in March and the weather becomes much warmer, this drink helps to quench your thirst. Ramzan 2024 is also in full swing across the world. Rose-flavoured drinks and desserts are commonly consumed. It keeps you hydrated when you are in the sun for hours.

Apart from its delightful taste, Thandai has some eminent benefits for your body. It helps boost immunity, gives instant energy, soothes body internally due to heat, and aids digestion.

Though readily available in the market as an instant Thandai syrup, I prefer the natural and healthier version of homemade Thandai. I suggest making the basic thandai paste / powder first ( both recipes are available on my blog ) and then use only a teaspoon as a recommended serving size per glass.

One can go with any choice of flavorings to make this festive drink. However, the flavors that I used here work pretty well in combination with basic Thandai ingredients. Everyone would relish the plain version, but I encourage you to go extra fancy with these flavors. Besides luscious taste, the beautiful and vibrant colors add to the excitement of the festival of Holi. Add some rose syrup-like rooh afza to the thandai. Consider adding a few drops of rose essence and fresh/dried rose petals on top for gorgeous aroma and look. 

Making this yummy and enjoyable drink is not limited to only Holi/ Ramzan . You can enjoy it in hot summer months to feel at ease. I love its texture and enjoy the nutty-ethereal taste. In India, special occasions are incomplete without sumptuous foods and drinks. Having soul-satiating food adds to the fun and frolic nature of any celebration. I hope you enjoy this recipe and have fun rejoicing the glorious festival of colors.

First things first that instantly come to my mind when someone says Holi is gulaal, pichkari, gujiya, and thandai. And since food is my thing, I’ll talk more about that part. You can find the gujiya recipe in my other Holi-special blogpost. In this post, you will get to know how to make rooh afza flavour thandai . This flavors is my particular favorite, but you can easily customize flavors as per your liking too. You will find simple thandai and chocolate thandai recipes on by blog.

It has a cooling effect on the body and hence the name Thandai. All thanks to its vital ingredient khus khus or white poppy seeds. Traditionally, devotees of Lord Shiva made Thandai with a dose of Bhang (Cannabis) in it, to celebrate MahaShivratri. Slowly the tradition of consuming Thandai during the festival of Holi became a norm too. Even today, some people add the weed in it to make it intoxicating. Apart from its delightful taste, Thandai has some eminent benefits for your body. It helps boost immunity, gives instant energy, soothes body internally due to heat, and aids digestion.

Though readily available in the market as an instant Thandai syrup, I prefer the natural and healthier version of homemade Thandai. I suggest making the basic thandai paste first and then use only a teaspoon as a recommended serving size per glass. So if you are making Thandai for ten people, use ten teaspoons with seven cups of cold milk and three cups ice-cold water. Further, add ice-cubes for enhanced cold taste. You can also consider making this drink vegan by using almond or soy milk. 


One can go with any choice of flavorings to make this festive drink. However, the flavors that I used here work pretty well in combination with basic Thandai ingredients. Everyone would relish the plain version, but I encourage you to go extra fancy with these flavors. Besides luscious taste, the beautiful and vibrant colors add to the excitement of the festival of Holi.

With Fruits – You can puree your choice of fruits and add it in for more flavor such as Guava, Mango, Strawberry, Banana, etc. Making this yummy and enjoyable drink is not limited to only Holi. You can enjoy it in hot summer months to feel at ease. I love its texture and enjoy the nutty-ethereal taste. Team it up with other lip-smacking snack options like gujiya, mawa kachoris, bread pakodas, dahi or vegetarian galouti kebabs. In India, special occasions are incomplete without sumptuous foods and drinks. Having soul-satiating food adds to the fun and frolic nature of any celebration. I hope you enjoy this recipe and have fun rejoicing the glorious festival of colors. Happy Holi!! 

Rooh afza milkshake / thandai is very often during the summer at my place. This is very healthy, cooling and refreshing summer milkshake unlike other milkshakes made using ice creams.

📌📌 Watch the full video recipe here 📌📌


 INGREDIENTS  :

1 tablespoon  Instant Thandai Powder/ Paste, 1-2 teaspoon Rooh Afza (sweet rose syrup) 2 2 Cup Cold Milk 

1 tablespoon Gulkand ( optional )

1 -2 tablespoon Powder Sugar ( adjust according to your taste )

Ice cubes

 For garnishing :

Fresh/dried Rose Petals 

 Chopped Mixed Nuts

1 teaspoon Rose Syrup 

METHOD :

STEP 1 - Pour cold milk  in mixer jar.


STEP 2 - Mix in thandai powder/paste, powder sugar, gulkand and rooh afza syrup.

STEP 3 - Blend everything well and strain if needed. I prefer to have it without straining.


STEP 4 - Once everything is mixed thoroughly, add few ice cubes and blend again for 1 minute.


STEP 5 - Pour into individual serving glasses and garnish with rose petals, chopped nuts .


Serve chilled!


NOTES - * The thandai  powder/ paste will store well in the refrigerator for up to 10 days. When you start noticing the paste getting foul in smell or sight, please discard it.

* If you wish to get powder instead of paste then avoid soaking the ingredients and roast them over low heat setting in a non-stick pan or oven. And blend with the rest of the ingredients.

* You can reduce or increase the quantity of thandai paste as per your liking and need. Roughly 1 tablespoon per person works best but you can go with the quantity that suits you.

* You can adjust the quantity of milk and water also as per your need. I prefer to add a cup of milk and top the remaining part with ice cubes.

* Again sweeten things up as per your or your guests' likings.

* Customise flavors as per your liking. Use fruit purees like mango, guava, banana, strawberry, or any other fruit of choice. Just blend the pureed fruit with milk and thandai paste or powder.

* Thandai tastes best when it is fresh and cold. That's why I recommend making thandai paste or powder in advance and then make it fresh at the time it is supposed to be consumed.

Monday, 1 April 2024

UDUPI HOTEL STYLE SAMBAR

 Udupi Sambar is a famous dish from the temple town of Udupi, also a city located in the Tulunadu region of southwest coast of India. Udupi cuisine is an integral part of the Tuluva-Mangalorean food repertoire as well.  


It is a fact that the South Indian combination of sambar-rice is one of the most comforting meals that can ever be. And why wouldn’t it be? It is a close relative of the quintessential ‘dal-rice or dal-chawal’ combo that is famous world over. So, here’s the Udupi Sambar recipe – a personal favorite from the world of sambars. This Udupi Sambar is spiced, slightly sweet, tangy, and made with pigeon pea lentils, tamarind, basic Indian spices, herbs and mixed veggies. The vegetables that I have added in this Udupi Sambar are carrot, drumsticks, brinjal (aubergine), cauliflower ( gobhi ), potato, tomato and bottle gourd (lauki). You can use any other veggie that usually goes well in a sambar or available at your place. Adding veggies not only improves the nutrition quotient of the sambar but also makes it filling too.

Udupi Sambar Paste is the USP of this dish. The choicest of spices, chana dal (Bengal gram) and dried red chilies are roasted first and then ground to a lovely fragrant paste with coconut and water. When you add this to the sambar, it’s nothing less than magic! Unlike the Kerala Sambar, this Udupi Sambar has a mild sweetness from the jaggery, some sourness from the tamarind, little spiciness from the chilies and a touch of earthiness from the coconut. It is aromatic and very fulfilling. I would call it an ‘all-rounder!’


This Udupi Sambar recipe is easy to make and can be served with steamed rice, Idli, Dosa or a Mysore Masala Dosa. Please be sure to rate the recipe in the recipe card or leave a comment below if you have made it. For more vegetarian inspirations, Sign Up for my emails and follow me on Instagram, Youtube, Facebook,

📌📌 watch the full video recipe here 📌📌


INGREDIENTS :

1 Cup Toor dal       

1 Drumstick, cut into small pieces 

1/2 Cup Gourd /Doodhi Bhopla 

1 Tomato, chopped 

1 Potato, chopped

1 Carrot, chopped 

1/2 Cup Cauliflower florets 

2-3 Brinjal, chopped 

2-3 tablespoon  Tamarind pulp

1 tablespoon Jaggery 

For Fresh Masala to Roast and Grind :

1 teaspoon Cumin Seeds 

2 Cloves 

1 Green Cardamom 

1 tablespoon Channa Dal    

2 teaspoon Urad Dal     

1/2 teaspoon Methi Dana 

1 teaspoon Rice

1 tablespoon Coriander Seeds/ Dhaniya  

 2 pinches Asafoetida / Hing   

 5-6  Dry Red chilli      

 1 tablespoon Coconut ( preferably kopra )   

5-6 Garlic Cloves 

1/2 inch Ginger 

1 Onion, chopped 

1/2 teaspoon Turmeric Powder / Haldi 

1 tablespoon Red Chilli Powder ( adjust according to your taste )

1 tablespoon Kashmiri Red Chilli Powder 

 1 tablespoon  Oil      

  few Curry leaves    

  Salt  as needed   

For Tadka / Tempering :

2 tablespoon Oil 

1 teaspoon Mustard Seeds 

2-3 Red Chillies 

Few Curry Leaves 

A pinch of Asafoetida / Hing 

METHOD  :

STEP 1 - Wash and soak toor dal for half an hour.

STEP 2 - Heat a kadai, add 1 teaspoon oil 

and roast all the above ingredients given under “to roast & grind”.


STEP 3 - Transfer on a plate and let it cool down completely.


STEP 4 - Grind everything to a smooth paste adding enough water. Keep aside.


How to Make Udupi Sambar  :

STEP 1 - In a pressure cooker, heat remaining oil. 


STEP 2 - Add chopped gourd, potato and carrots and cook for 1 minute.


STEP 3 - Add tomato and salt and mix well followed by adding the other veggies. Cook for 1-2 minutes.


STEP 4 - Add the freshly blended masala paste and mix well.


STEP 5 - Add soaked dal with 2 glass water. Mix everything very well.


STEP 6 - Close the lid and pressure cook for 4 whistles.


STEP 7 - Let the pressure release. 


STEP 8 - Gently mash the dal with a hand whisk. ( optional )


STEP 9 - Add tamarind pulp, jaggery and give it a mix.


STEP 10 - Adjust the consistency by adding water and cook again for 3-4 minutes.


For Tadka / Tempering :

STEP 1 - Heat a tempering pan with 2 tablespoon oil.


STEP 2 - Add mustard seeds and let them crackle.


STEP 3 - Add red chillies and curry leaves and cook for 30 second.


STEP 4 - Add asafoetida and mix well.

STEP 5 - Pour the tempering into sambar and mix well.


STEP 6 - Cook for 2 more minutes.


STEP 7 - Cover the pan with a lid for a few minutes, so that the flavors of the tempering get mixed in the udupi sambar.


Serve Udupi Sambar hot with steamed rice, idli or dosa.


NOTES - * For the lentils, I have used only toor dal but feel free to use moong lentils or a mix of toor and moong dal. 

* You can also make the udupi sambar with an equal mix of toor dal and masoor dal. 

* Choose to add vegetables that you have in your pantry or the veggies that are usually added in a sambar. Keep in mind the cooking time of the veggies and add them accordingly while cooking.

* Adjust the consistency of the sambar as needed by adding less or more water.

Thursday, 28 March 2024

DRYFRUITS - BANANA MILKSHAKE / SMOOTHIE

 Dry fruits - Banana Milkshake is very popular in Indian restaurants and in the juice centers found in the cities of Mumbai and Delhi. Healthy, refreshing, this dry fruits, banana milkshake recipe is the perfect beverage to give you a quick energy boost throughout the day! It includes dried fruits, nuts, banana and  milk. In India, flavoured milks are quite popular all year round and different varieties are prepared depending on the region and weather. If your growing up kids are not in a mood to eat especially during the scorching heat in the summers,  make this a milkshake for them. It was a perfect summer cooler, healthy, filling and nutritious. This Dry Fruit Banana Smoothie is my new favourite drink! It is a healthy drink full of nutrientsis

From boosting your immune system to providing a punch of antioxidants, dry fruit banana milkshakes/ smoothies offer numerous health benefits due to the presence of dry fruits. This is because dried fruits and bananas are –

📝High in vitamins and minerals that support bone health.

📝Rich in dietary fibers that help regulate the digestive system. They are also filling, and this prevents mindless snacking.

📝A good source of antioxidants and help reduce inflammation.

📝High in monounsaturated and polyunsaturated fats lower the risk of heart disease.

📝Banana contains both "quick-release glucose and slow-release fructose". 

📝Banana is a storehouse of good carbs. Banana helps induce weight loss.

📝 Banana is one of the most common fruits, present in every household. 

📝 Dry fruits such as dates, raisins, figs, etc., provide essential nutrients that are rich in fiber and are a good source of antioxidants. The natural sweetener in these fruits can eliminate the need to add sugar to smoothies or milkshakes.


This milkshake is delicious, packed with nutrients like protein, iron, calcium, and is great for boosting energy levels. You can also drink this milkshake during fasting or vrat seasons. This milkshake is very filling so I usually skip a meal after drinking it.It is healthy, fulfilling and a staple across the globe. You may either have it as is or can whip up delicious sweet and savoury dishes with this versatile fruit. Banana has always been stereotyped to be a weight-gaining fruit. But the fact is that it may actually help you lose weight, if taken with a well-balanced meal. It includes zero percent fat and is enriched with good carbs, fibre and protein that helps strengthen muscles and bones. Best for kids to take in the morning to keep them full and fueled.

I got recipe request from my hubby for this dry fruits and banana milkshake. So made and clicked last month. In spite the fact it is not having any ice cream in this milkshake, it turns out thick and rich because of the dry fruit nuts and banana in it. But if you want, you can add a scoop of ice cream too for tempting your kids.

One of the most popular options for a healthy breakfast, this smoothie is a perfect blend of health and taste. Have it as your first meal or as a mid-day treat, this drink fills you up to the fullest. Have it in controlled portions, banana helps you lose weight too. 

To summarize, drinking a dry fruit- banana milkshake is an easy and delicious way to include essential nutrients in your diet. Whether starting your day or refueling after a long day, a dry fruit smoothie can be both satiating and satisfying.

Would love it if you could try out and rate this recipe. Let me know how it was in the comments below. To keep updated with the recipes, stories and so much more follow me on Facebook, Instagram and Youtube shorts @kalpanaslacucina 🥰

📌📌 Watch the full video recipe here 📌📌

INGREDIENTS :

1 Banana 

4 Badam /Almonds

4 Kaju /Cashew nuts

4-5 Pistachios

4 khajur /Dates

5-6 Khishmish / Raisins 

1 Anjeer / Dried Fig

1 Cup Milk 

Few Saffron Strands 

1 Pinch Nutmeg ( optional )

1 Cardamom ( optional )

METHOD :

STEP 1 - Firstly, soak badam, cashew, pistachios, raisins, fig, saffron, dates in 1/2 cup milk for half an hour.

STEP 2 - After that, transfer the soaked dry fruits to mixer jar with the milk.


STEP 3 - Add peeled and chopped banana and also add the remaining half cup milk 


and blend well until smooth.


STEP 4 - Add cardamom powder and nutmeg powder.

STEP 5 - Pour it in a serving glass and serve immediately.


Serve this smooth and thick milkshake immediately with some chopped nuts on the top.


NOTES -  * I have not peeled the almonds, pistachios as it adds fiber to the smoothie, however if you wish you can use peeled ones.

* You can use any milk for this recipe like dairy milk, almond milk, soy milk or oats milk.

* I prefer to use cold milk at room temperature but if you like use chilled milk or sometimes add a couple of ice cubes while blending.

* Always soak the nuts for about an hour in milk so that it is easy to grind the nuts.

* Grinding smooth or chunky depends on your preference, how you like it.

* The nuts ground chunky adds a nice texture if you love to have a texture as you drink to chew.

* Use good quality dates and figs for the best flavour. I would suggest pitted dates for this recipe as they are easier to chop, and it will save you some time as you won’t have to deseed them before blending.

 * You may have some trouble blending them even after soaking. So you can skip it or chop it and then add it.

* You can add other nuts like pine nuts, hazelnuts or macadamia nuts.

* You can also flavour the smoothie with ¼ teaspoon of ground cinnamon or 1 to 2 pinches of nutmeg or ¼ teaspoon of rose or kewra water.

* Use ripe banana for this smoothie.

* Instead of sugar , you can add castor honey or brown sugar.


Thursday, 22 February 2024

SATTU KA PARATHA / सत्तू का पराठा

Sattu Ka Paratha Recipe is made out of sattu which is essentially the roasted channa dal flour. It is one of the vegetarian sources of protein for people of Bihar and used in many authentic Bihari recipes like -​Sattu and Milk Porridge, ​Sattu Sharbat, ​Sattu and Jaggery Balls, ​Sattu Litti, Sattu Bharta, ​Sattu Cheela, Sattu Kebab, Sattu and Coriander Chutney and many more. A most common way to use Sattu is in parathas.


Sattu ka paratha is an immensely popular recipe of paratha in North India. It is a pure Bihari delicacy and one of the most frequently prepared breakfast or lunch in Bihar, Uttar Pradesh and few parts of Bengal. This healthy stuffed paratha is prepared with spicy and flavoured Sattu stuffing. The stuffing is inserted into the wheat dough portions and roll out to flat parathas. Sattu ka paratha is shallow fried in pan with little oil. It is mostly relished with yogurt, pickles or mild curries.

 What is Sattu??

The difference between  besan and sattu because they both look about the same. The difference being that whereas besan is the flour of raw gram, and sattu is the flour of the roasted gram. Roasting the besan it is not same as the flour of roasted chana. Sattu is also high in protein.

Sattu flour is available nowadays in shops but if you cannot find them, then you can always make some right in your own home by grinding some roasted gram dal aka chutney dal/ फुटाणे.

Sattu ka paratha is a very simple and easy recipe. It requires very common ingredients which are very easily available in kitchen pantry. Though the recipe is simple, but it tastes divine. I heard many times about ‘Sattu Ka Paratha’ being one of their traditional food. Today morning, I was wondering what I should make for breakfast. Suddenly, it clicked my mind that I got pair of Sattu packets. Whenever I get Sattu, I always make sure to prepare Sattu ka paratha. The best thing of the Sattu paratha is that it will make you feel full for a long time. So, it is always a great option for heavy breakfast. Hence, everyone loves it in our family. The best part of the dish is that it does not require any side. Yogurt, pickle, chutney or ketchup any of these condiments is enough to accompany the luscious paratha recipe. 


Health benefits of Sattu -->>

[ Sourc -timesofindia.indiatimes.com ]

Sattu is a great ingredient to add to your daily diet if you want to stay fit and disease free. Here are a few health benefits of Sattu-->>>

➡️Natural summer cooler: A drink made out of Sattu is a great drink to quench your thirst during summer. It prevents the body from overheating and brings down the body temperature significantly.

➡️High nutritional value: The dry-roasting process by which Sattu is made, seals in all the nutrients. It is rich in protein, fibre, calcium, iron, manganese and magnesium.

➡️Great for digestion: Sattu has high amounts of insoluble fibre which is great for the intestines. It cleanses the colon, detoxifies it of greasy food, constipation and acidity.

➡️Helps fight diseases: Sattu is a low-glycemic index food and is a great option for diabetics. It keeps blood sugar levels in control and regulates blood pressure. The high fibre in it is great for those suffering from high cholesterol.

➡️Aids weight loss: If you want to reduce weight, start consuming Sattu on an empty stomach. It helps reduce bloating and also enhances metabolism and burns calories effectively.

Read Also - Sattu Benefits for Fitness Freaks

These shallow fried flat breads are a speciality of the Bihar region where the paratha is stuffed with a mildly spiced roasted gram flour filling that makes a great breakfast/ lunch option. My family just loved it  and I am happy that I can include this recipe in our regular diet too. Friends, do try this easy and yummy sattu ka paratha and enjoy for your breakfast/ lunch or dinner ! Do try this recipe and if you ever try this, do share your feedback with us in the comment section bellow. For more updates and new recipes, #Facebook #Instagram and #Google+.


For more simple and easy recipes follow  me on my blog @kalpanaslacucina❤️

📌 Watch the full video recipe here 📌

INGREDIENTS :

For Making Dough -

2 Cups Whole Wheat Flour

1 teaspoon Oil

Salt as needed

1 teaspoon Carom Seeds 

 Water as needed to make a dough

For Stuffing -

1 Cup Roasted Gram Flour ( सत्तू का आटा )

1 Onion , finely chopped

2 Green Chillies , minced ( हिरवी मिरची )

6-7 cloves Garlic , minced ( लसून )

1 inch Ginger , finely chopped / grated  ( अद्रक )

2 teaspoon Carom Seeds ( ओवा )

1 teaspoon Onion Seeds ( कलोंजी )

3-4 tablespoon Coriander  Leaves , chopped

1 tablespoon Mustard Oil/ Ghee

Half Lemon Juice 

2 tablespoon Mango pickle 

More Ghee  or oil for frying the पराठास

METHOD :

How to make the dough -

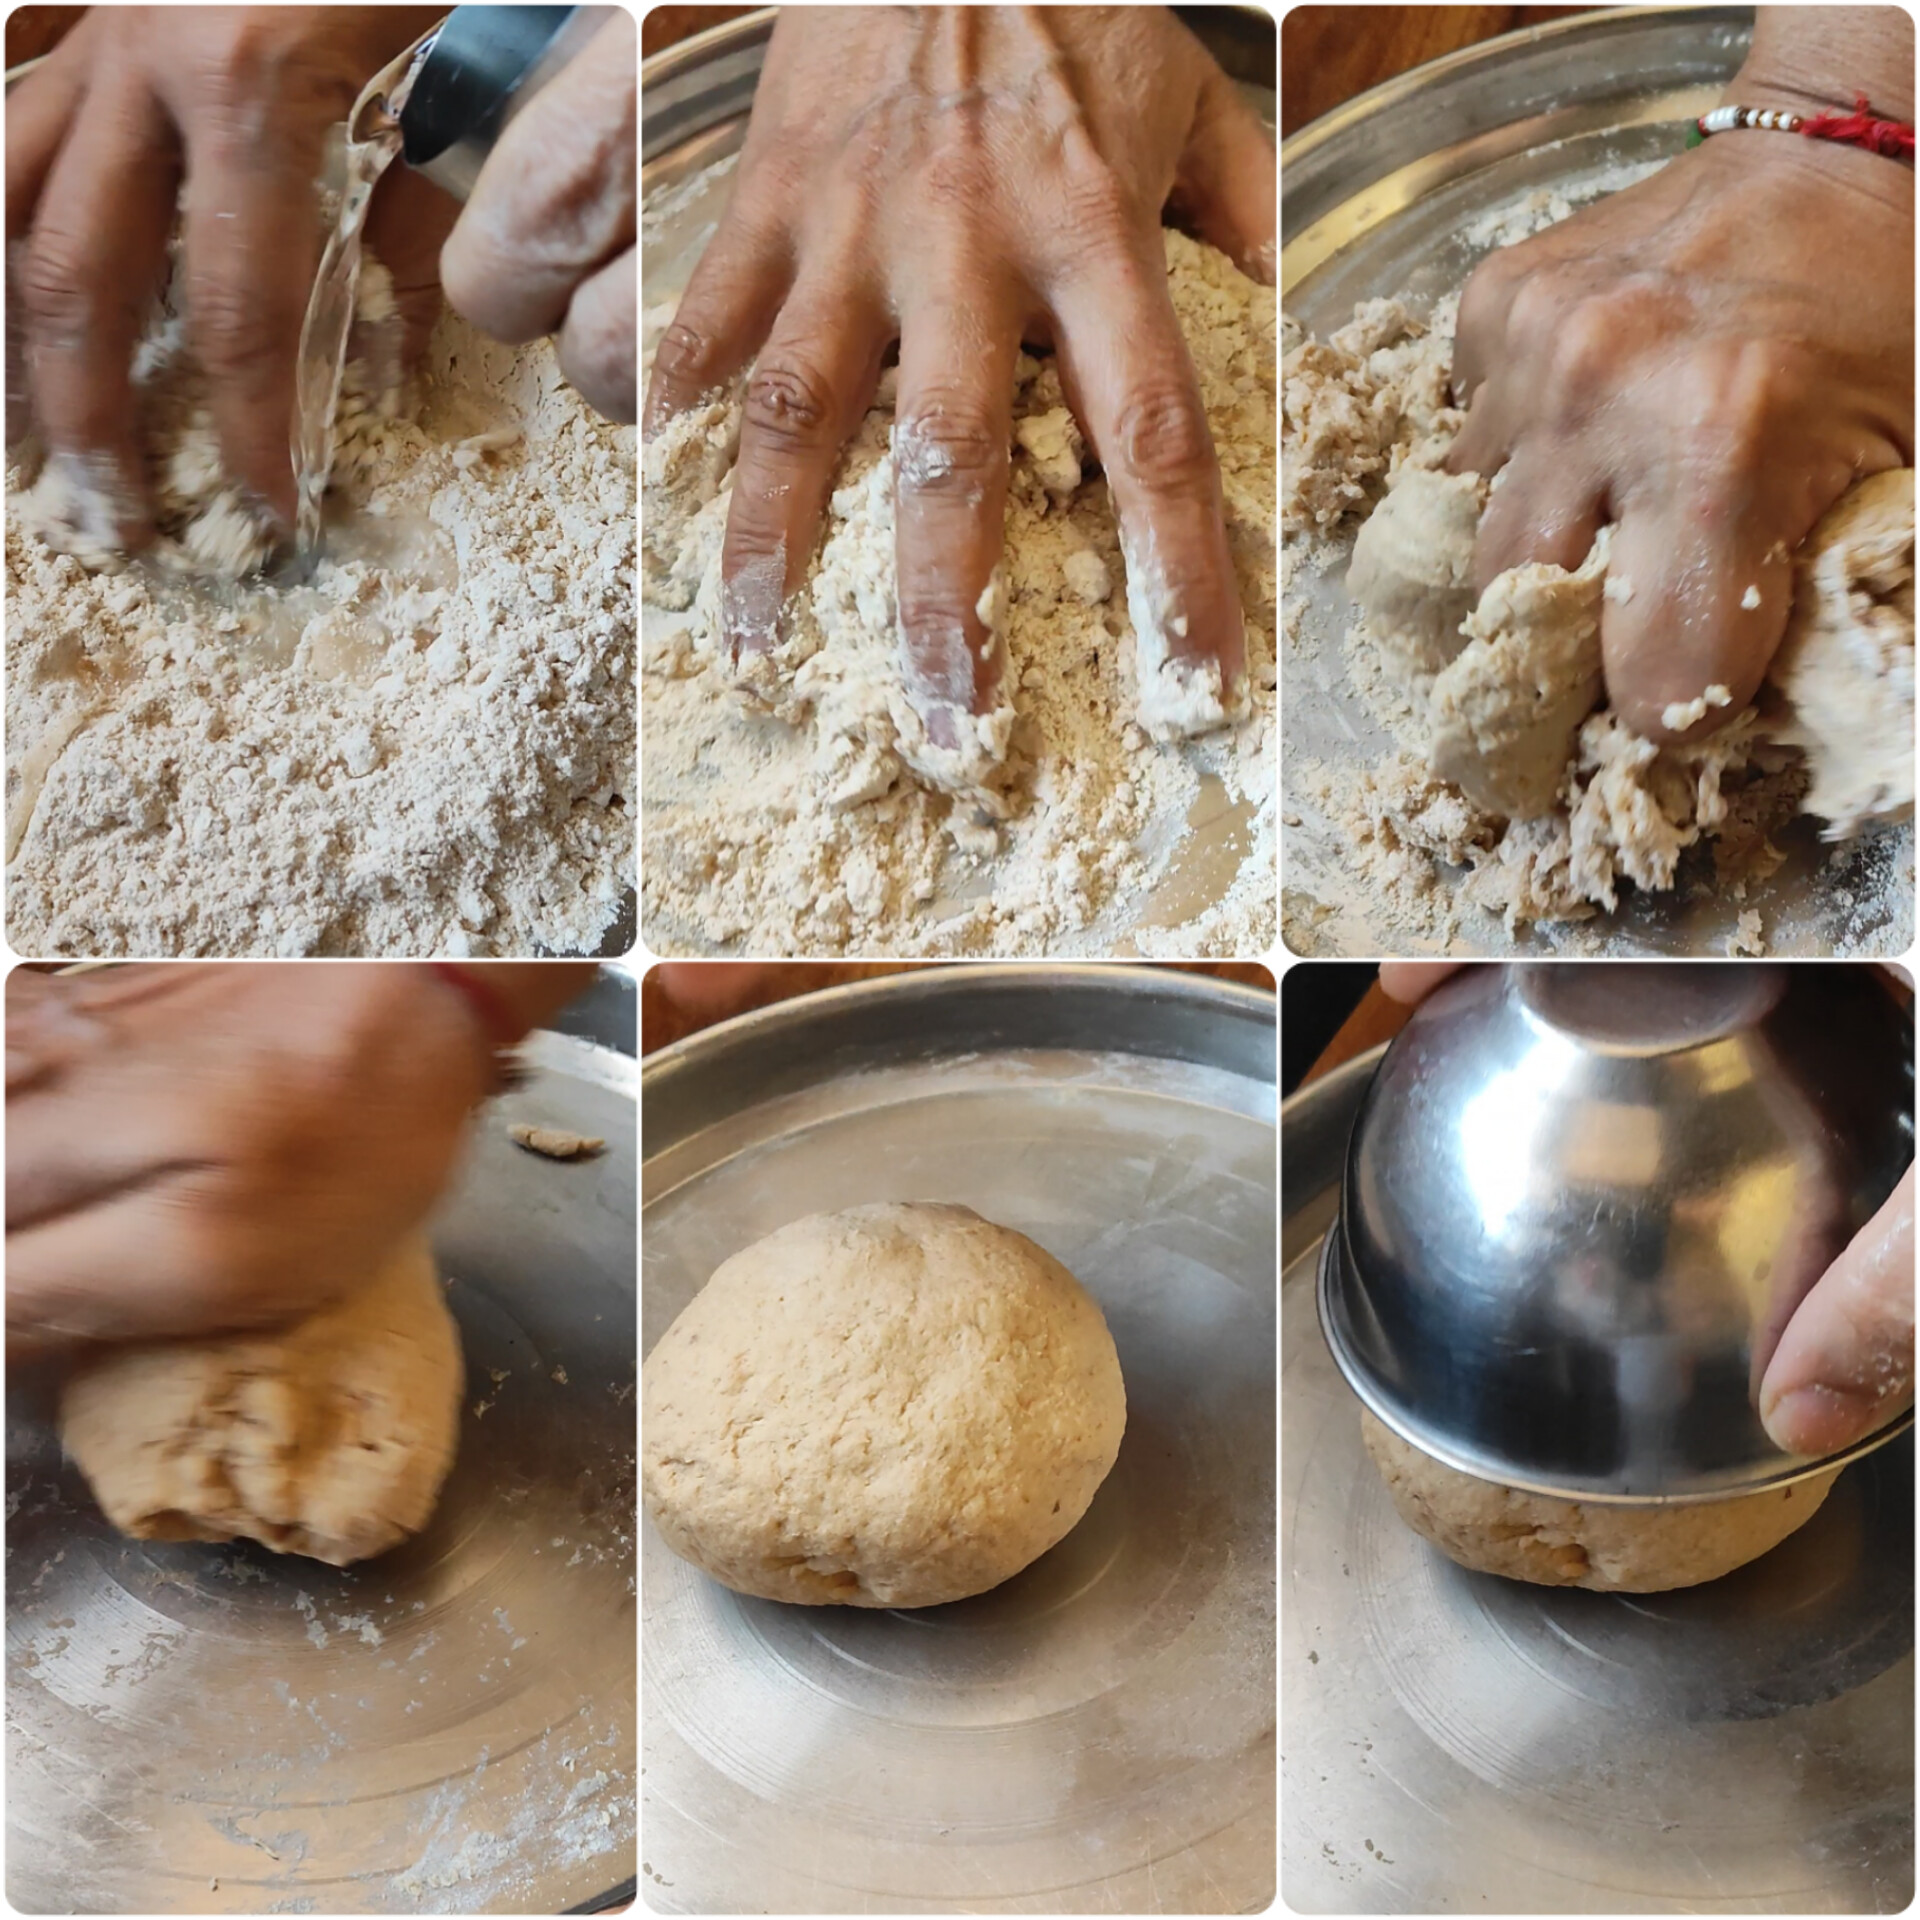
STEP 1 - To prepare the dough, in a wide bowl, bring all the ingredients together for making dough.


 STEP 2 - Mix all the ingredients and water together, knead in a mixing bowl to make a soft dough.


STEP 3 - Keep aside covered till you prepare the stuffing. ( 10-15 minutes )


For Making Stuffing - 

STEP 1 - In a bowl, add all the stuffing ingredients one by one.

STEP 2 - Mix very well with your finger tips till it resembles like bread crumbs.

STEP 3 - Then add pickle masala, ghee and lemon juice and mix really well. Keep aside.


For Making Sattu Ka Paratha -

STEP 1 - After the said time, once again knead the dough for 2 minutes and then divide the dough in small 6 balls.

 STEP 2 - Take one dough ball, gently flatten it and shape it like a bowl/ cup.

STEP 3 - Place 2-3 tablespoon stuffing in the centre.

STEP 4 - Now bring all the edges together and seal it properly.

STEP 5 - Gently flatten it, apply some dry flour.

STEP 6 - Dust some dry flour on your rolling board and roll each ball 1/2 inch thick and 4-5" diameter disc.

STEP 7 - Heat a tawa/ griddle on low flame.

STEP 8 - Slowly slide the paratha on hot tawa and cook each side of the paratha evenly.


STEP 9 - Apply ghee / oil and roast paratha from both sides until golden brown and few black spots on the top puffs up.


STEP 10 - Repeat the process for the rest of the parathas.


Serve these hot Sattu Ka Paratha with curd and your favourite pickle.

 When sided with baingan ka bharta, Sattu ka Paratha makes a wholesome weeknight dinner.


NOTES - *A well kneaded soft dough leads to softer parathas.

* If the mixture feels very dry, sprinkle a little warm water and mix well.

* Parathas can be kept at room temperature for up to two days wrapped in aluminum foil or in a covered container.  For later use, parathas can be refrigerated three to four days or frozen for up to a month. Re-heat using a skillet or oven.