_________________I am Mrs. Kalpana Mhaske, a Home-Maker, from the city of 52-Gates, one of the famous heritage- destination of the world- Ajanta - Ellora Caves, Bibi-Ka- Maqbara (The Taj of Deccan) and Deogiri Fort. i.e. AURANGABAD. I admire cooking - tryout and innovate different cuisines. Basically, both of my gorgeous daughters are foodie, they have always encouraged me in the kitchen and forced to carve a Food Blog, that’s why, I am happy to share the makings with you. I am an artist too. Painting – especially, Canvas-Painting is my one more hobby. In total - Ours is an ART-FAMILY, my husband is an Architect. In the end, I keep the same belief with Louise Fresco - “ Food, in the end, in our own tradition, is something holy. It's not about nutrients and calories. It's about sharing. It’s about honesty. it’s about identity ”

Friday, 1 April 2022

MASALA PEANUTS / SPICED PEANUTS

 The crispy, savoury coated Masala Peanuts is a perfect snack and an old-time favourite. But have you ever thought of making Masala Peanuts at home? Well, the same best-selling snack can be made in your home kitchen! You don’t have to use any special ingredients or kitchen tools to make this spicy Peanuts recipe. Get some Peanuts in a mixing bowl. These masala peanuts are made by combining gram flour and rice flour in a particular proportion (check the recipe below). This delightful vegan snack is a perfect combination of heat and spice. It tastes just like the store brought ones and you will be surprised how easy it is to make them at home. This can be made more or less spicy by adjusting the chili powder. Masala Peanuts are delicious, crispy munchies. If you are craving for a nutty treat, these are hearty enough to satisfy you. It is a zesty, crunchy snack, deep-fried to crispy golden. I love the simplicity of these old fashioned snack recipes. It is a perfect snack recipe, especially when you have made plans to spend the day watching sports on TV. Peanuts are loaded with protein, fiber, healthy fats; and roasted Masala Peanuts have distinctive flavours that adds to the appeal. The only problem with these peanut goodies is that your hands won’t stop digging into the jar! It is hard to resist your cravings when you listen to the satisfying crunch of nuts around you. Let your taste buds indulge in and bring back the memories etched in your mind. Enjoy! Here is the simple, deliciously crispy masala peanuts recipe.

 Give it a try and do share your feedback about the recipe with us.

INGREDIENTS :

For Coating -

2 Cup Peanuts

1 Gram Flour/Besan

3 tablespoons Rice Flour

1/4 teaspoon Baking Soda

1/2 teaspoon Citric Acid

Salt to taste

Pinch of Tandoori Food Colour ( optional )

3/4 - 1 Cup Water

Enough Oil for frying

For Masala - 

10 - 12 Cloves

25-30 Black Peppercorns

1 teaspoon Cumin Seeds

1 teaspoon Black Salt

1/2 teaspoon Rock Salt

1" Cinnamon stick

2 teaspoon Kashmiri Red Chilli Powder

1 teaspoon spicy Red Chilli Powder ( optional ) ( see notes )(or according to your spice tolerance)

1 teaspoon Aamchur / Dry Mango Powder

1 teaspoon Coriander Powder


METHOD :

For making fresh masala powder- 

STEP 1 - In small chutney pot, add all the ingredients for masala.


STEP 2 - Blend it to make a fine powder. 


STEP 3 - Your chatpata masala is ready . Transfer it to a bowl and keep this aside.


For making Masala Peanuts -

STEP 1 - Add gram flour, rice flour, citric acid, baking soda, salt in a mixing bowl. Mix it well using a spoon.


STEP 2 - Now, add Water to this mixture and prepare a thick batter of it.


STEP 3 - Put the peanuts in the batter and mix well so that the peanuts get covered with the flour batter.


STEP 4 - Heat sufficient oil in a kadai for deep-frying. 


STEP 5 - Make sure the flame is not too high. ( see notes )

STEP 6 - Take small portions of peanut masala mix and put in hot oil. Fry the peanuts in 2 - 3 batches.


STEP 7 - With the help of a spoon or fork, separate the lumps while frying.


STEP 8 - Stir the peanuts for even frying.


STEP 9 - When the coating turns golden brown drain with a slotted spoon. ( see notes ) It will take approximately 7-8 minutes for one batch.


STEP 10 - Transfer to a plate lined with tissues.

STEP 11 - Immediately, take them out in a plate / bowl and sprinkle some freshly ground  masala powder on it.


STEP 12 - Mix well and make sure that the peanuts were well coated with the masala. ( see notes )


STEP 13 - Collect them to a bigger bowl. Allow to cool well and enjoy the deliciously crunchy masala peanuts.


Serve them with a hot cup of tea or store them in an air-tight container for later use.


My jars usually get emptied within a day or two, so it is really hard to tell how long it will stay!


NOTES : * Adjust the spices according to your taste.

* There is no need to use roasted peanuts for this recipe. You can use raw peanuts directly in the flour batter.

 * I used rice flour and gram flour to make the masala coating, and both these flours are good enough to make the crunchy and crispy Peanuts.

* Citric Acid acts as a preservative and also helps in getting a sour/tangy taste to the dish.

* I have used Aamchur powder to give it nice chatpata taste, but feel free to use chaat masala p instead of it. It gives more authentic chaat-like flavor. 

* I got the best results and perfect crunchy texture with medium-hot oil. So keep the flame on medium. If you fry them on high flame, the coating color changes to very dark brown and the peanuts remained uncooked.

* Each batch will take almost 7-8 minutes to be done . So be patient.

* I have used both spicy red chili powder and  kashmiri chilli powder for this recipe. * If you want only firey red color to your peanuts, you may skip  red chili powder.

* Keep in mind that you have to coat the fried peanuts when they are hot. So do it immediately after frying each batch. It helps to coat them with masala evenly.

* These Peanuts can last really long if you can preserve them in an air-tight container.

* You may also bake masala peanuts in the oven for a healthier version; however, deep fried masala peanuts are tastier and crunchier.

Wednesday, 30 March 2022

SPICED BUTTERMILK / मठ्ठा / CHAAS

 Indian masala chaas is the ideal summer drink! Made with yogurt, water and some spices, it’s not only light and refreshing but also good for you! You can refrigerate it and have it cool to beat the heat during the hot summer days. Masala Chaas is the salted version of buttermilk which is simple but very effective drink for the summer season in India. It is famous in all the states of India with different names and some variations are there in preparation too. In Tamil it is known as Neer Mor, Sambharam in Malayalam, Chaas in Hindi and Taak in Marathi. It is cool, low fat and healthy refreshing summer drink. Worth trying this summer. A great thirst quencher on a hot day. Traditionally buttermilk is made with yogurt but not in mixer or blender but it is blended in a pot with an instrument called Ravi / Whipper / मथनी. Remove the butter on the top and the remaining liquid which is left is chaas / buttermilk. You can improve this buttermilk and add your own spices to make it more tasty.  For today's recipe here I used curd / yogurt. Yogurt is excellent for the digestive system and loaded with natural probiotics. It also helps to cool down the body during the hottest months of the year. Not at all! Spiced Buttermilk is simply delicious & damn easy to make. Just 5 mins, & a blender. So don’t miss How to make Masala Chaas recipe...stay cool and enjoy...!!

                                                             [  Serves - 2 ]


📌📌Watch the full video recipe here 📌📌

INGREDIENTS:

1 Cup Yogurt/ Curd

1 Cup Cold Water

Ice Cubes as needed (optional )

Few Mint leaves, chopped

1 tablespoon Coriander, chopped

1 small Green Chilli, chopped finely

¼ teaspoon Rock Salt / Kala Namak

1/4 teaspoon regular Salt

1/4 teaspoon Chaat Masala  Powder

½ teaspoon Cumin Powder

For garnishing:

Few Mint Leaves

 1 Slit Green Chilli

Pinch of Cumin Powder

METHOD:

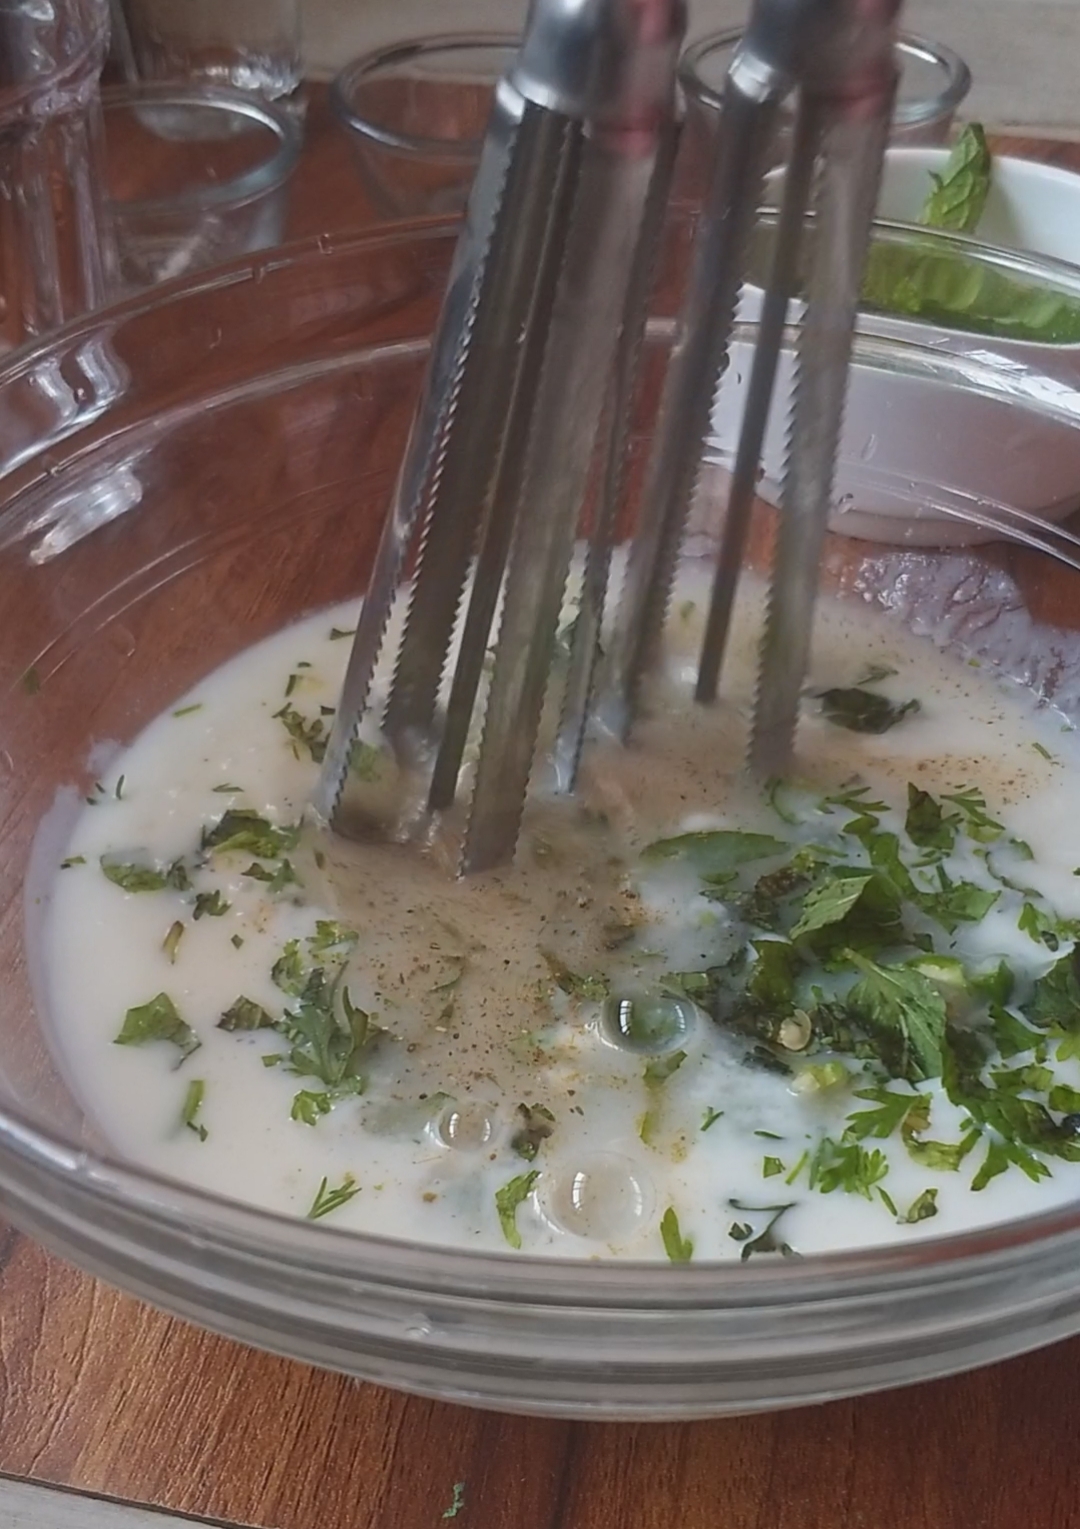
STEP 1 – In a mixing bowl, add yogurt, and whisk it using a hand whisk.


STEP 2 - Add chopped coriander, mint leaves, green chilli, cumin powder, chaat masala powder, salt,  rock salt and water. 


Whisk it again for 30 seconds.

STEP 3 –  Add few ice cubes and give it a nice mix.


STEP 4 – Adjust the seasonings and pour into individual serving glass.


STEP 5 – Sprinkle some cumin on the top. Garnish with few mint leaves,  slit green chilli and coriander leaves and serve chilled.


NOTES : *Masala chaas is one summer drink which you can made even in advance. Make it ahead and keep it refrigerated till ready to serve. It tastes best when chilled.

* If you do not use chilled water & yogurt then you have to use a lot more ice to chill the drink & this will make the drink watery.

* If you like, you can add 1/2 inch grated ginger too.


Friday, 25 March 2022

RAJASTHANI KANJI VADA

 With Holi around the corner, it's time for some fun and frolic ,which is simply incomplete without good food. Kanji is a popular Rajasthani drink that is generally made during the onset of summers or more appropriately during holi festival. It is fermented concoction made from mustard seeds, red chilli powder, hing and black salt.  It is an absolutely lip curling drink and eat. Traditionally it is prepared in earthen pots, but any non reactive container like glass can be used. It takes 2-3 days time to get prepared. Moong dal is soaked, grind, beaten and then fried into fritters called vadas. These are then added to kanji to make kanji vada. It is kept for 5-6 hours before serving to absorb flavor of kanji. It’s a digestive drink and helps in keeping your stomach in perfect order. Tangy kanji vada comes to the rescue when you have eaten too many sweets on festivals and don't feel like eating anything else. So, after all that unhealthy snacking and munching, this kanji recipe can make perfect blend that promotes digestion !! 


INGREDIENTS :

FOR making KANJI :

2 Litre Water

2 pinches of Asafoetida

1 teaspoon Turmeric Powder

1 teaspoon Red Chilli Powder

2 tablespoon Black Mustard Powder

1 teaspoon Salt

1/2 teaspoon Black Salt

1 tablespoon Mustard Oil


FOR making VADA:

1 Cup Yellow Moong Dal

1/2 Cup Urad Dal

Pinch Asafoetida

Salt to taste

Oil for frying

METHOD :

FOR making KANJI :

STEP 1- In a big food grade plastic / glass container, add asafoetida, turmeric powder, red chilli powder, black mustard powder, salt, black salt and mix everything really well.

STEP 2 - Add the said amount of water, mustard oil and mix it well.


STEP 3 - Close the container with a lid and keep aside for 3 days. 


STEP 4 - Stir the kanji everyday with a clean and dry spoon.


Kanji tastes great on the fourth day when all spices mix to the water.

 STEP 5 -  Tangy-zingy and yummy kanji is ready.


FOR making VADAS :

STEP 1 -  Clean moong and urad dal thoroughly and soak in water for 2-4 hours.


STEP 2 -  Drain out the excess water later.


STEP 3 - Grind the soaked moong- urad dal in a mixture jar coarsely. Add 1-2 teaspoon water while blending if needed.


 STEP 4 - Take out the dal in a mixing bowl and add salt and asafoetida to it. 


STEP 5 - Whisk the dal paste well with your hands for 4-5 minutes until it turns light and fluffy. Colour of the dal mixture changes to white. (see notes ) I used an electric beater to make it more easy and fast.


STEP 6 - To check the batter is ready or not, take water in a small bowl and drop a tiny vada batter to it. If it floats then your batter is ready, if it sinks to the bottom then you need to whisk it for few more minutes.


STEP 7 - Heat enough oil in a wok or pan to deep fry the vadas. Drop a small vada to check if the oil is hot or not. If it comes out quickly then the oil is perfect.


STEP 8 - Wet your hand with water and drop little batter at a time in hot oil with your hands to make marble sized vadas. 


STEP 9 - Place 8 to 10 vadas in oil at a time or as many as possible. Now deep fry the vadas till they get fluffy and golden brown from all sides.


STEP 10 - Drain out the fried vadas on paper kitchen towels to remove excess oil. Likewise, fry all the vadas and keep aside.

STEP 11 - Soak these hot fried vadas in lukewarm water with 1 teaspoon salt for 15-20 minutes and then squeeze out the excess water. (see notes ) 


STEP 12 - Keep the vadas aside.


STEP 13 - When the vadas are ready, put them into prepared kanji almost half an hour before serving. 


HOW TO SERVE KANJI VADA :

STEP 1 - Place 4 to 5 vadas in a serving dish.

STEP 2 - Pour 3-4 spoons of kanji and ready to serve. If you like add some namkeen boondi on the top. But it's totally optional.


NOETS : * Here I have used both moong as well as urad dal, but you can prepare it only one dal too.

* Do not forget to whisk the dal mixture. It helps to make the vadas light and fluffy.

* You will see the colour changes to white after whisking.

* To check the vada batter is perfect or not - take water in a glass/ bowl.

* Drop a marble size mixture in it.

* If it floats then your batter is perfect. If it settled down to the bottom whisk the batter for some more time.

* One batch of vadas will take 4-5 minutes for frying.

* For soaking vadas always use lukewarm water with 1 teaspoon salt.

* After soaking vadas in water, remove and press in between your palms to squeeze out the excess water.

* If you are not going to serve the vadas immediately, keep these vadas in an air tight container and refrigerate it.

* Put them in kanji half an hour before serving.


Monday, 21 March 2022

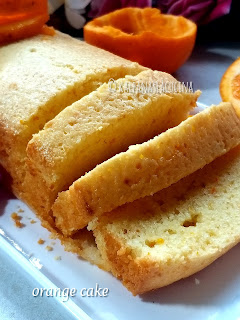
FRESH ORANGE CAKE

An ORANGE CAKE recipe with only handful of ingredients, interesting! isn’t it? A fragrant, soft, moist and tender orange cake that’s bursting with freshly squeezed orange juice and zest. It’s super easy, takes you maximum 10 minutes to prepare, and it tastes amazing. With or without frosting, it is perfect for tea time, breakfast or as a simple dessert to bring with you for potlucks and picnics. 


This everyday orange cake recipe is easy to make and only gets better over time. All of the above, this recipe is super easy to prepare, ready in no time, and will never disappoint you. No need to go for a fancy recipe, often, simple is best! Store cake in an airtight container in the refrigerator for up to 5 days. For the best moist texture, the cake is best served at room temperature. This easy recipe is a winner! I have shared the recipe, with step by step photo with lots of tips and it’s a no-fail recipe too.

📌📌 Watch the full video recipe here 📌📌

INGREDIENTS :

1 Cup/100 gm All-Purpose Flour / Maida

1 teaspoon Baking Powder

 2 large Eggs

 1/2 Cup granulated Sugar

 1/4 Cup melted Butter

1/4 Cup Oil (vegetable oil)

1/4 Cup freshly squeezed Orange juice

1/2-1 tablespoon Orange zest  (I always use the zest of same oranges which I use for the juice)

1 tablespoon Lemon juice

1 teaspoon Vanilla extract

Pinch of Salt


METHOD :

STEP 1 - Preheat oven to 170°C. Grease a bundt pan or a standard 7" loaf pan with butter, arrange the butter paper and set aside. 


STEP 2 - In a blender jar, add eggs at room temperature, sugar, vanilla extract, oil and melted butter. Blend it for just 1 minute or until combined well. (see notes )


STEP 3 - Transfer the mixture in a mixing bowl and keep aside.


STEP 4 -  Then sift in flour,  salt, and baking powder.


STEP 5 - Add orange zest, lemon juice,  orange juice, (see notes ) and the egg mixture. 


STEP 6 - Keep whisking slowly until just combined by cut and fold method. Don’t overmix.


STEP 7 - Pour the batter into the prepared 7" loaf tin. Tap it once to remove the air.(see notes )


 STEP 8 - Bake for 35 - 40 minutes at 170 degree C. (see notes )

STEP 9 - The cake is ready when golden, and a skewer inserted in the middle of the cake comes out clean. 


STEP 10 - Allow the cake to cool for 10 minutes on the wire rack before serving.


 STEP 11 - Demould, let the cake cool completely to room temperature and  then cut into slices.


STEP 12 - Store cake in an airtight container in the refrigerator for up to 5 days. (see notes )  


NOTES : *You can add your own twist to the recipe by using some chocolate chips, cinnamon, walnuts… be creative.

* Measure the ingredients properly and as per the recipe.

* Adding more liquid or using large eggs instead of medium size eggs will change the texture of the cake.

* Taste the orange juice before adding it to the batter. Sometimes the orange will look good, but it will taste bitter if it was left outside for long, so it’s better to taste the orange before using it in this recipe.

* If the top is browning quickly while baking, cover loosely with aluminum foil. 

* Select a suitable size tray as the cake doubles in size.

* For the best moist texture, the cake is best served at room temperature.